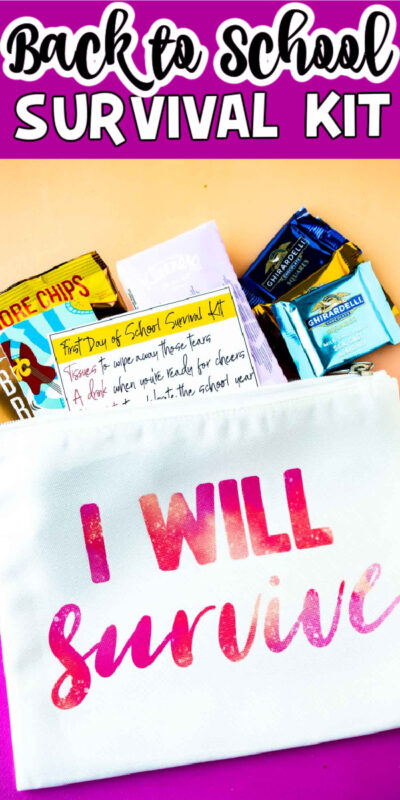
Sponsored by: Cricut. All opinions are honest and my own. This post also contains affiliate links. If you purchase via these links, I may receive a small commission at no additional cost to you. Is anyone else still shocked that kids are already going back to school? With last summer being like six months long, this summer fell so short. My oldest went back last week and while I was excited to get back into a routine, honestly, it was tough to say goodbye. We’ve just had so much fun enjoying time together this summer. I’m not the only parent out there having a hard time sending their kids off to school this summer. Whether it be sending kids off for the first time ever, sending kids to a new school (or high school!), or just sending kids back after a year of homeschool or virtual learning – I think parents are more nervous than ever. I’ve already shared plenty of back to school ideas for kids and back to school gifts for teachers so this post is for the parents – a back to school survival kit for those parents who need all the help they can get this year. I made these for my five closest neighbor friends who are were a little nervous about sending kids back for one reason or another. As much as I think we all wish this year were back to normal, this is not so normal year number two. So back to school survival kits for parents it is!
Supplies
Supply Notes
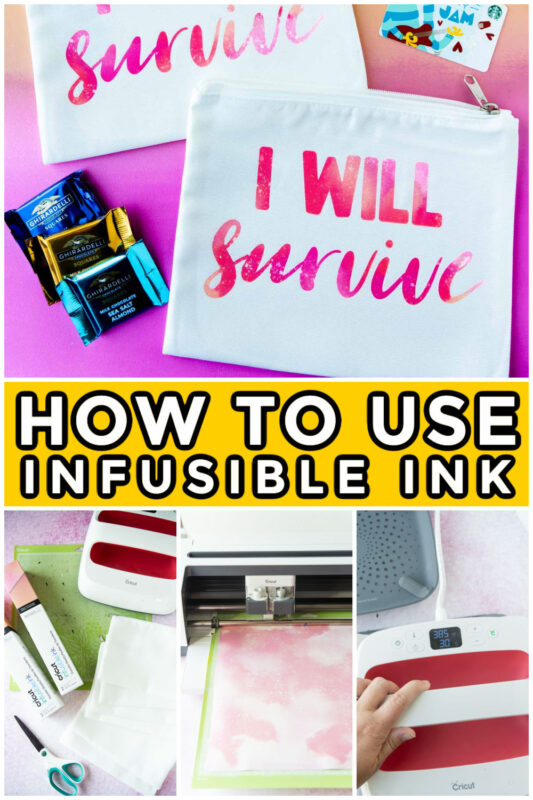
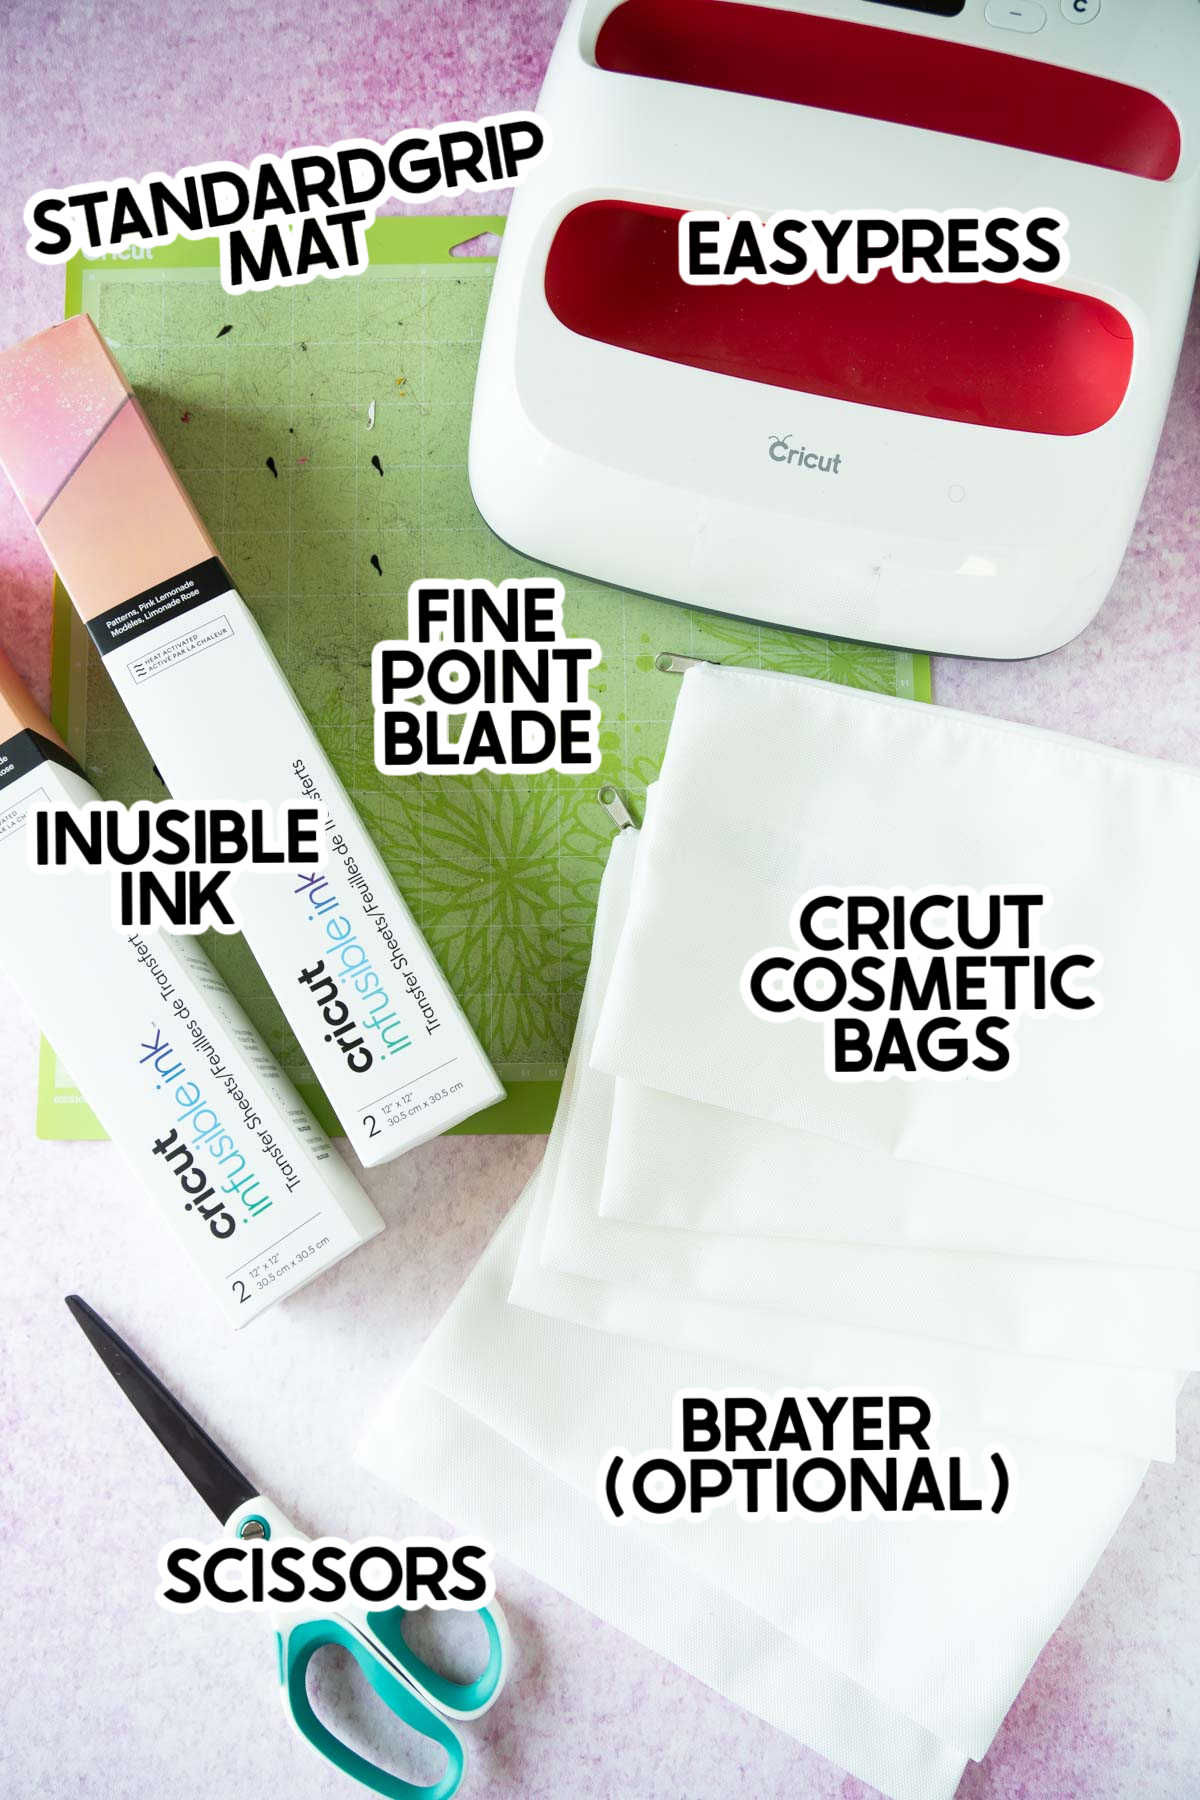
Cricut Machine – this project will work with a Cricut Maker (that’s what I used), Cricut Explore Air 2, or a Cricut Joy. All three are compatible with Cricut Infusible Ink! Cricut Infusible Ink Transfer Sheets – I used this pink lemonade set because I loved the color; you could definitely choose from any of these Infusible Ink transfer sheets. Cricut Cosmetic Bags – this set of Cricut cosmetic bags are designed specifically as Infusible Ink blanks, so they work perfectly for this! I got the set that has two medium size bags and one large bag, and the medium ones were an ideal size for this project! Cricut Fine Point Blade – make sure your fine point blade is sharp and pushed all the way down into your machine holder. I made the mistake of trying to cut with the blade not pushed all the way in and ruined my first set of Infusible Ink. Oops. Cricut EasyPress – you can use either an EasyPress, EasyPress 2, or EasyPress Mini (although the Mini might be a little tough for this project since the cosmetic bags are larger than the mini). You’ll ideally also want the EasyPress mat to go with it! Cricut StandardGrip Mat – make sure your mat is nice and sticky as the Infusible Ink tends to be a little tough to get to stick since it’s packaged rolled up. If it doesn’t stick easily, you can also tape it down or use a brayer to help! Cricut Brayer (optional) – this is one of my new favorite tools and while it’s technically optional, the brayer helps to smooth the material onto the mat so it sticks! Scissors – you’ll need scissors to cut out the printable tags and to cut away any excess Infusible Ink to use for future projects! Survival Kit Design Space File – you can use my “I will survive” file in Cricut Design Space here! Printable Gift Tags – if you want to use the survival kit tags I made, you can get them here or download them at the end of this post! White Card Stock – you’ll need this to use for pressing the Infusible Ink onto the bags, it protects your bag and the EasyPress mat!
How to Make Custom Cosmetic Bags
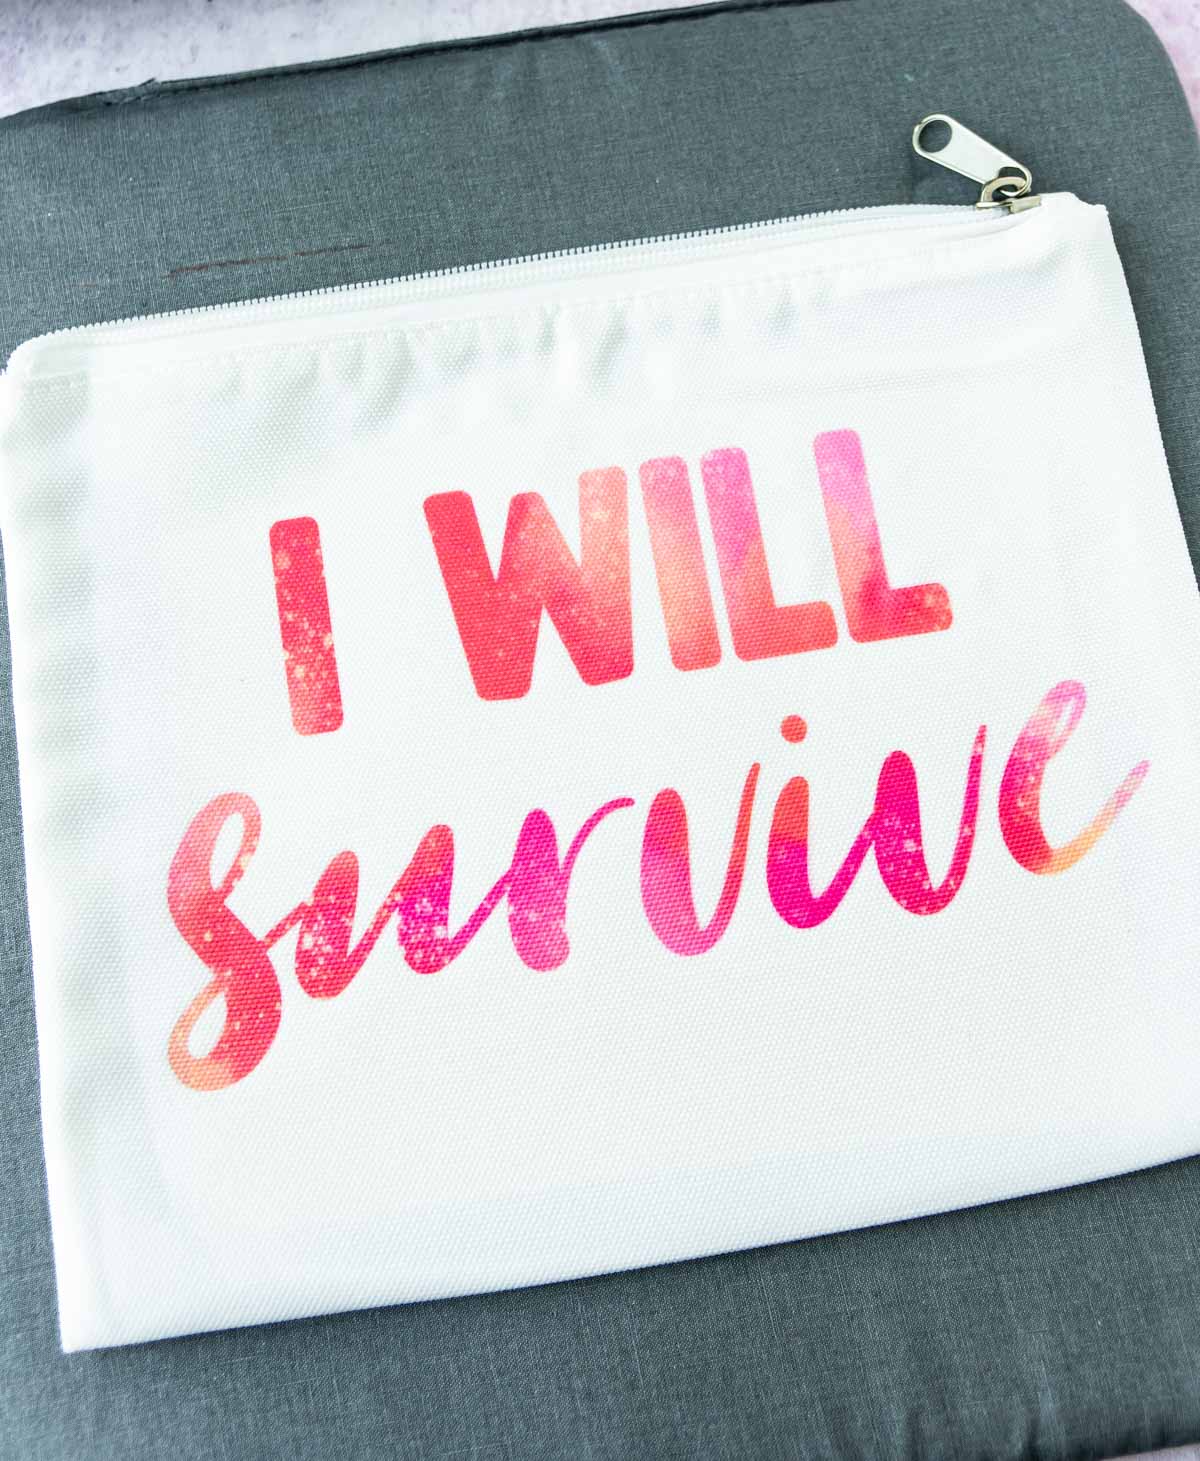
This is my very first time using Cricut Infusible Ink, and I’m absolutely in love. I’ve always been a huge fan of iron-on vinyl and have done tons of Cricut projects with it in the past. But I may be an infusible ink girl from now for projects like these. I made these with Infusible Ink rather than vinyl because the ink actually transfers into the bags rather than just being added on top. All of the moms I was giving these to have smaller kids, which means rough housing and just more likelihood of the vinyl getting ruined. But the Infusible Ink is permanently inked on there and will be great to use for a long time to come! Plus, the colors came out so bright and vivid – I just love it! Anyway, back to how to make these!
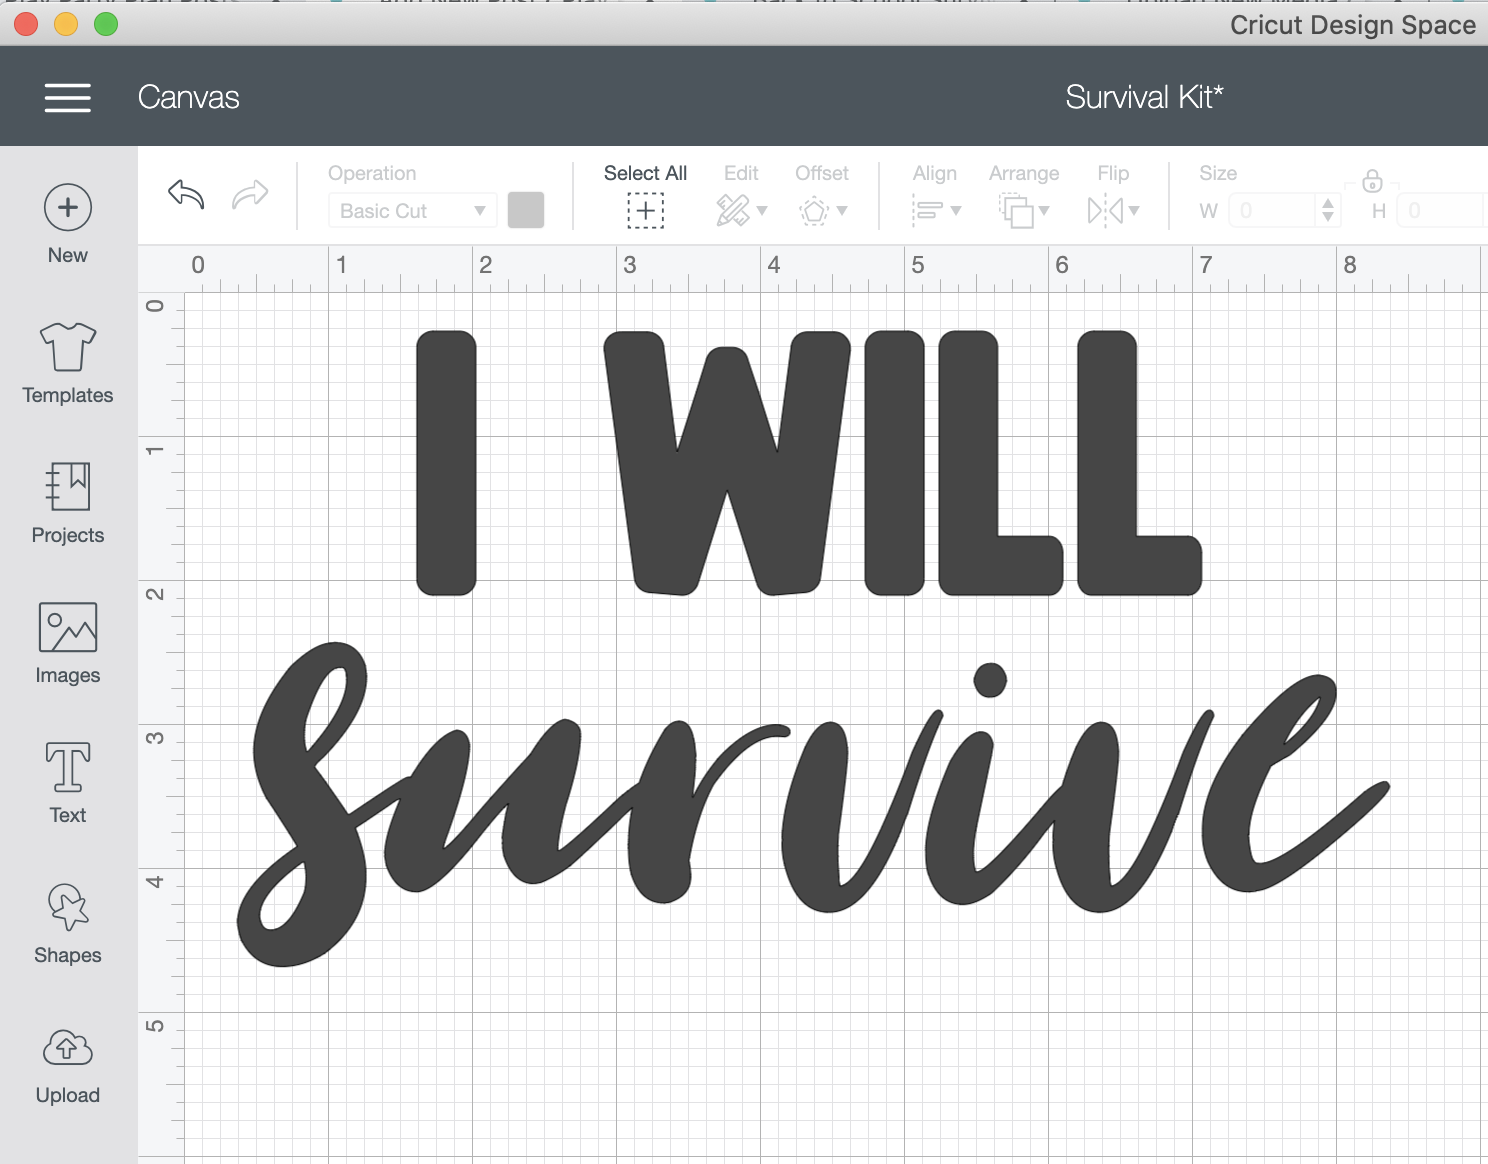
1 – Make or Customize the Design
The first thing you need to do is make your design or if you want to use mine, you can just grab the file here. It’s sized to fit the Cricut cosmetic bags but if you’re using something else, just click customize and change the sizing if you need before cutting.
2 – Cut the Infusible Ink
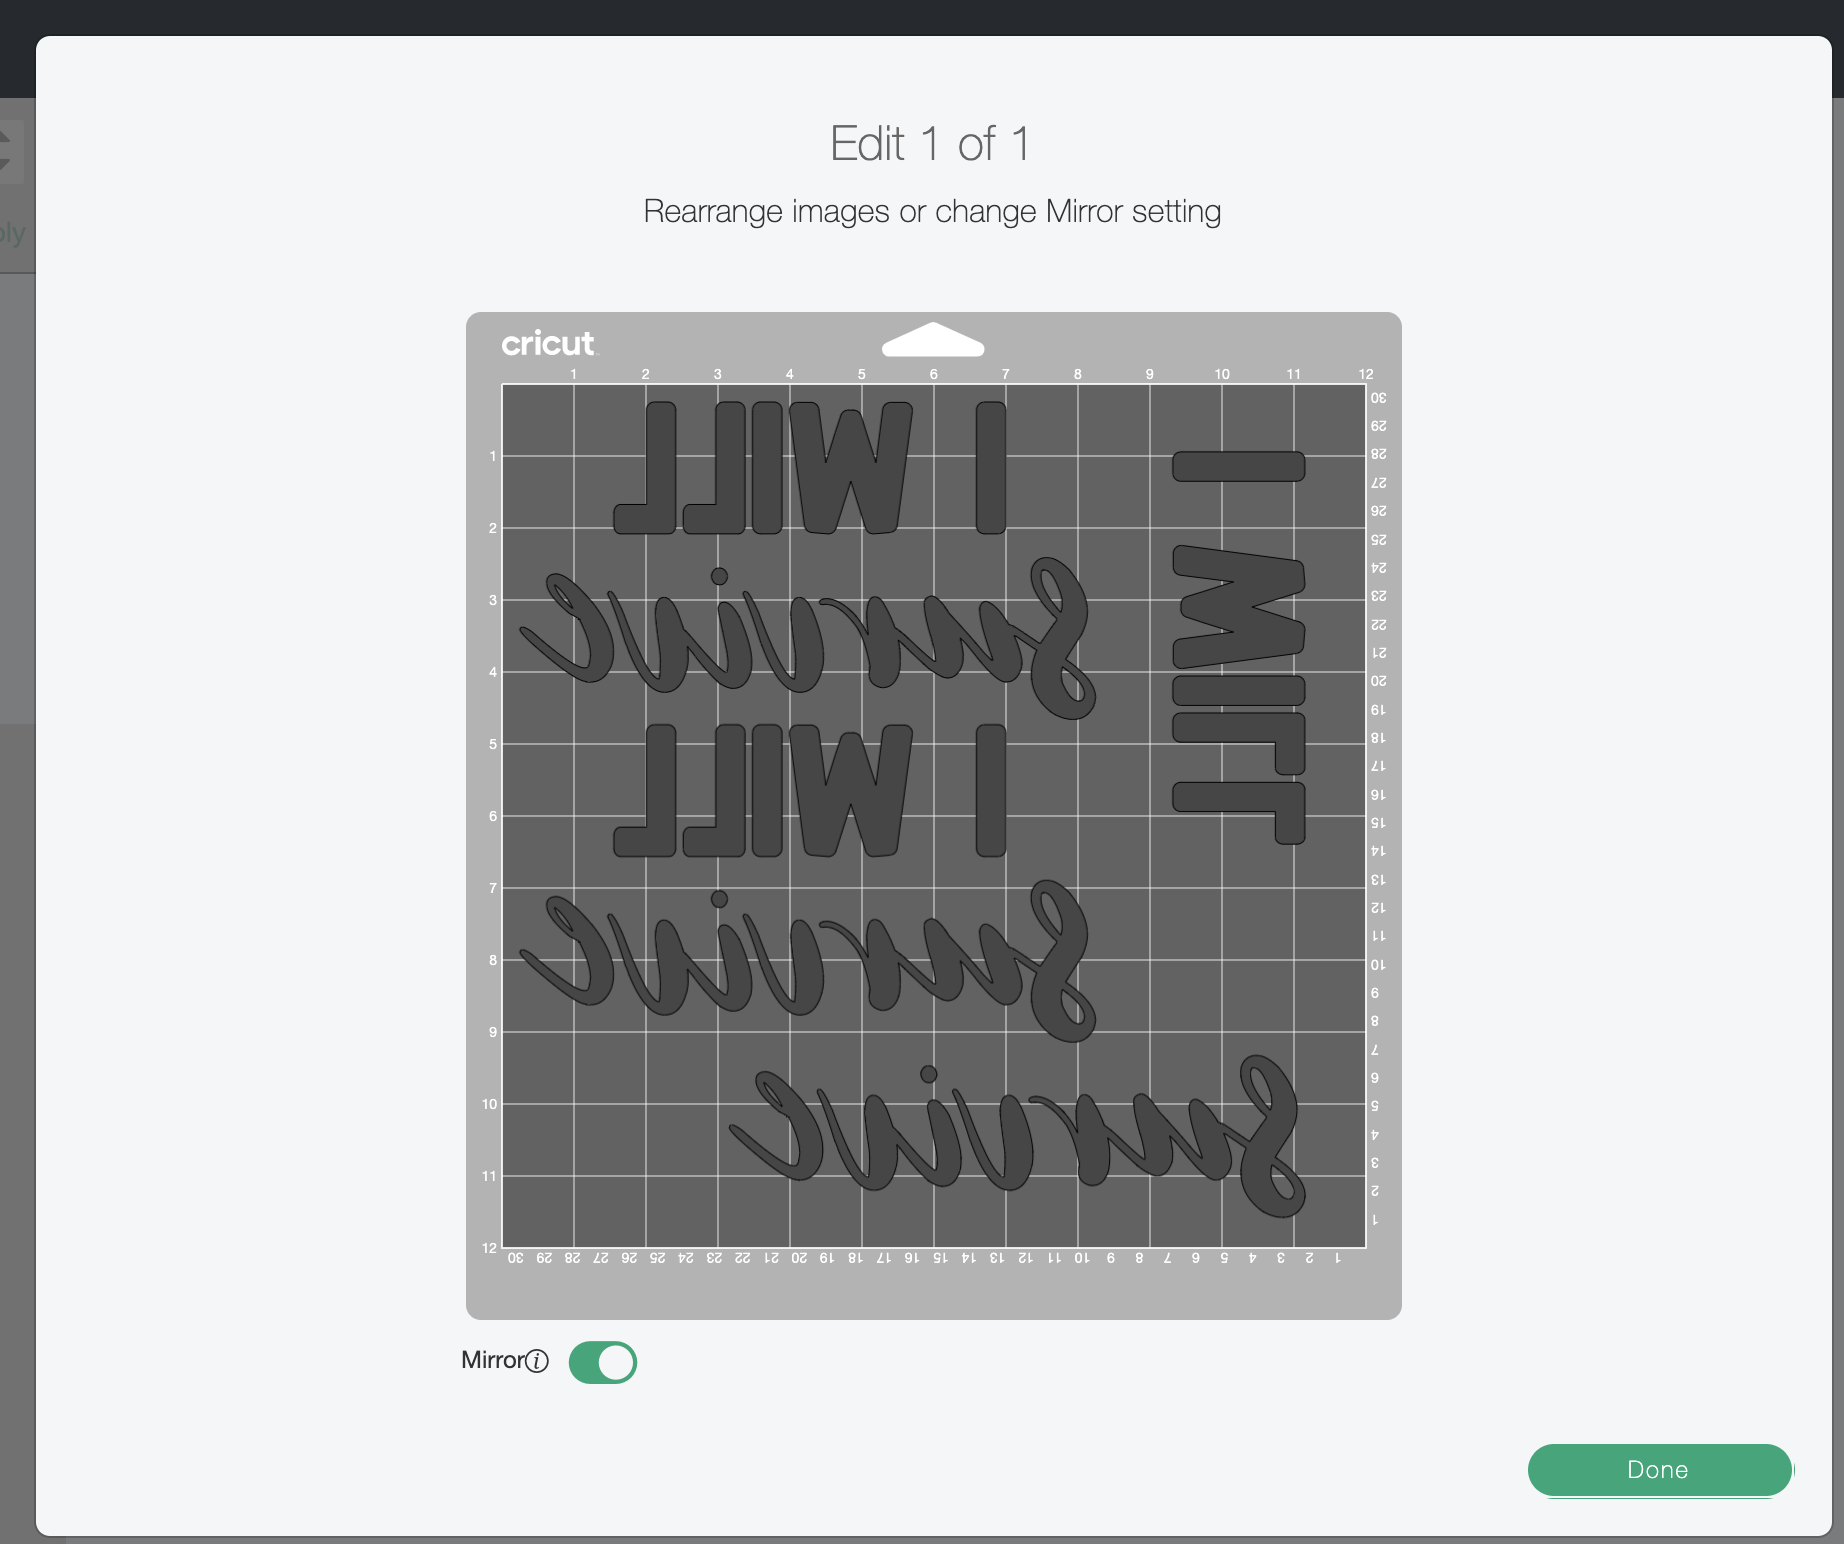
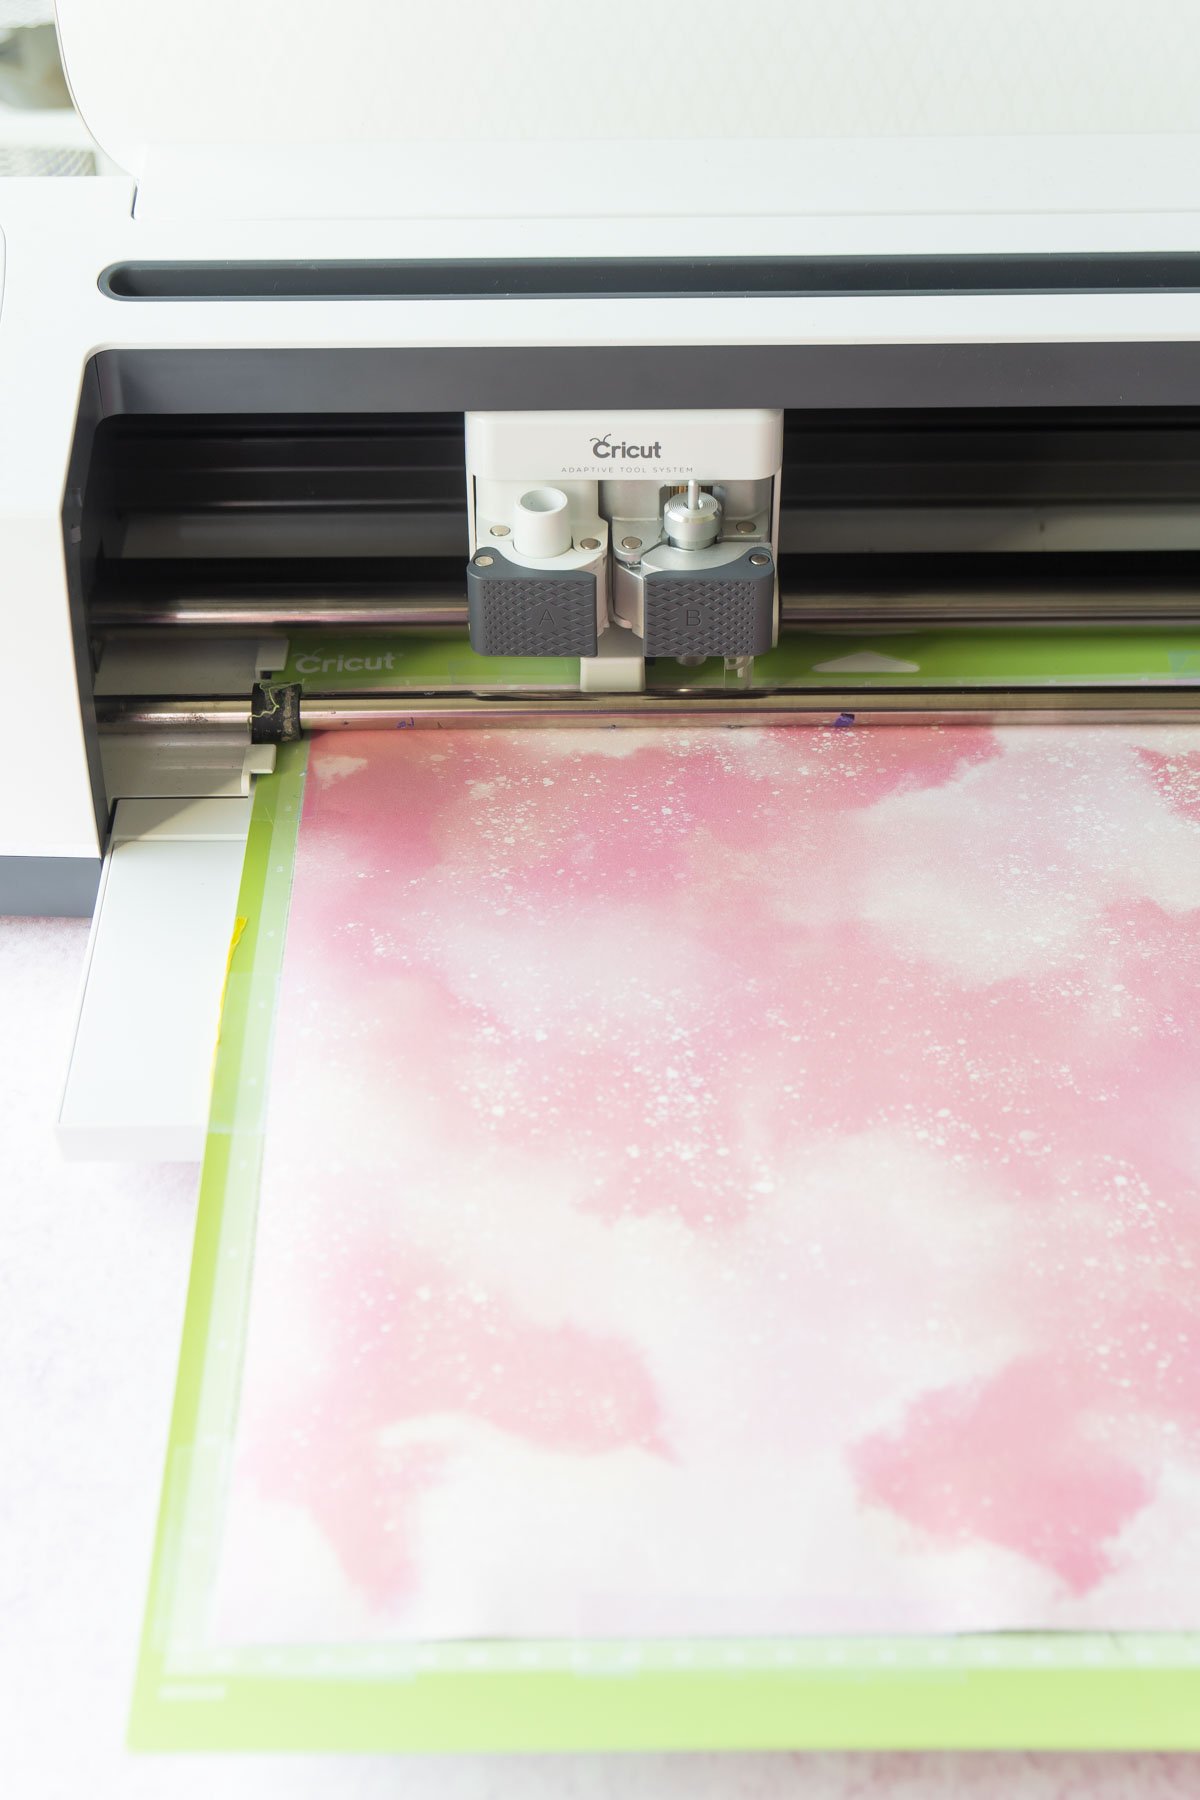
Once your design is good to go, click the Make It button in the top right hand corner. This will pull up the screen that allows you to customize your cut. Select your machine (I used my Maker), make sure your design is mirrored, and then click Done. Choose your material – Infusible Ink Transfer Sheet and it’ll prompt you to load a Fine Point blade in your machine if there’s not already one in there. Once your design is all ready to cut, place your Infusible Ink transfer sheet design side up (not design side down like you do with iron-on vinyl) on the mat. If you’re having problems getting it to stick to the mat (because it’s stored rolled up in the package), use the brayer to roll it down on the mat. Tape the very edges to the mat using painter’s tape if necessary. Just be careful to keep it to the very edge and to use painter’s tape because regular Scotch tape can remove the ink when removing the sheet. Load it into the machine then press the little Cricut logo to cut your design. Since it’s cutting Infusible Ink, it will likely take a little longer than regular vinyl but shouldn’t take too long.
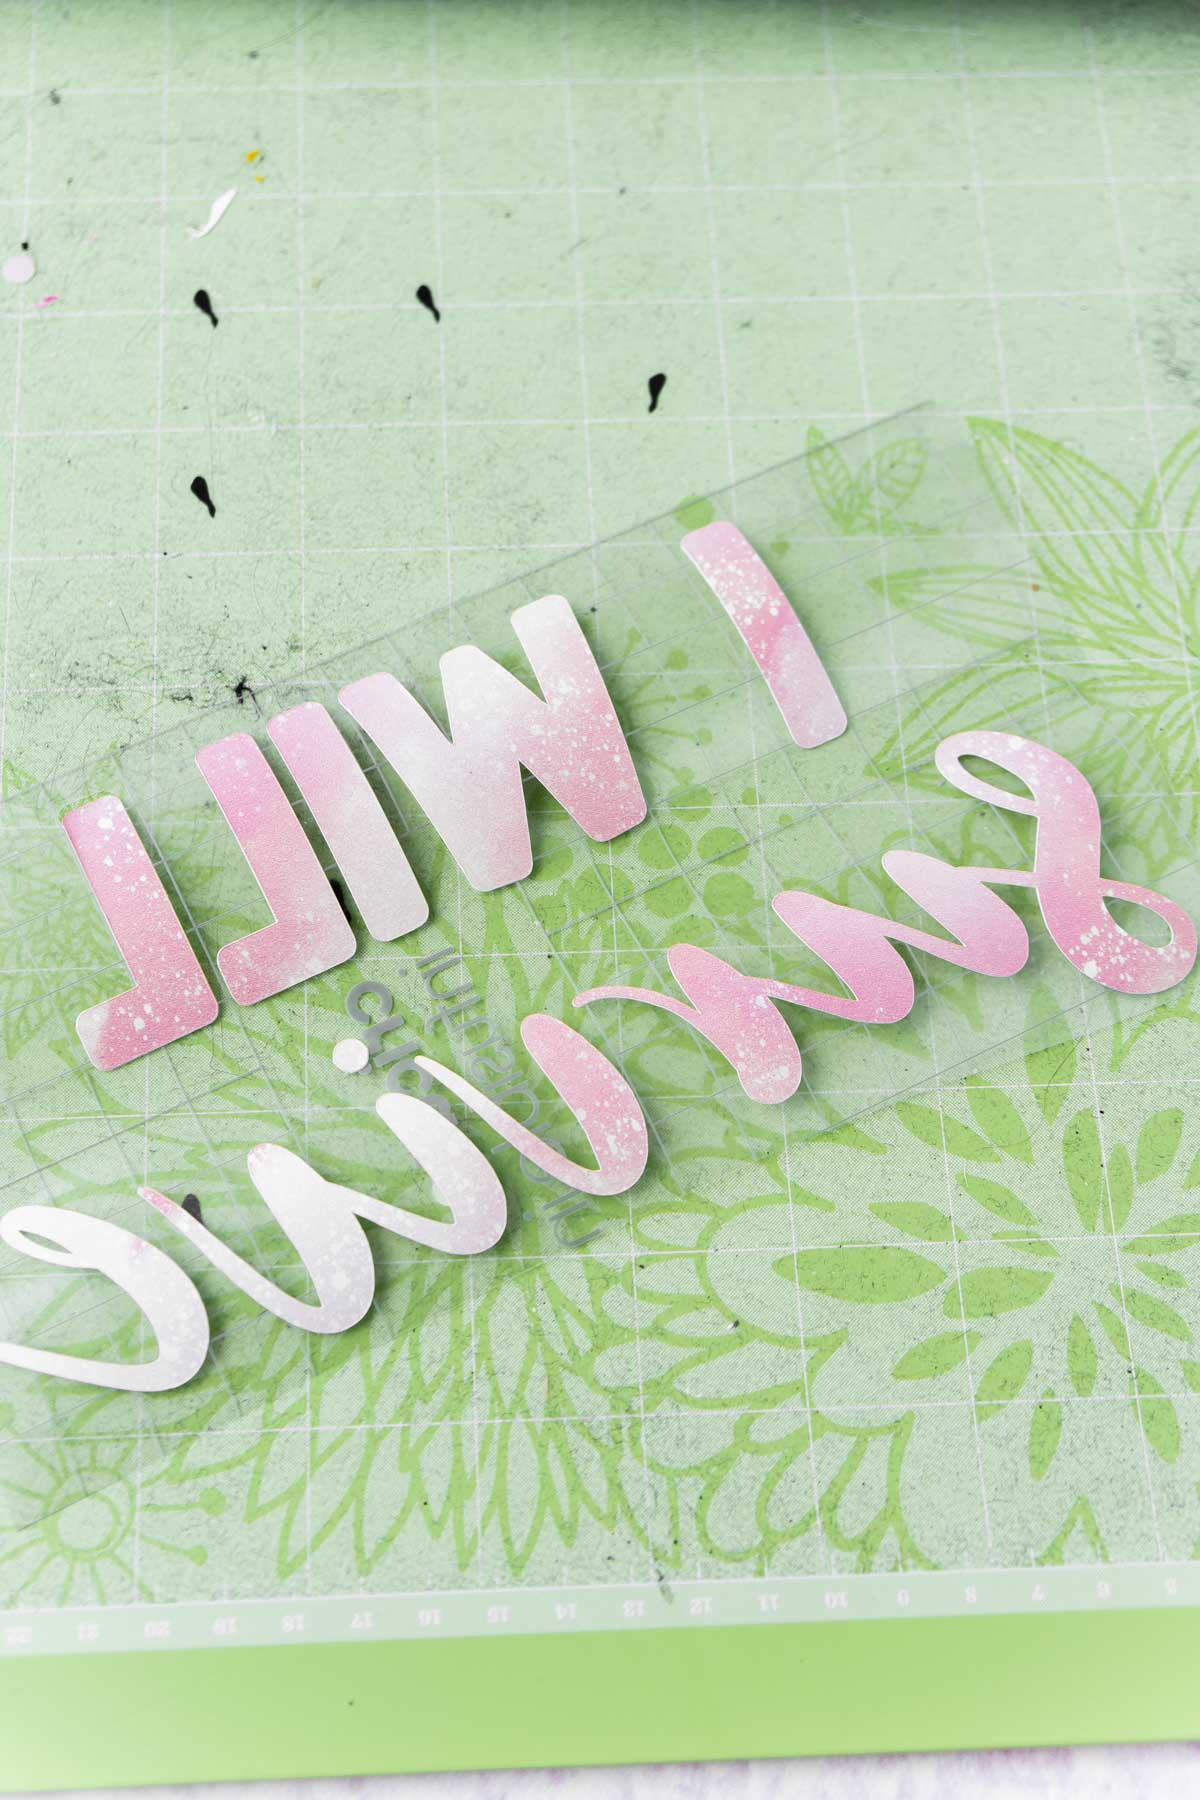
3 – Weed the Infusible Ink
Once the design is cut, unload the mat from your machine. Cut around your design as close to the design as possible so that you can reuse any of the extra Infusible Ink transfer sheet in a later project! Carefully peel the backing (with your cut design) away from the rest of the transfer sheet. Use your finger to gently remove any of the extra pieces like insides of the E or the S until you have a design that looks like the one below.
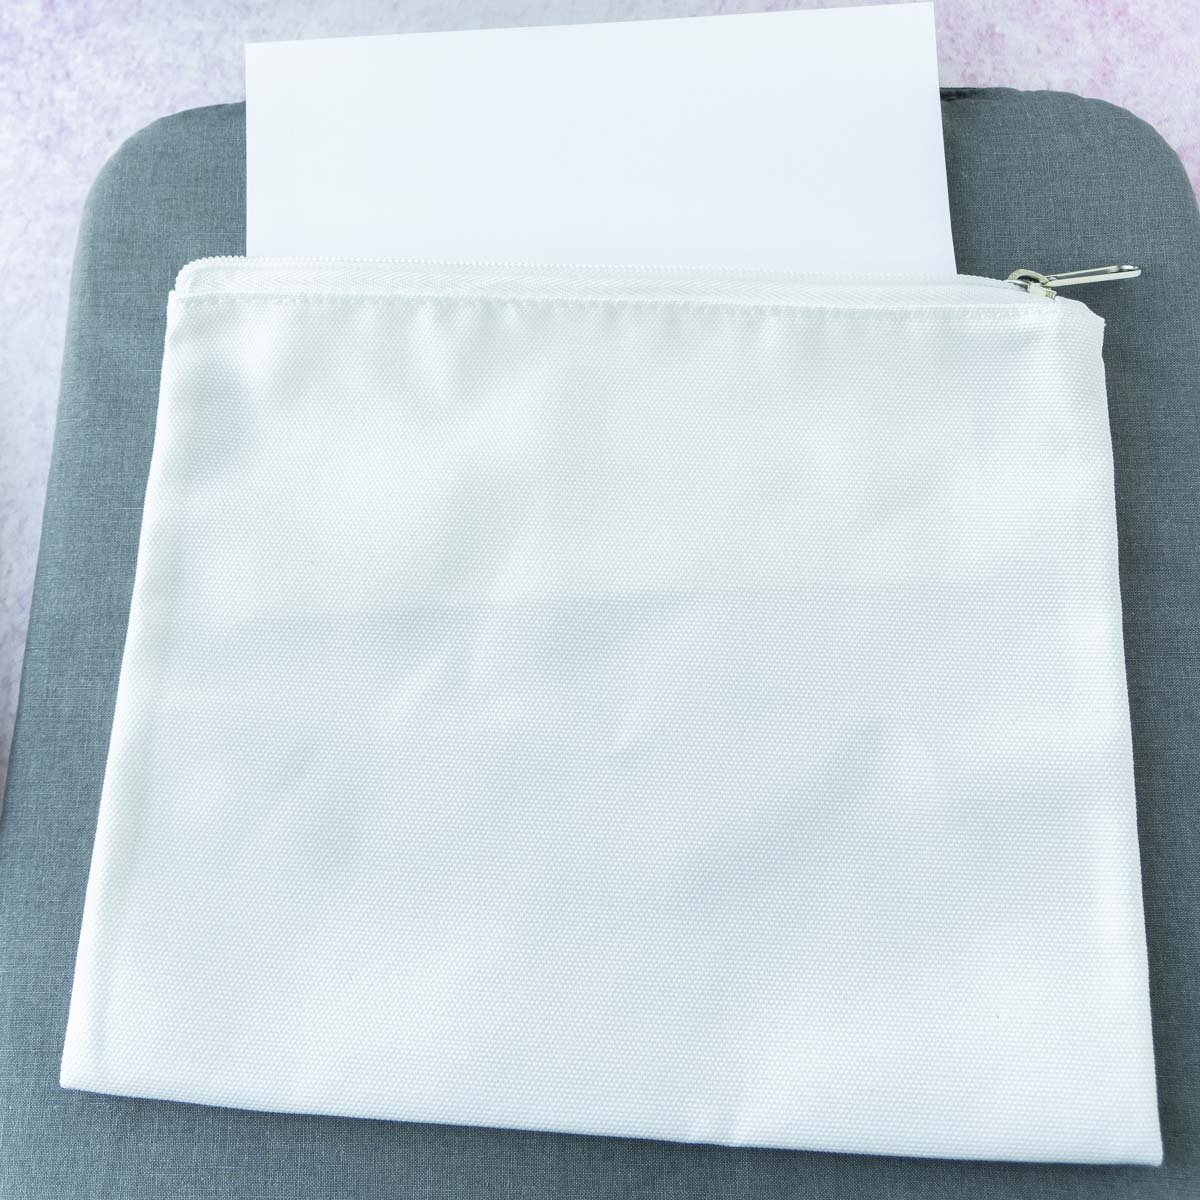
4 – Prep the Cosmetic Bags
Cricut has a fantastic tutorial for using Infusible Ink here that I highly recommend you check out, especially if you’re using a different material or EasyPress than I do for my project. For my project, I placed a piece of white card stock inside the cosmetic bag, placed the cosmetic bag on top of the EasyPress mat, topped the cosmetic bag with butcher paper, and pressed gently with the EasyPress at 385 degrees for about 15-20 seconds to remove any wrinkles from the mat. All of this preps your cosmetic bag so that the ink transfer correctly.
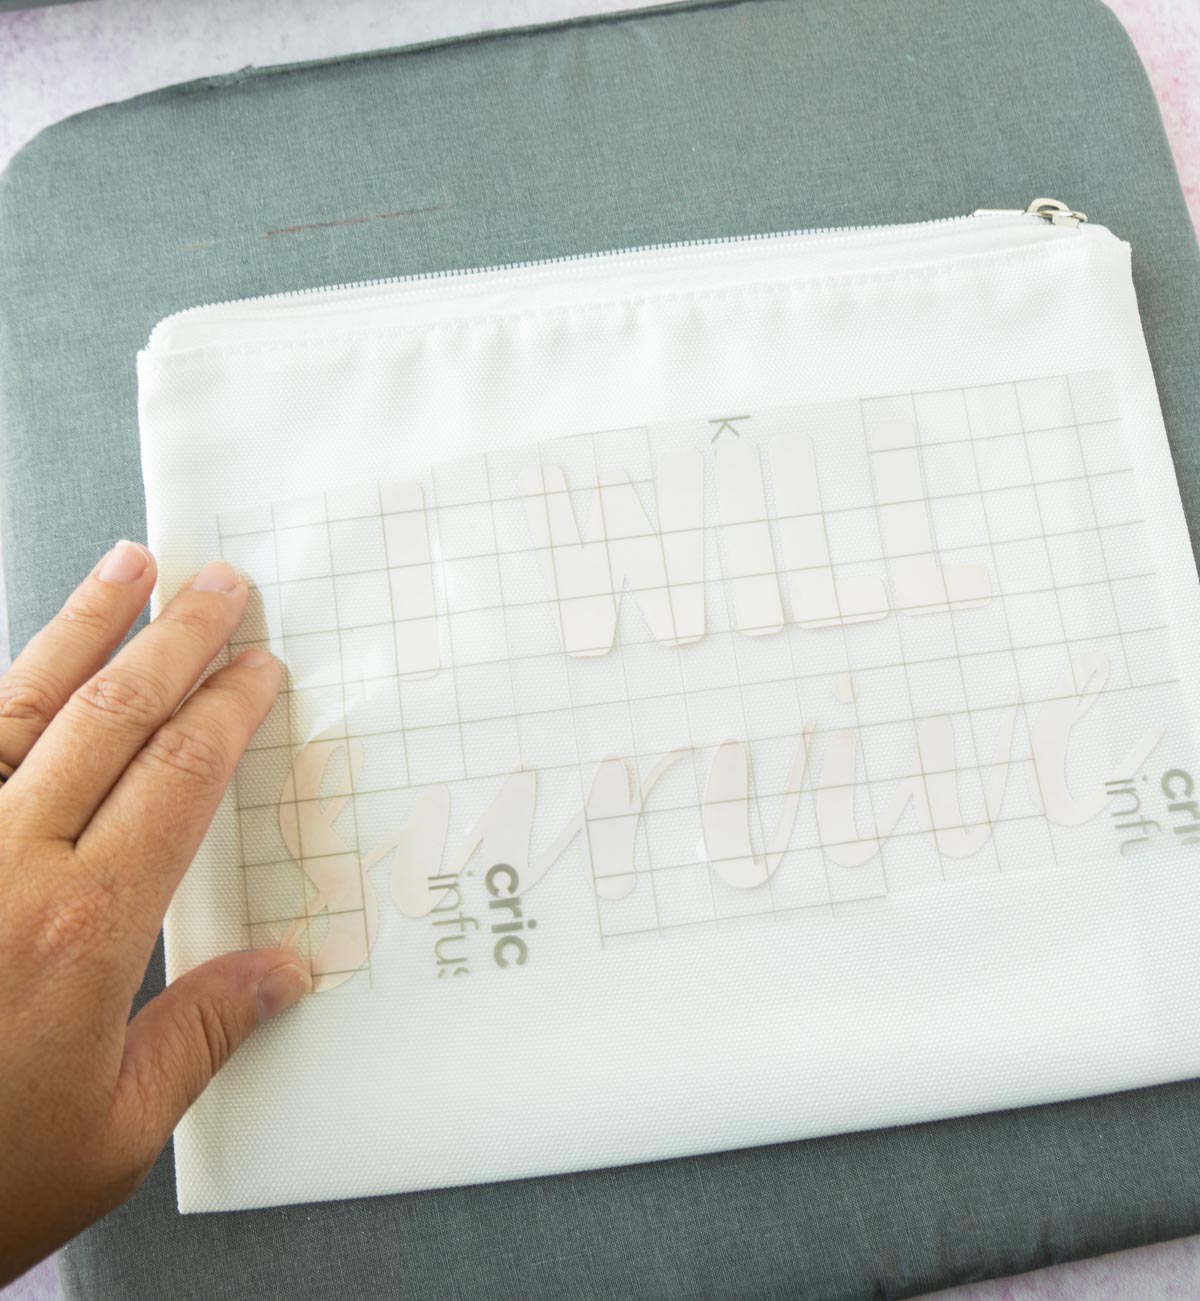
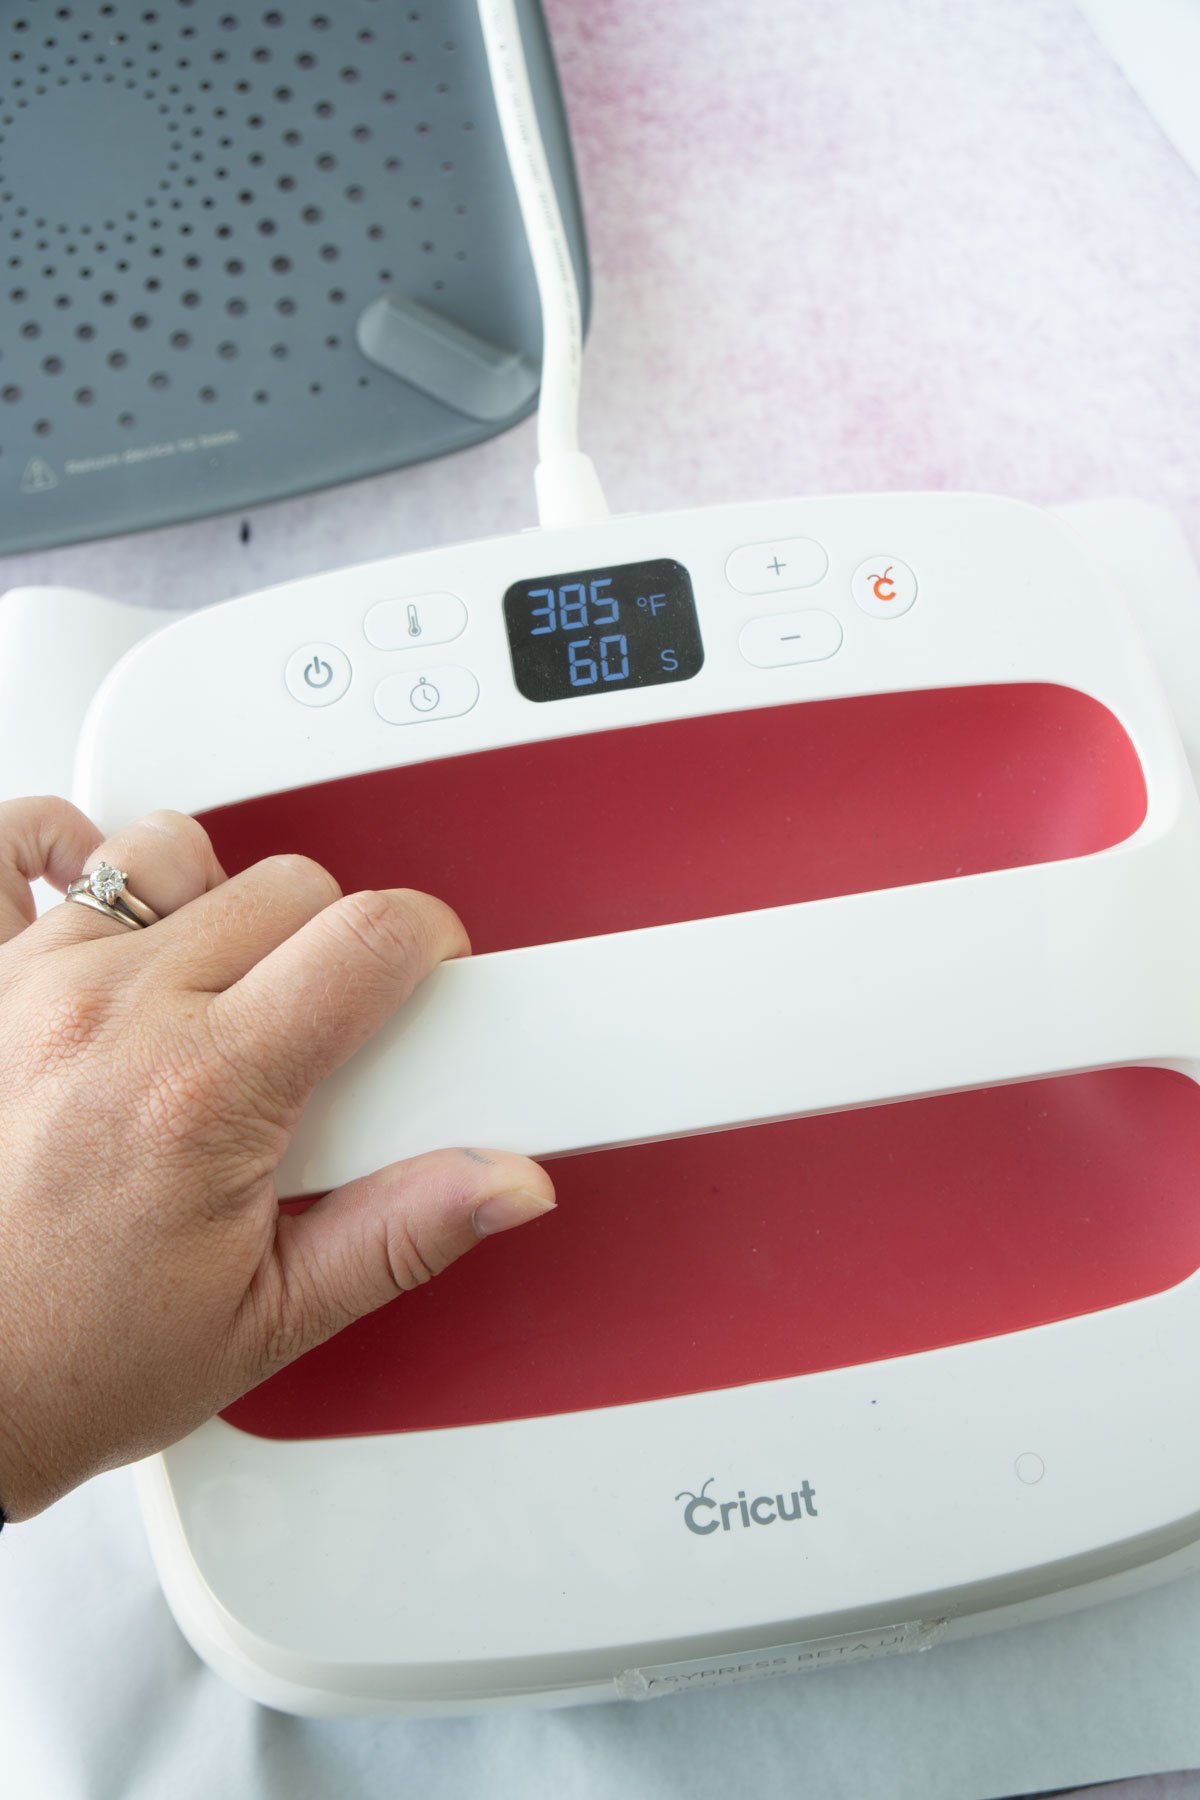
5 – Transfer the Infusible Ink
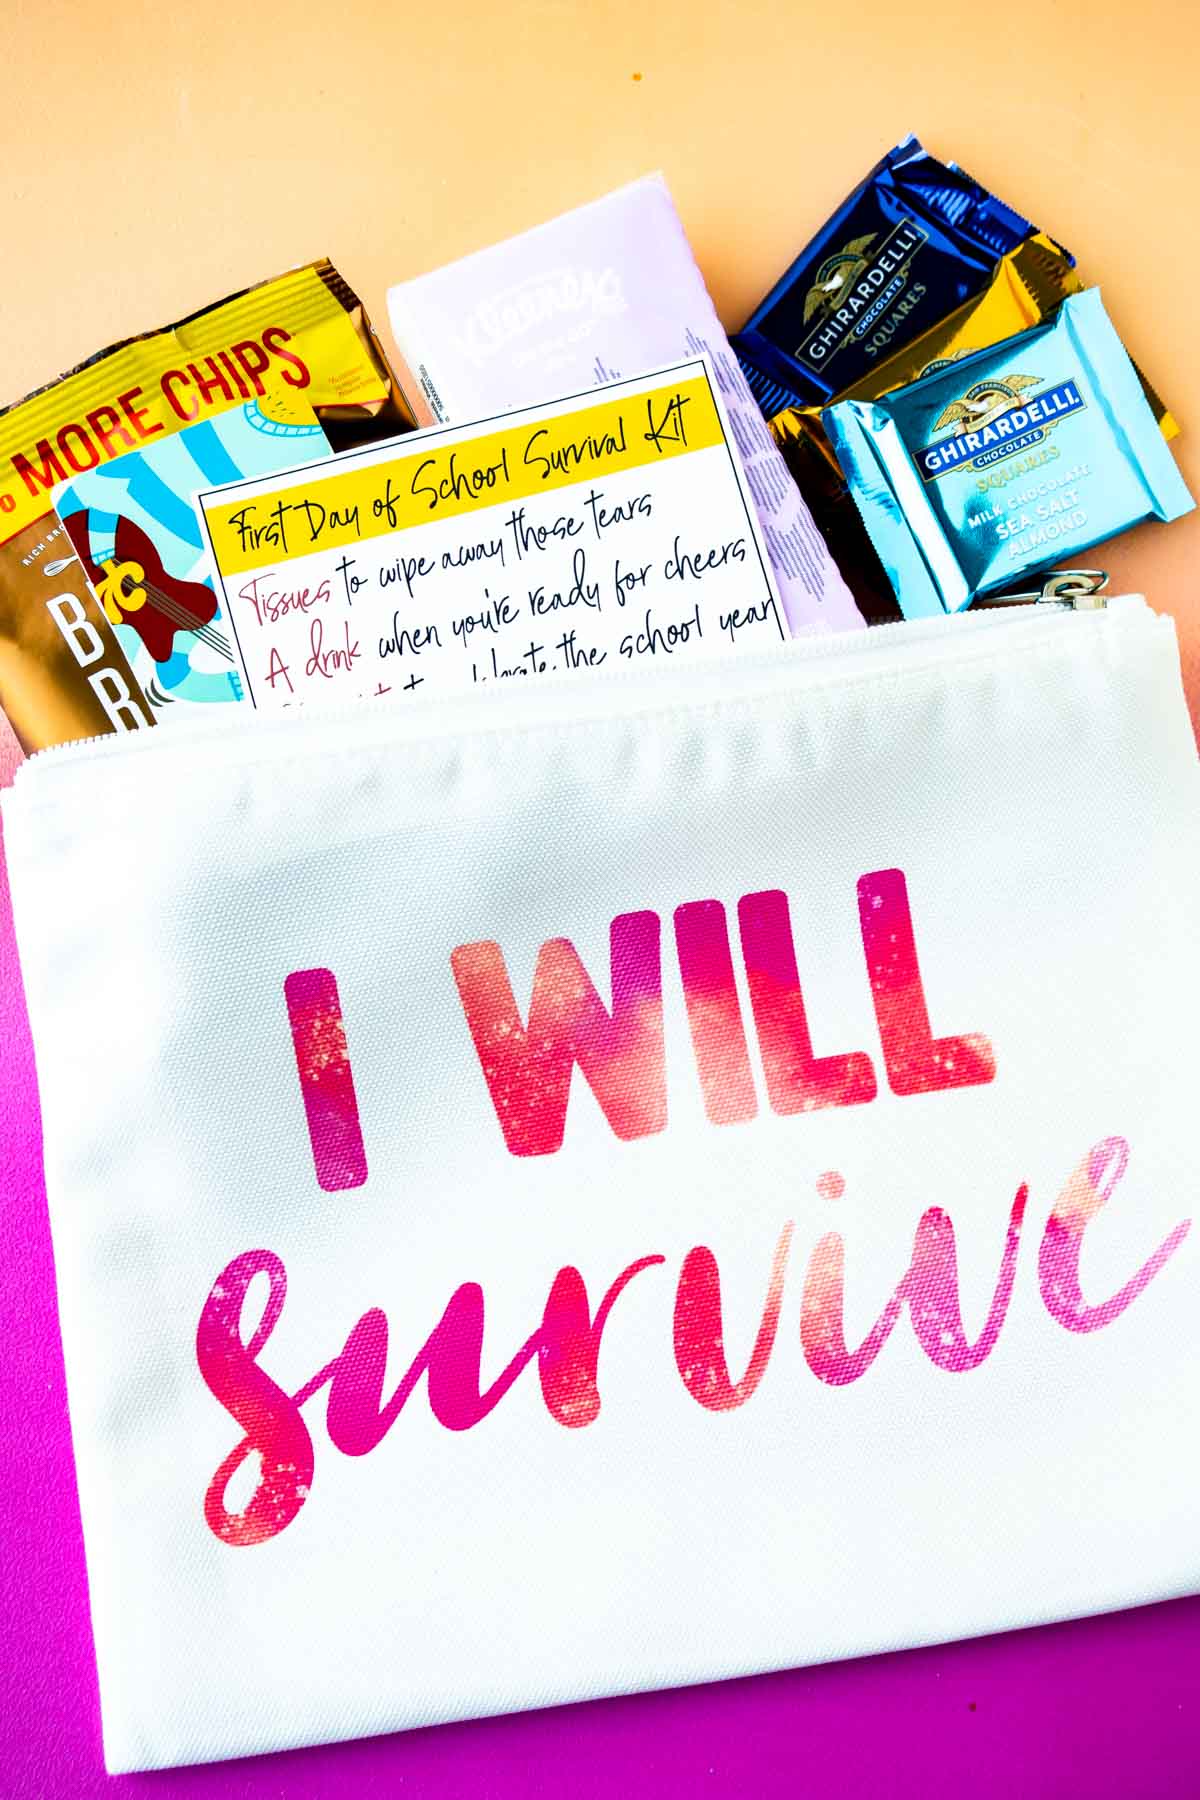
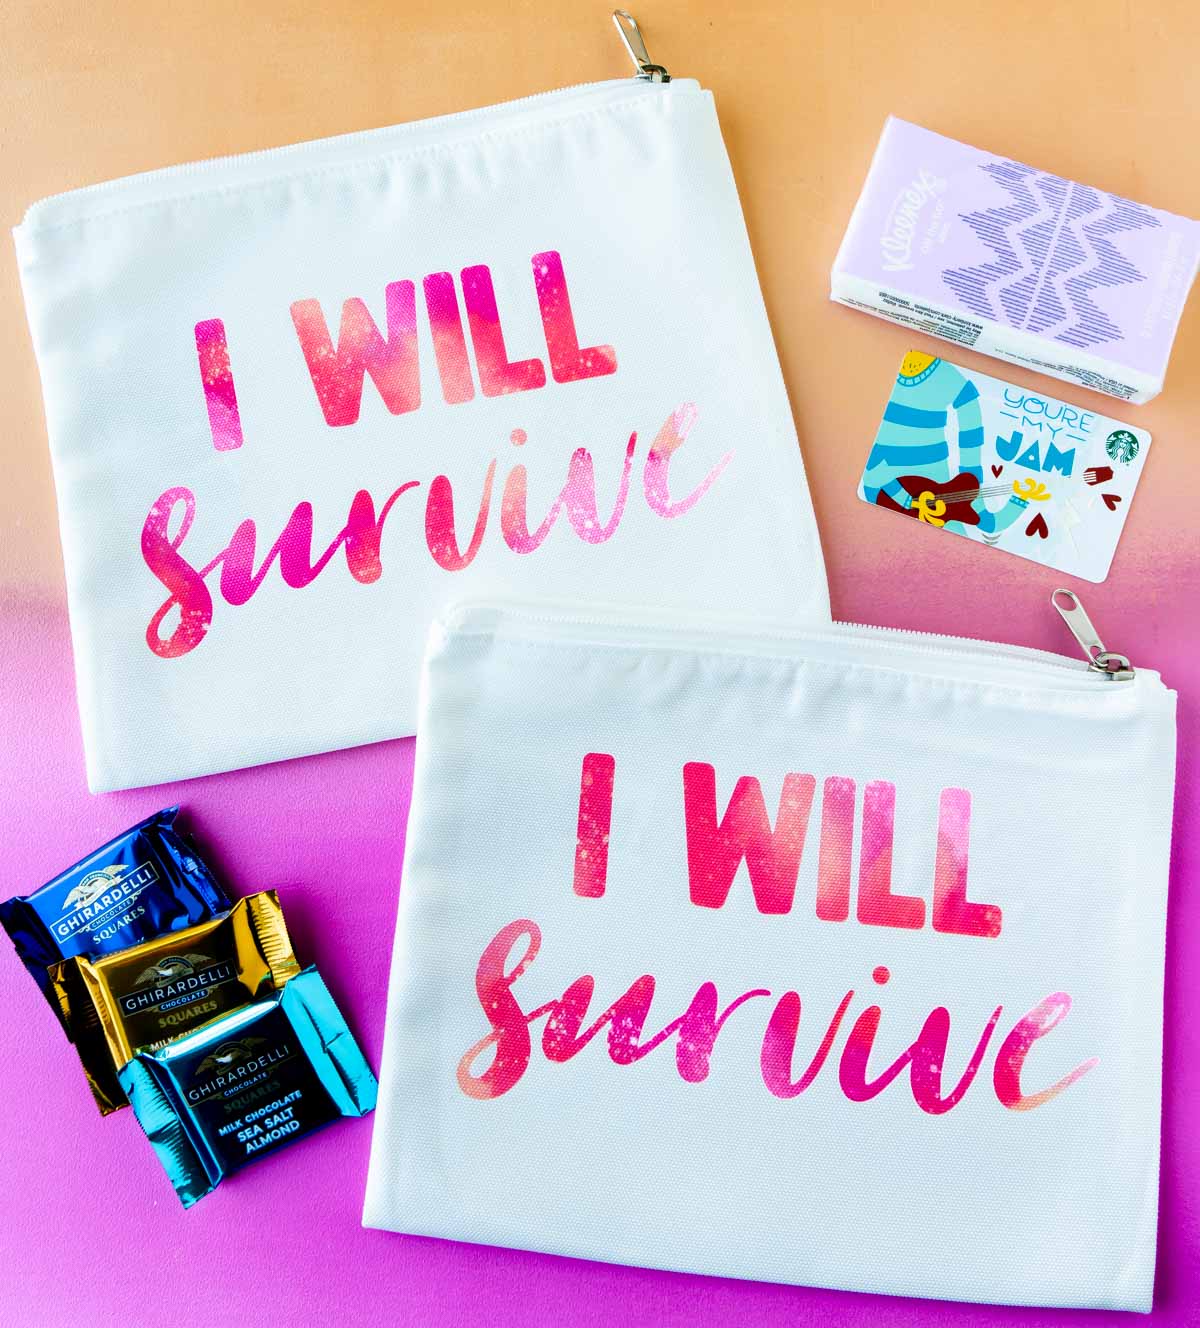
Once your ready for the transfer, place the infusible ink transfer sheet on the cosmetic bag (with the card stock still inside), design side down. You’ll see here why you needed to mirror it! Place the included piece of butcher paper over top of the design then press the design down firmly with the EasyPress 2 at 385 degrees for 60 seconds. Once you’re done pressing, remove the EasyPress and butcher paper carefully. Then last, gently remove the Infusible Ink backing from the transfer sheet. Your design should be inked onto the cosmetic bag! Look how vivid the colors turned out on my I Will Survive bags! I thought they were a good end of summer color and one that would work for these back to school survival kits any any type of survival kits my friends wants to use these for! I personally will likely use them for:
MasksFirst aid kitsKid airplane activities Medicine and other travel necessities
How to Make a Back to School Survival Kit
Okay so now that we have our custom cosmetic bags done, it’s time to finish off the back to school survival kits! All you need to do is:
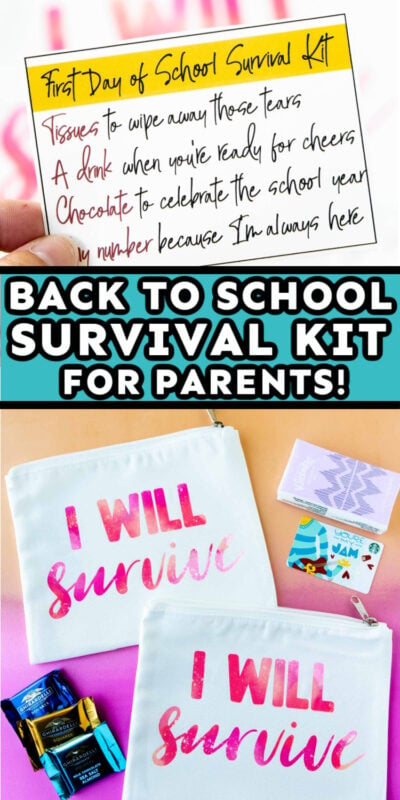
Things to Put in the Survival Kit
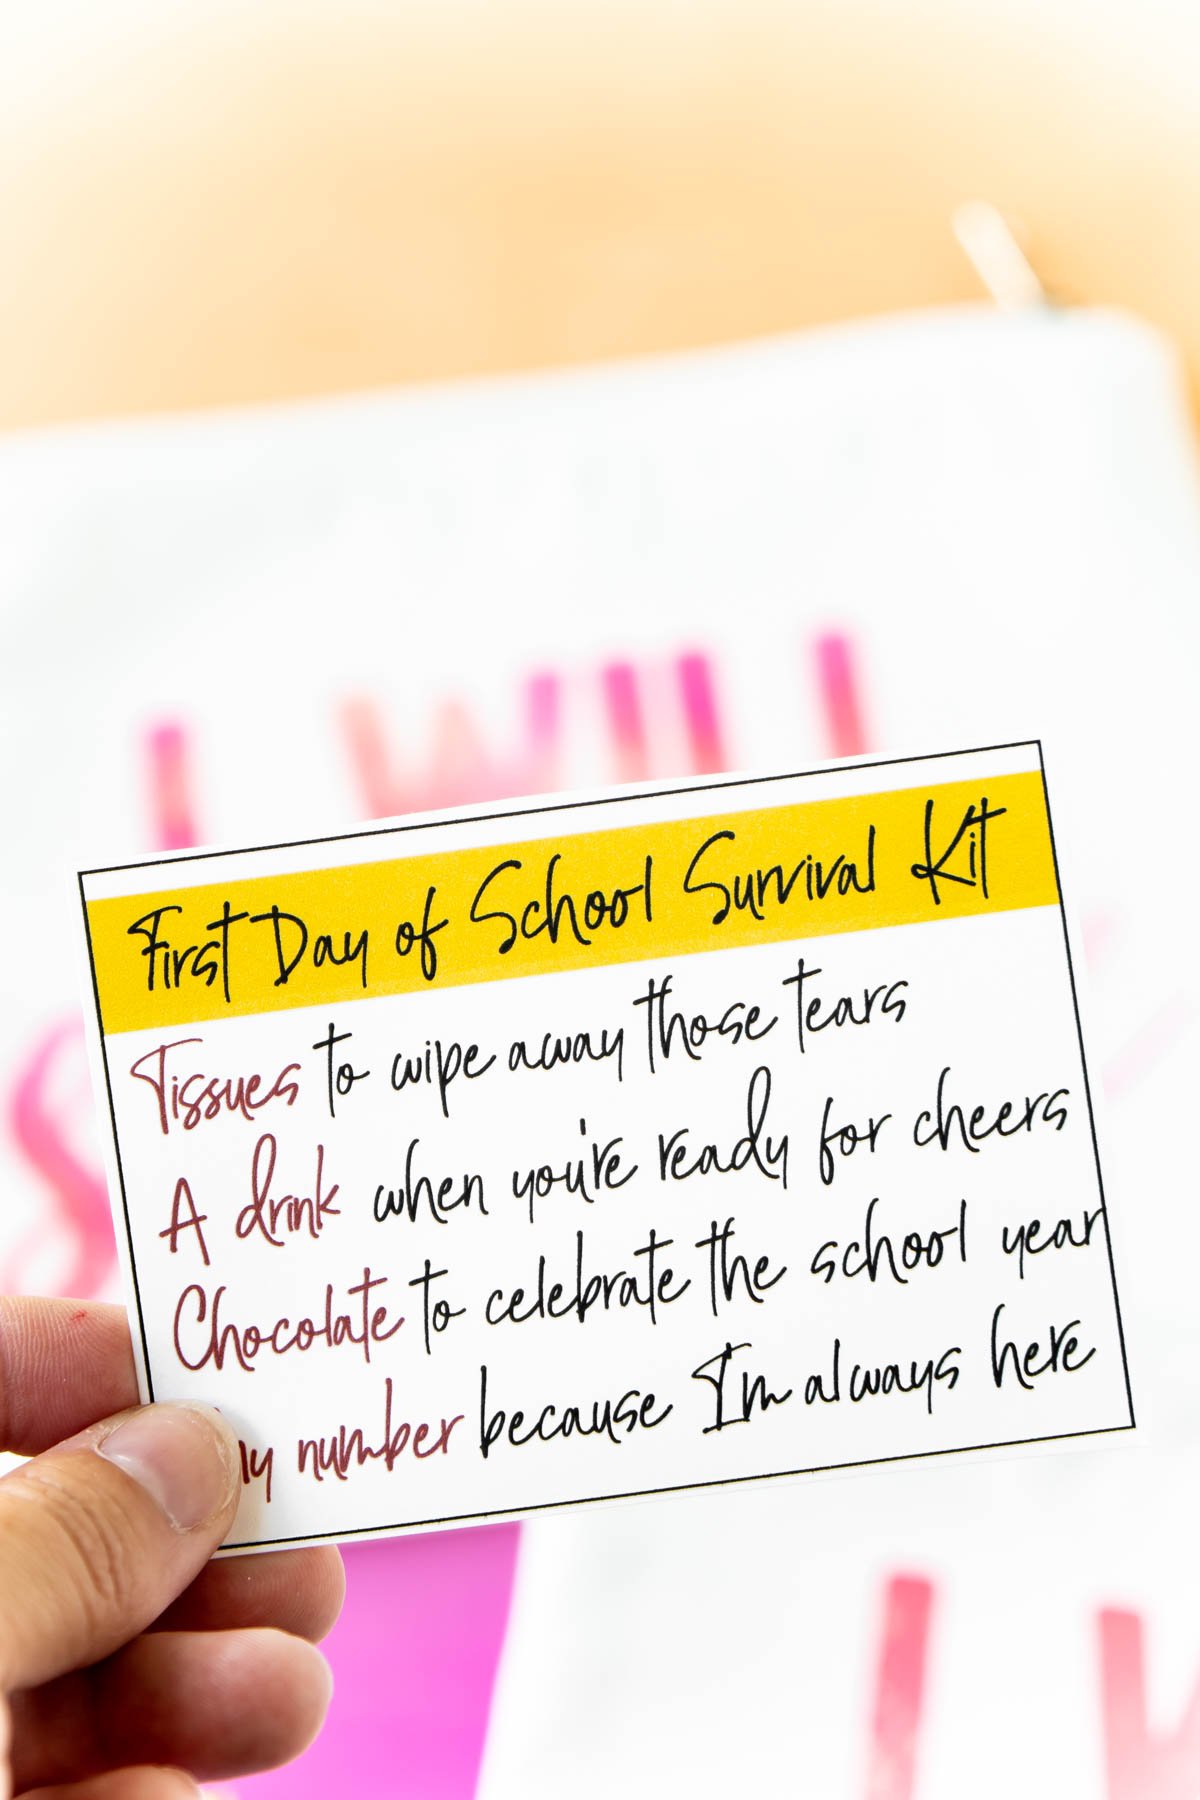
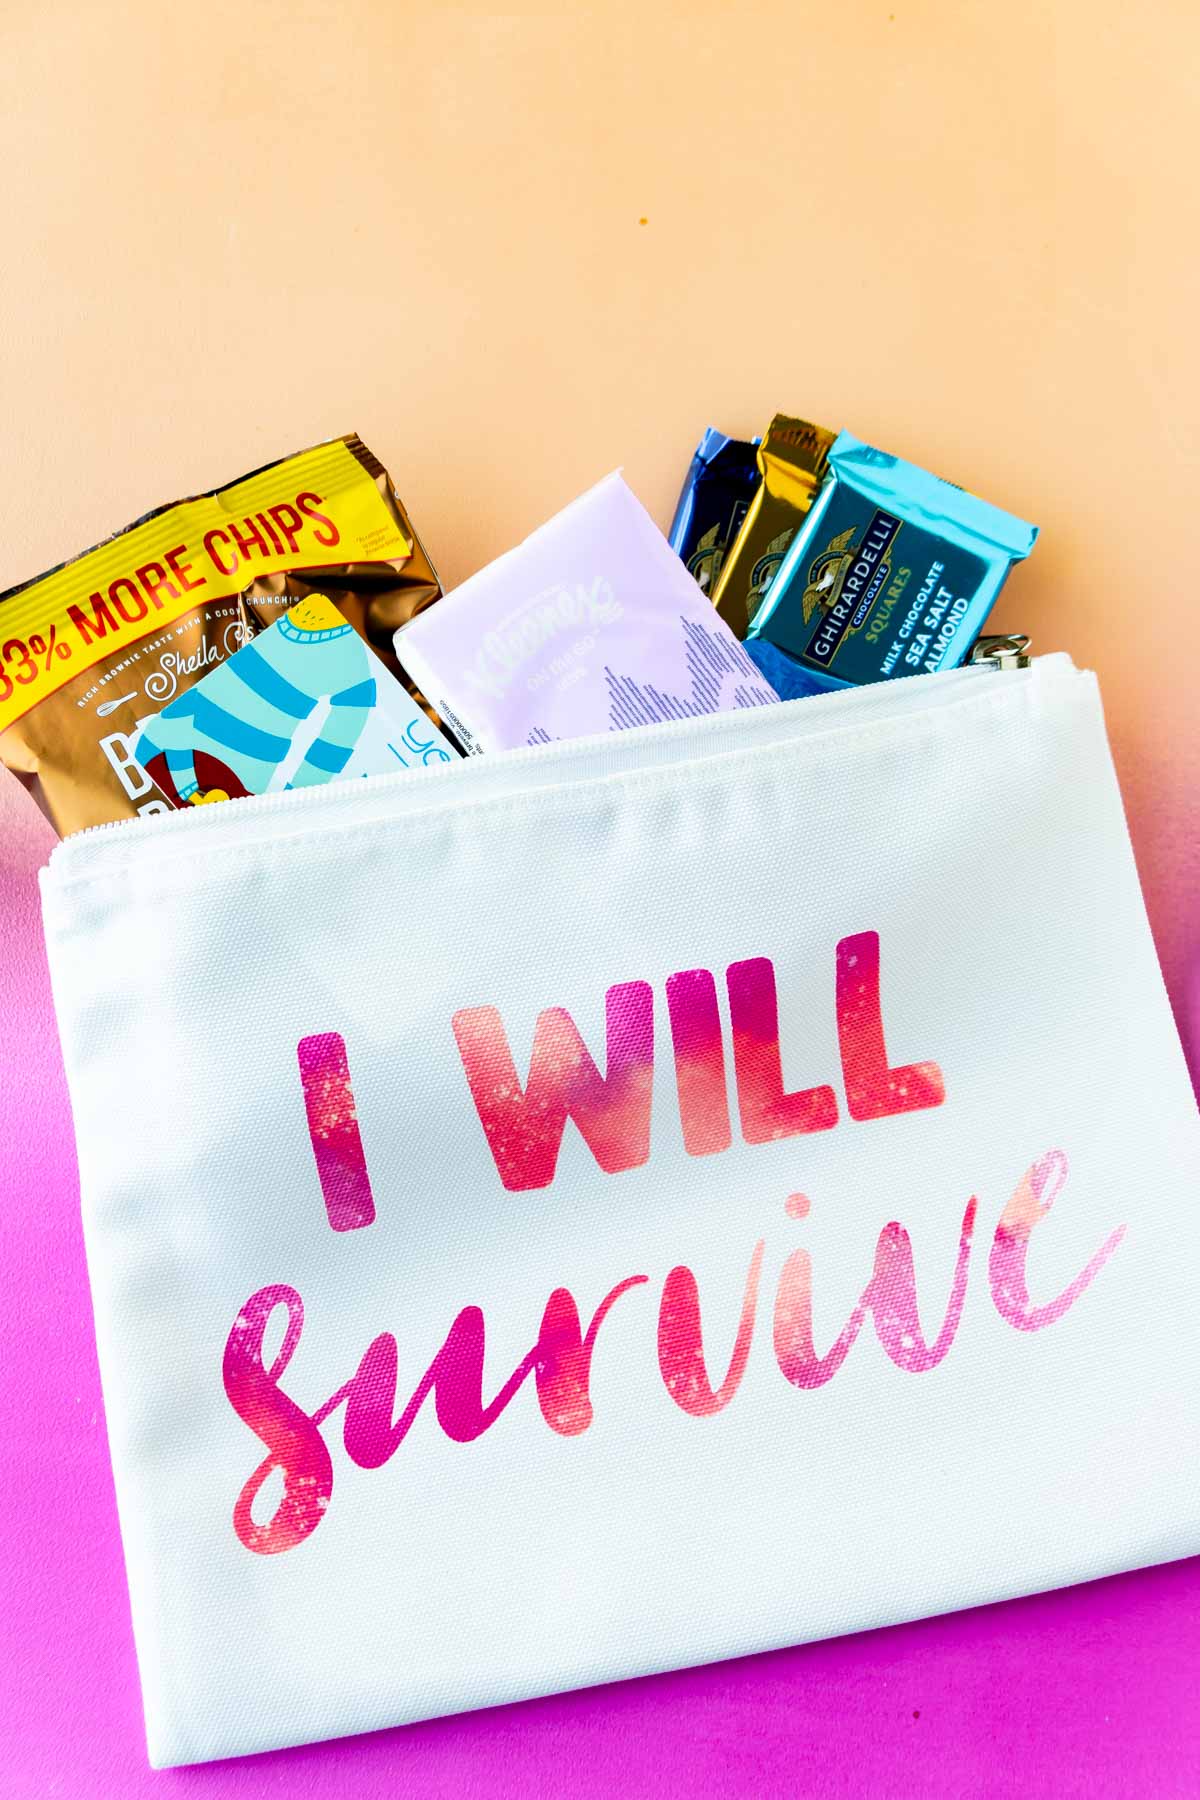
The little cards that I created mention including tissues, drinks, chocolate, and your phone number. I tried to make them generic enough that you could really make it work with anything. Here are some simple ideas:
ChocolatesCandy barsChocolate granola barsHomemade chocolate treats Gift cards to somewhere to get drinks – Sonic, Starbucks, gas station, etc. Drink of some sort Tissues
I hope you can make these and give these to other parents who need a little reassurance or maybe just someone to lean on during this crazy year (and future years). I know my neighbor with a son going to school for the first time really appreciated the tissues and chocolate on day one!
More Easy Cricut Projects
Amazing Race Clues – set up your very own Amazing Race night with these free Amazing Race clues! A great activity to do as a date or with your family! Modern play playroom ideas – create your own set of modern playroom rules with this fun DIY project that’s great for the entire family! Felt Pizza – learn how to make your very own felt pizza, a fun activity for all ages from preschoolers to middle schoolers! Space party decorations – Free printable space party decorations for a party that’s out of this world! DIY dice – make your very own jumbo dice, perfect for playing all sorts of dice games at home!
Download the Printable Survival Kit Tags
If you’d like to use the printable back to school survival kit tags I made, you can download them by simply clicking the button below or clicking here. The PDF will have six to a page survival kits you can simply cut and add to your bags with goodies!
Download The Free Printables
If you’re ready to download the free printables to use, simply click the button below or click here.