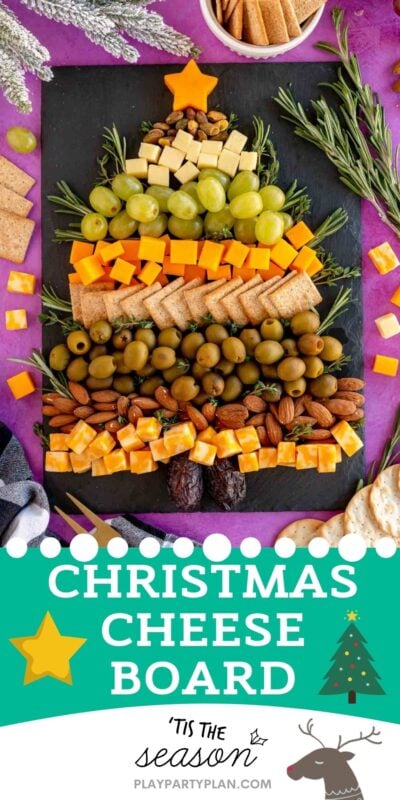
The holidays are the perfect time to get together with family and friends, but it can be hard to come up with a menu that everyone will enjoy. While most people enjoy the desserts like peanut butter blossoms and cranberry orange bread, I always recommend having some sort of Christmas appetizers too. With people being as picky as they are, I love to make appetizers that give people a choice, like this Christmas charcuterie wreath I made a few weeks ago, and this Christmas tree cheese board. It’s festive and fun but also gives people the ability to just grab the things they want to eat! It’s a great way to solve the picky eater problem. Plus, it’s easy to put together, pretty inexpensive, and who doesn’t love cheese and crackers? I’m going to show you a simple way to create your own Christmas tree cheese board for your holiday parties!
Why You’ll Love This Recipe
Easy – there’s no baking, no cooking, no real effort involved. All you have to do is make sure your cheese is cut (or buy pre-cut cheese) and your fruit washed. Then it’s just putting the tree together!Versatile – don’t like the types of cheese I used in my board? Use different ones. Substitute your favorite crackers or fruit for the ones I used. This one’s totally up to you!Prep ahead of time – I don’t necessarily recommend making this one ahead of time if you’re using fresh fruit, but you can totally prep it ahead of time and then just put the tree together last minute. I’ve done that numerous times and it works great!
Ingredients
What goes on a cheese board
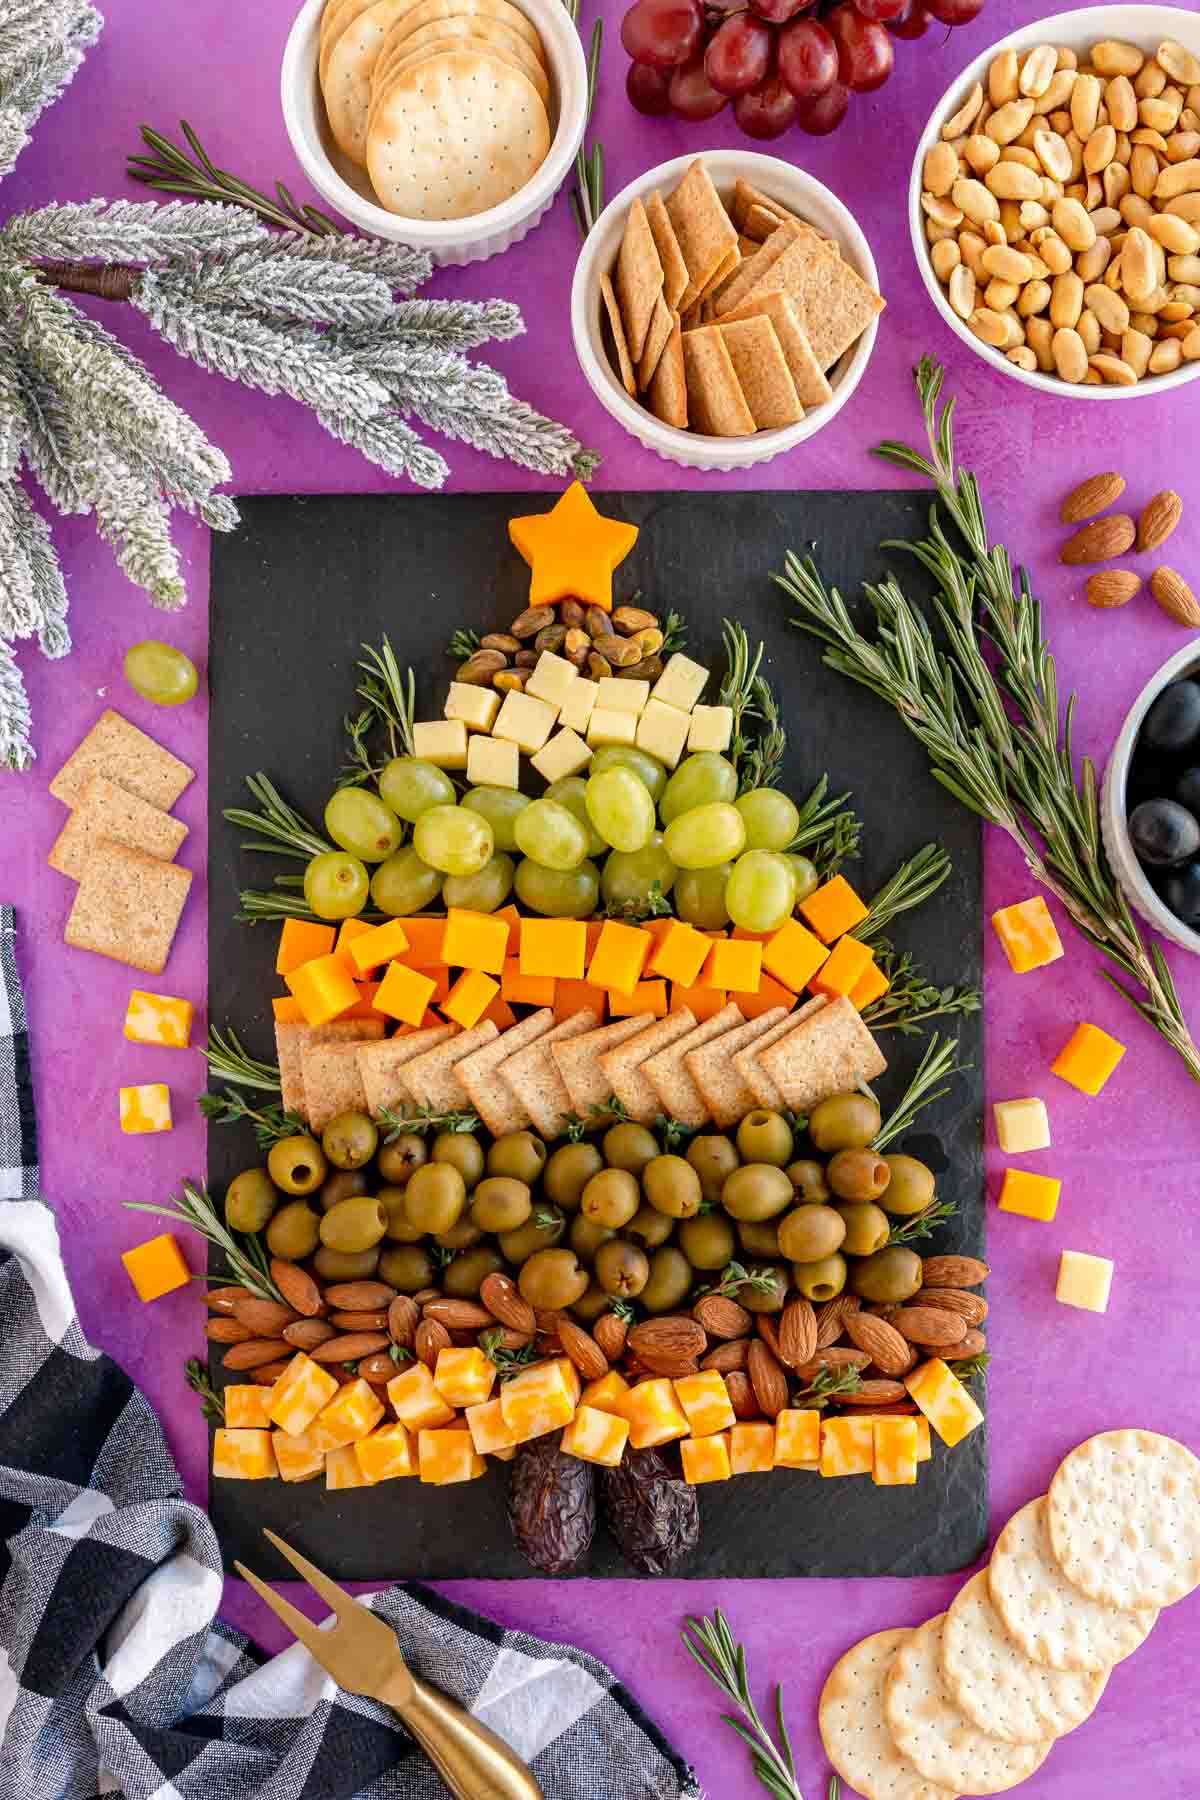
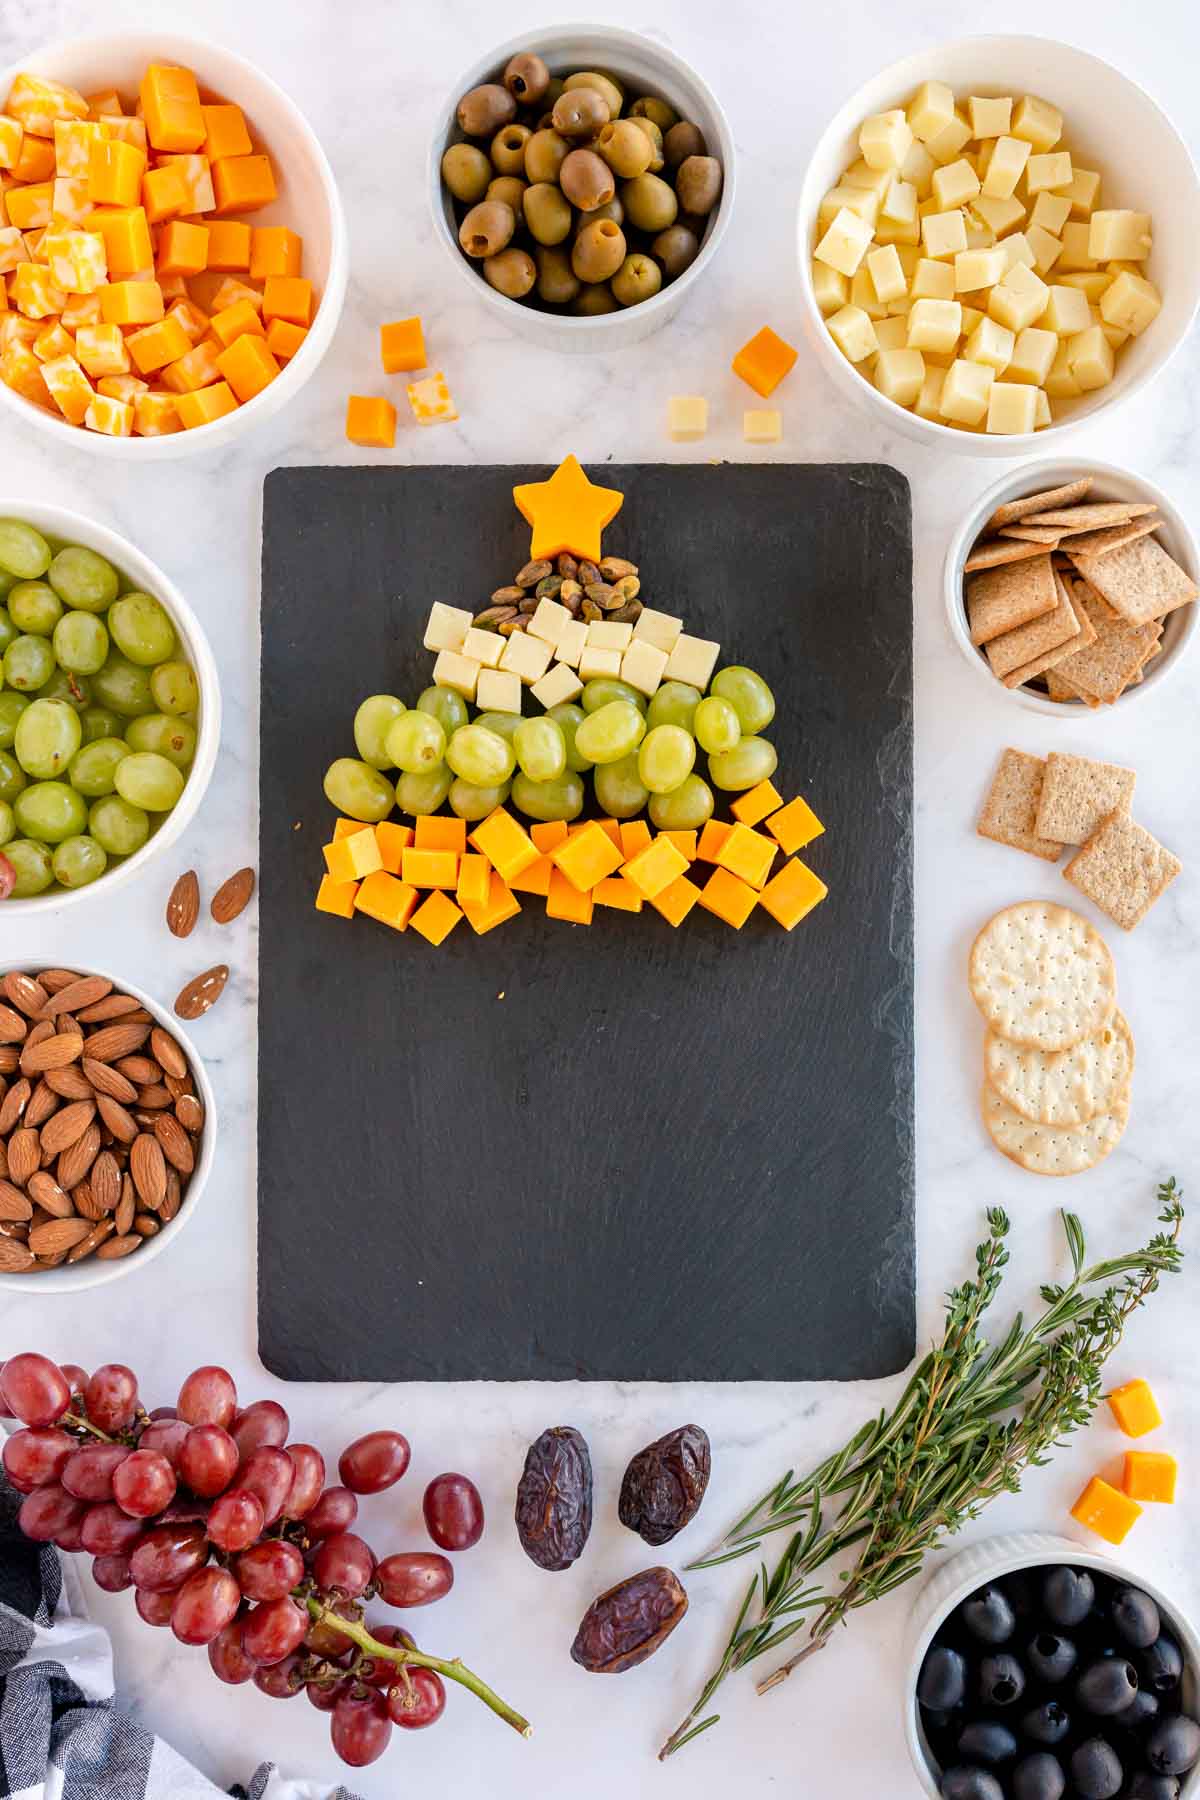
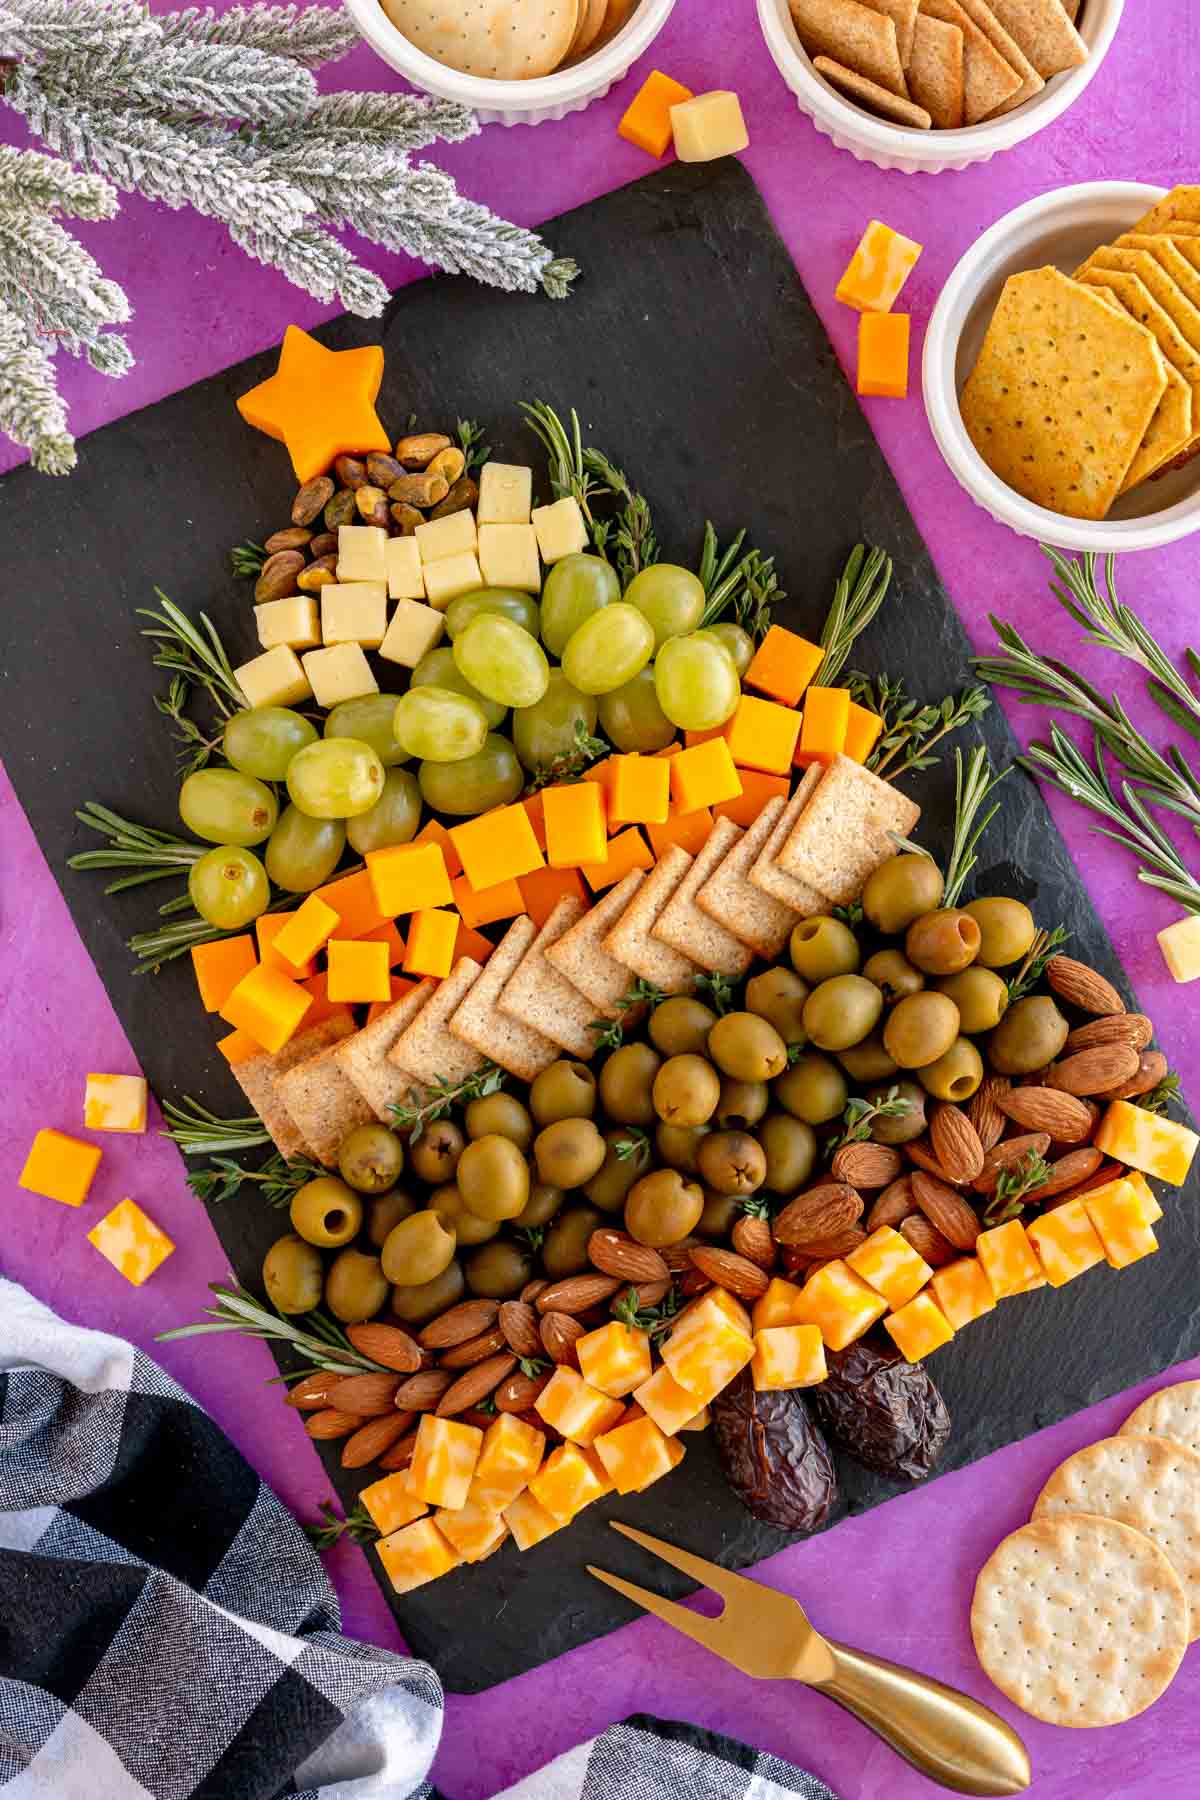
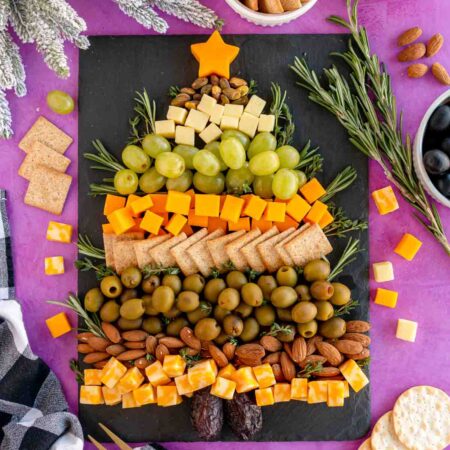
Okay so let’s talk about what goes on this Christmas tree cheese board. I’ve included a photo above with pictures of everything I included on mine, but I wanted to give you some other tips, alternatives, and ideas for creating your own.
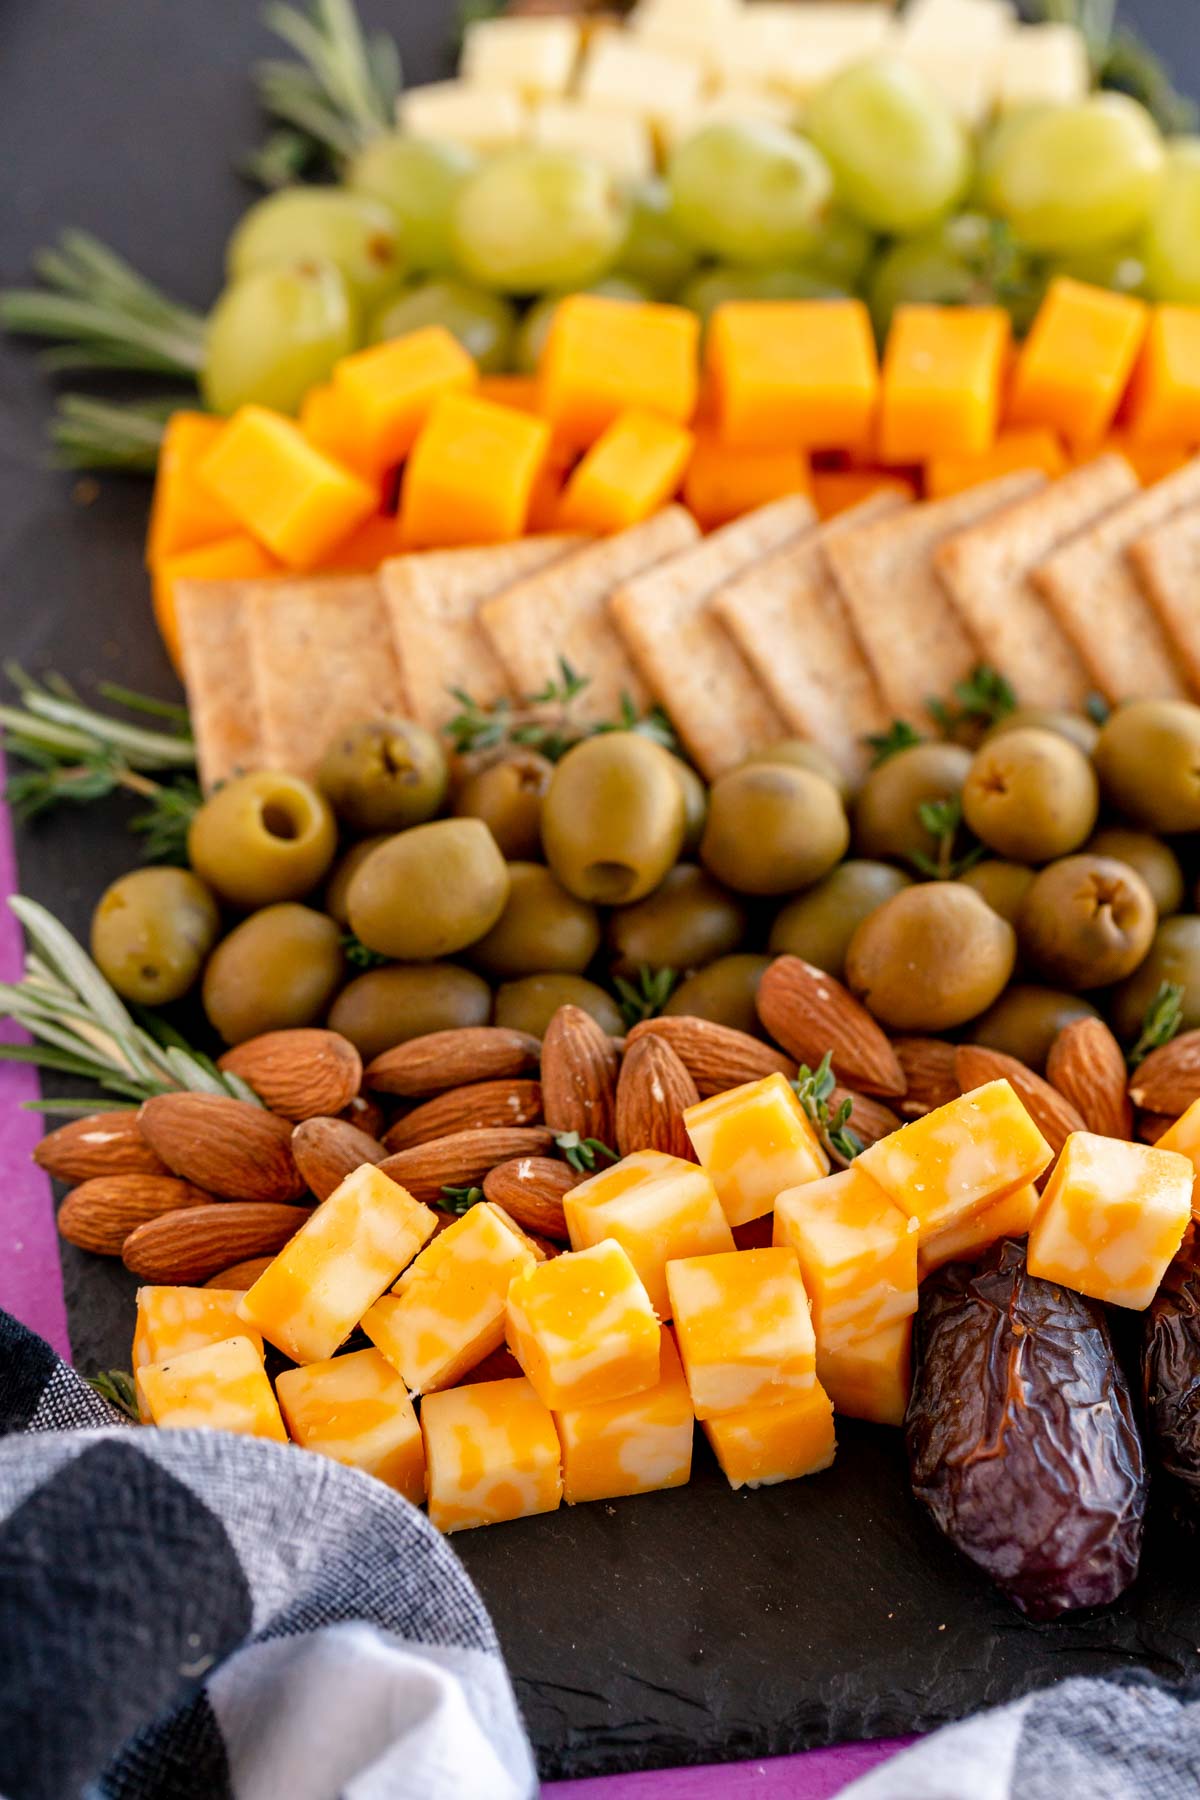
Cheese
The first thing you need on a cheese board of course is cheese. You could do sliced cheese, but I love the bulk that cheese cubes add to the board. I did three different kinds of cheese cubes – cheddar, Monterey jack, and colby jack. I personally love adding different kinds of cheese boards, especially since it’s a cheese board! If you’re feeling up to it, you could even add some of these DIY cheese board signs to tell people what kind of cheese it is! Unlike typical cheese boards that may have soft cheeses like brie, goat cheese, etc. I recommend sticking with medium or harder cheese that can be stacked into the tree shape easily.
Crackers, Crackers, and More Crackers
Next up is something to put the cheese on like crackers. I love doing a variety of different crackers with different flavors, shapes, and colors. If you’re doing this at an event with kids attending, I recommend sticking with typical crackers like butter crackers, Ritz crackers, Wheat Thins, Triscuits, etc. If you’re doing this for a more elegant party with just adults, you can get fancy and do crackers with different flavors and tastes.
Fresh and Dried Fruit
my favorites for this cheese board are red grapes, green grapes, and dates. You could also do a variety of dried fruits if you want like dried apricots or mangoes would be really good. I know a lot of regular cheese plates have things like berries on them but my reasoning for not including those things is this – berries are messy. For this Christmas tree cheese plate, you’re stacking the different things on top of each other and if the berries get all over the other things, it takes away from letting people choose what they want. So stick with the clean fruit that aren’t going to ooze onto the other ingredients. Or maybe put some star shaped strawberries around the side if you really want to.
Nuts
I love adding a variety of nuts to my cheese boards. They’re great to add a little crunch to your plate plus, they add fun color and texture to a board. I used almonds, peanuts, and pistachios on my board but you could really use any type of nuts you want. I just like the tree like colors of those three nuts!
Olives
The last edible thing I included on my board was both green and black olives. I love olives as a finger food and on any snack tray, so they just fit well here. Plus, they create a nice line in the Christmas tree! If you’re serving kids, you my want to stick with just black olives. I just like the color variety of using both black and green!
Fresh Herbs
Last but not least, I like to add fresh herbs to the tree to make it look more like it belongs out in nature like an actual Christmas tree. I used fresh rosemary for this particular one but you could use anything that looks woodsy – rosemary, thyme, oregano all would work well.
How to make a christmas tree cheese board
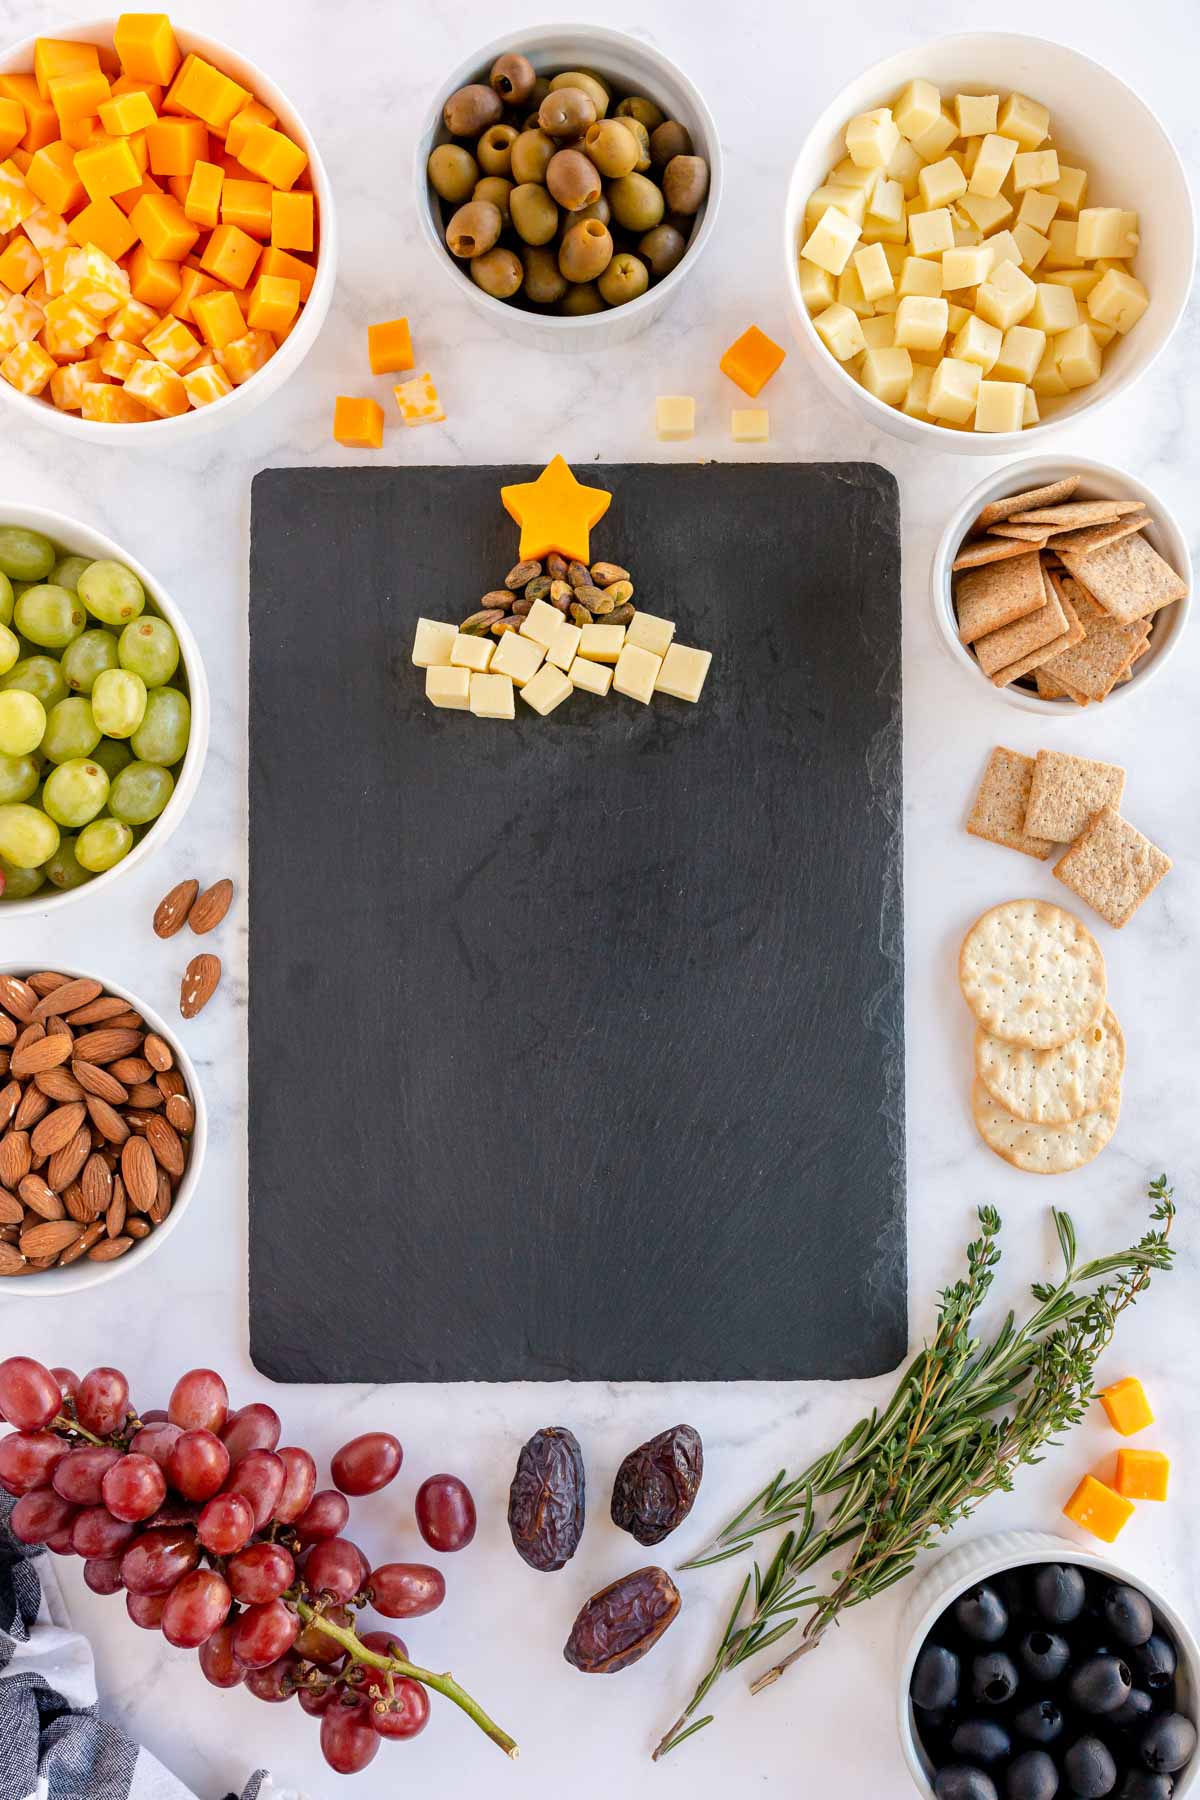
Tis the season for holiday parties and holiday food! This cheese board is really easy to make and best of all – you can customize it however you want as long as it ends up looking like a tree in the end! But I’ll still walk you through how we made ours just in case you’re not up for being creative after planning all those Christmas games and making your own DIY advent calendar (or is that just me!?!). My recommendation is to first figure out what you want your tree to look like. I sometimes draw it out on paper with little stick squares and circles to get a vision for my tree. Or you can just look at my pictures in this post and copy that, totally okay too! Once you’ve figured out what you want your tree to look like, it’s time to put it together!
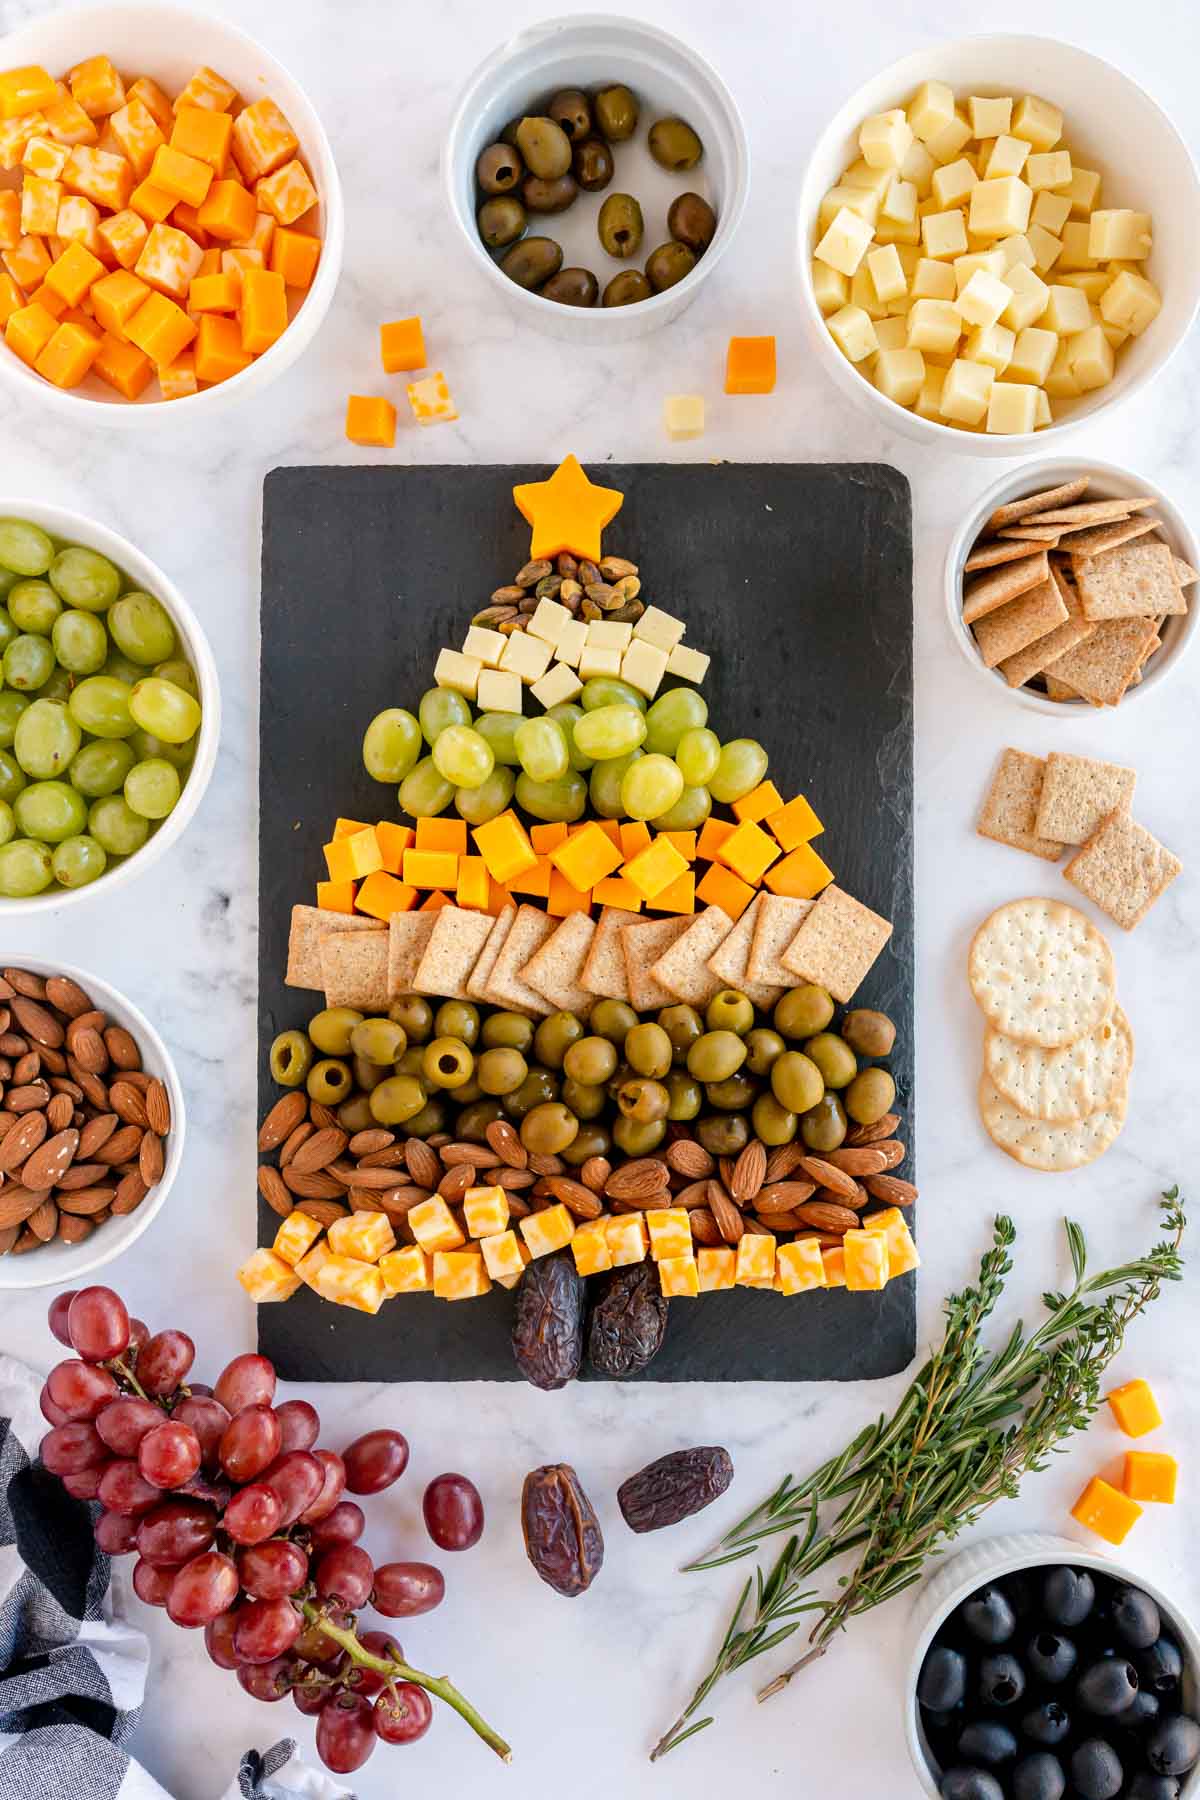
1 – Start the Top
I like to start at the top with a cheese star (just use a little star cookie cutter) and then move down from there. Why do I start at the top? So I can make sure I have space for the star and so that I can taper the tree shape down as I go. I tried starting from the bottom once and I ended up with what looked more like a rectangle tree than a tapered one because it’s harder to taper up than down. You can do it either way, I just recommend going top to bottom. After the star, this is a great place for something small like the pistachios I added next because you want to be able to really shape this point in the tree. It’s a little harder to do with big items like grapes or olives, so I recommend pistachios or something small here. After that first section, you can just start making straight layers in your tree. To taper them, just make them a little wider as you go down the tree.
3 – Add tree layers
Keep going adding small layers of snacks as you go, trying to separate colors and shapes as much as possible, just like I do with my dessert boards. It’ll help create interest when you look at the board! When you’re creating the layers, I try to not make them more than two items tall and two items stacked. That keeps them about the same size and depth when you’re looking at the trees.
4 – Keep Going
Keep adding layers to the tree until you get to about an inch from the bottom of your cheese board following the same tips I mentioned above. This is much easier to do if you’ve planned out your tree design in advance. I’ll be the first to tell you that if you just start going and adding things, it’s easy to end up with only like three things on your board and realize you saved all of the grapes for last. And then you end up starting over and wasting more time. I’ve done it way too many times so now I always design it first. Once the layers are complete, fill in that empty space at the bottom of your cheese board with a little date tree trunk to make it a tree!
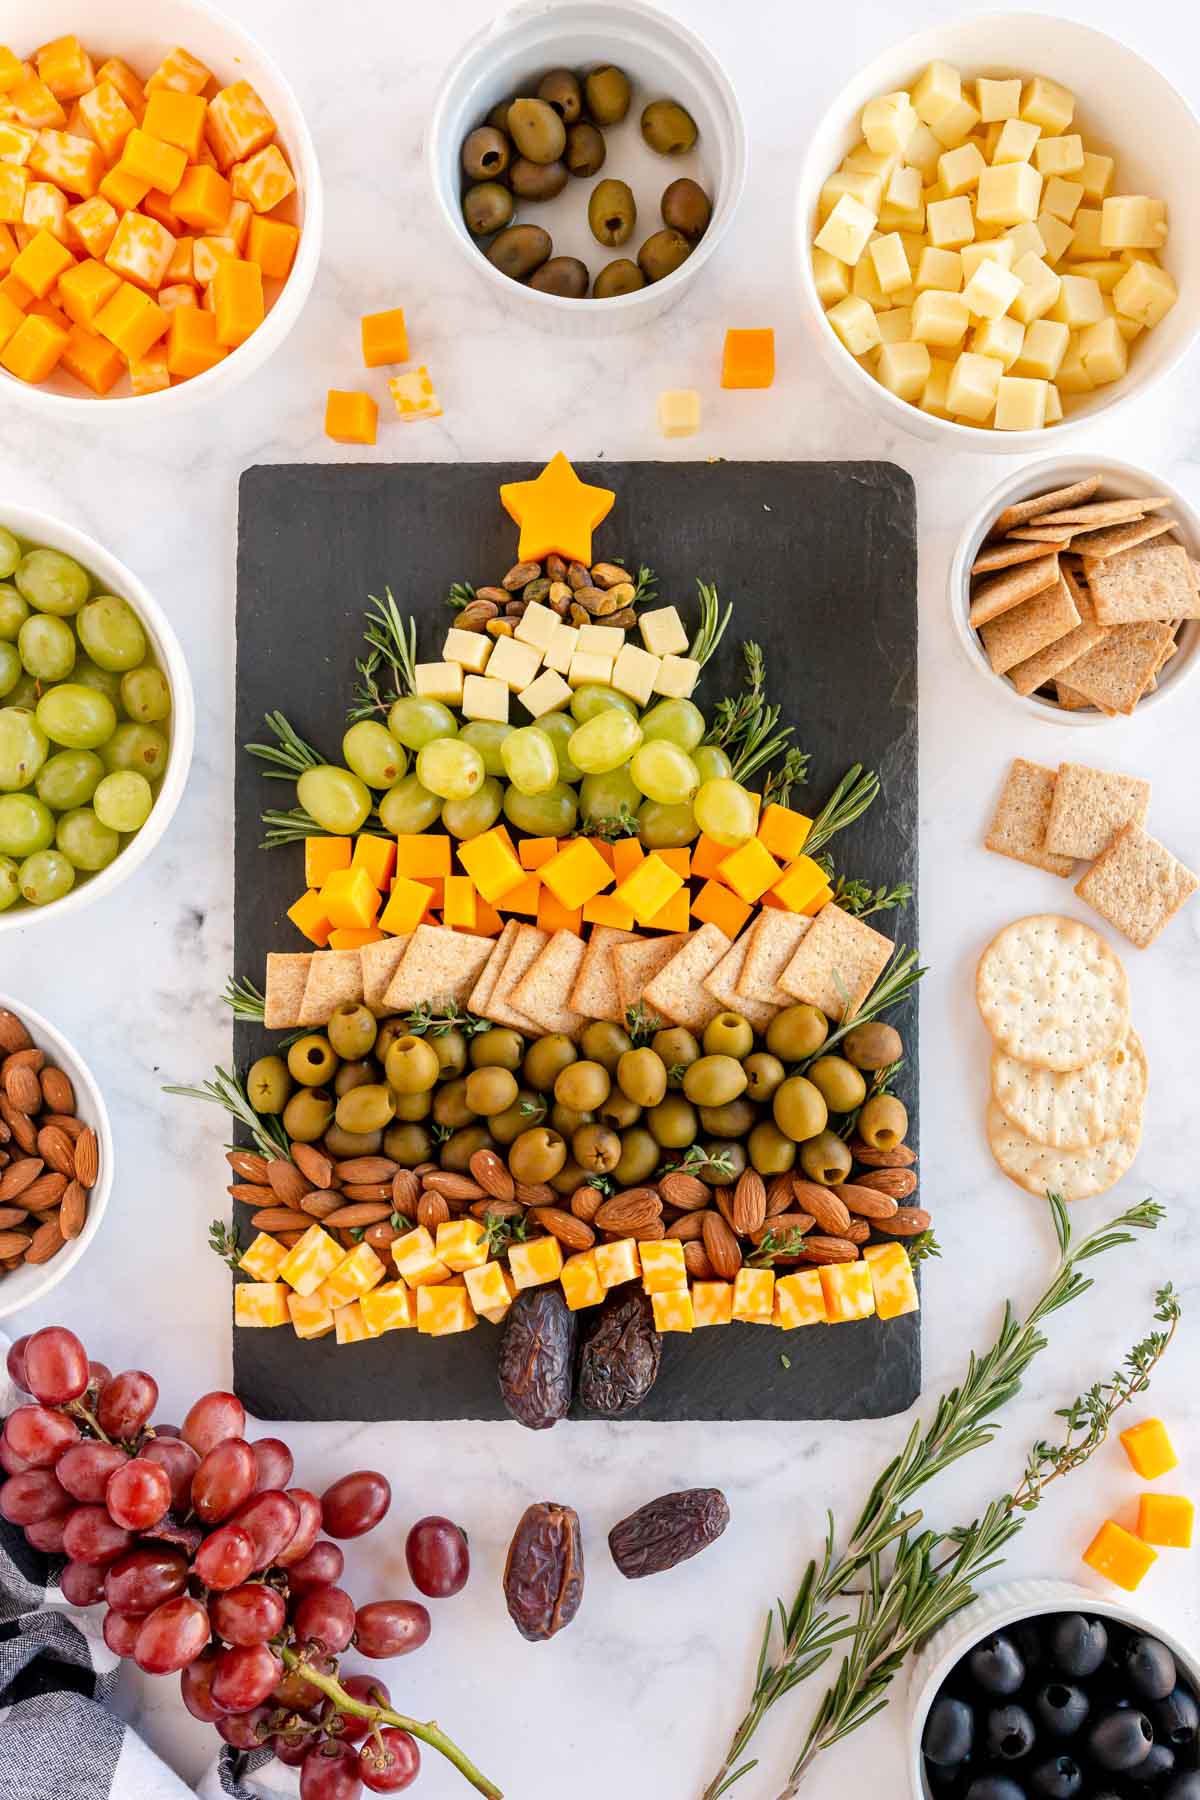
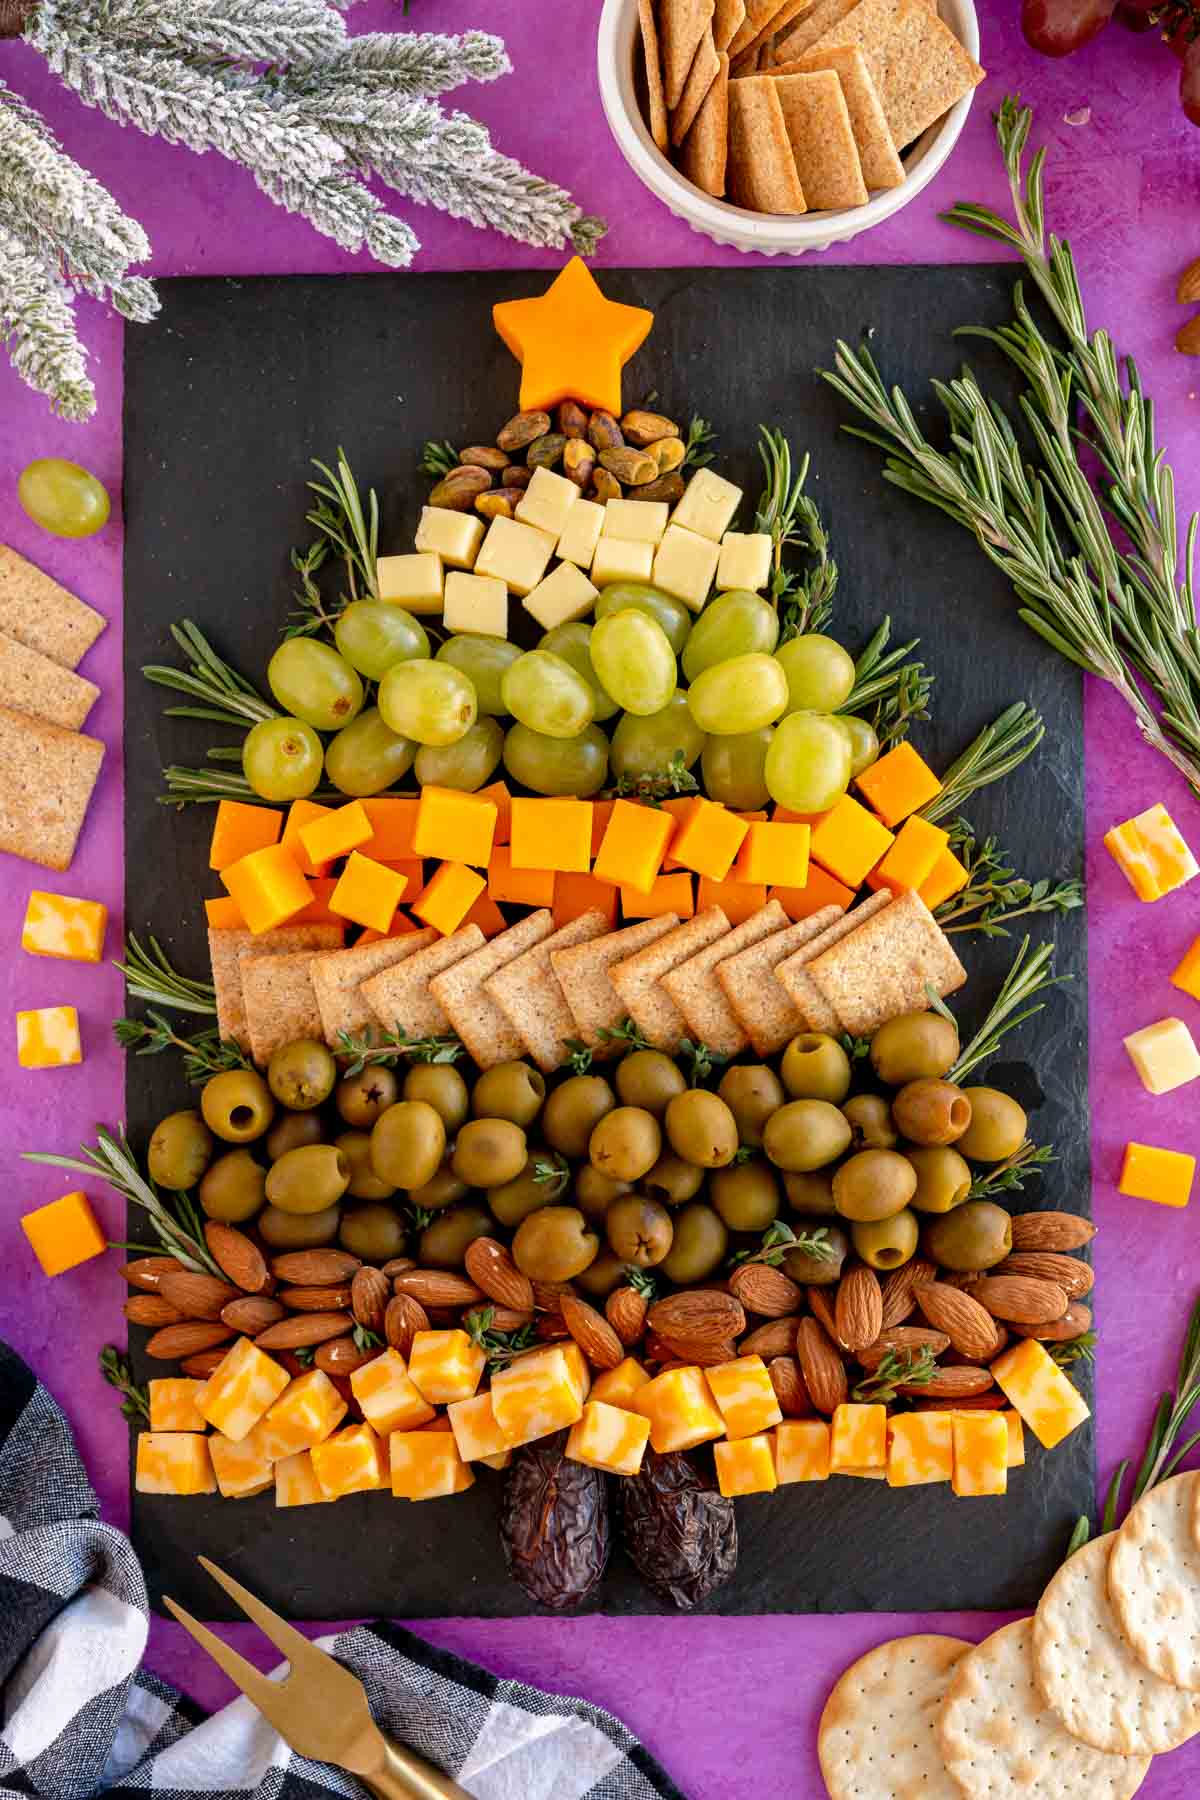
5 – Finish it off
Finish the tree off with the addition of some fresh herb garnishes to give it more of that tree look. I recommend being light handed with the herbs but still adding them where you think looks best. And that’s it! You’re ready to serve the cheese board! If you want to make this ahead of time, you can make it and add plastic wrap around the board, but I would only do that for a few hours, not for a long time! Speaking of plastic wrap, if you want to transport this, wrap it in plastic wrap then unwrap and just fix up any pieces that moved during transport!
Expert Tips
Use ingredients that aren’t going to bleed or impact other ingredients nearby. Hard or medium cheeses, nuts, grapes, and dried fruits work best. Serve this alongside your favorite jams, spreads, and dips if people want to use them to eat with the cheese and crackers. Start with small layers, just like I did with this s’mores board, and refill as necessary. You don’t want to try and stack too many pieces of anything into a layer or it’ll ruin the look of your board. Store any leftovers wrapped in plastic wrap in the fridge for up to five days. Remove the crackers before placing in the fridge and store outside of the fridge in their own airtight container then just add when you’re ready to eat again.
More Christmas Appetizers
If you like this Christmas tree cheese board, you’ll love these other delicious Christmas appetizers!
Brie bites – if you’re missing the brie in this cheese board, try these delicious sweet and salty brie bites! Bacon wrapped smokies – super easy and super yummy little smokies wrapped in bacon then tossed with honey!Bacon wrapped dates – use leftover dates from this cheese board to make these delicious little bites of sweet and salty!Cheese tree cheese ball – if you’re missing your soft cheeses in this Christmas tree cheese board, plate up this fun Christmas tree cheese ball on the side!Grape jelly meatballs – a unique twist on a classic favorite, these meatballs are cooked in the crockpot and delicious!