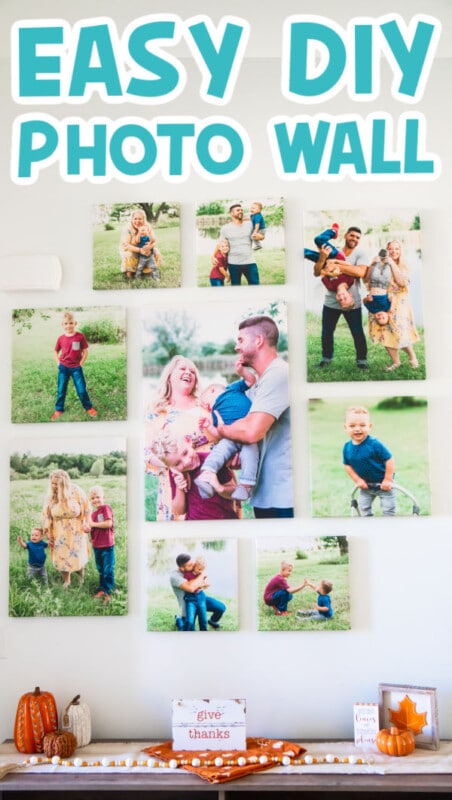
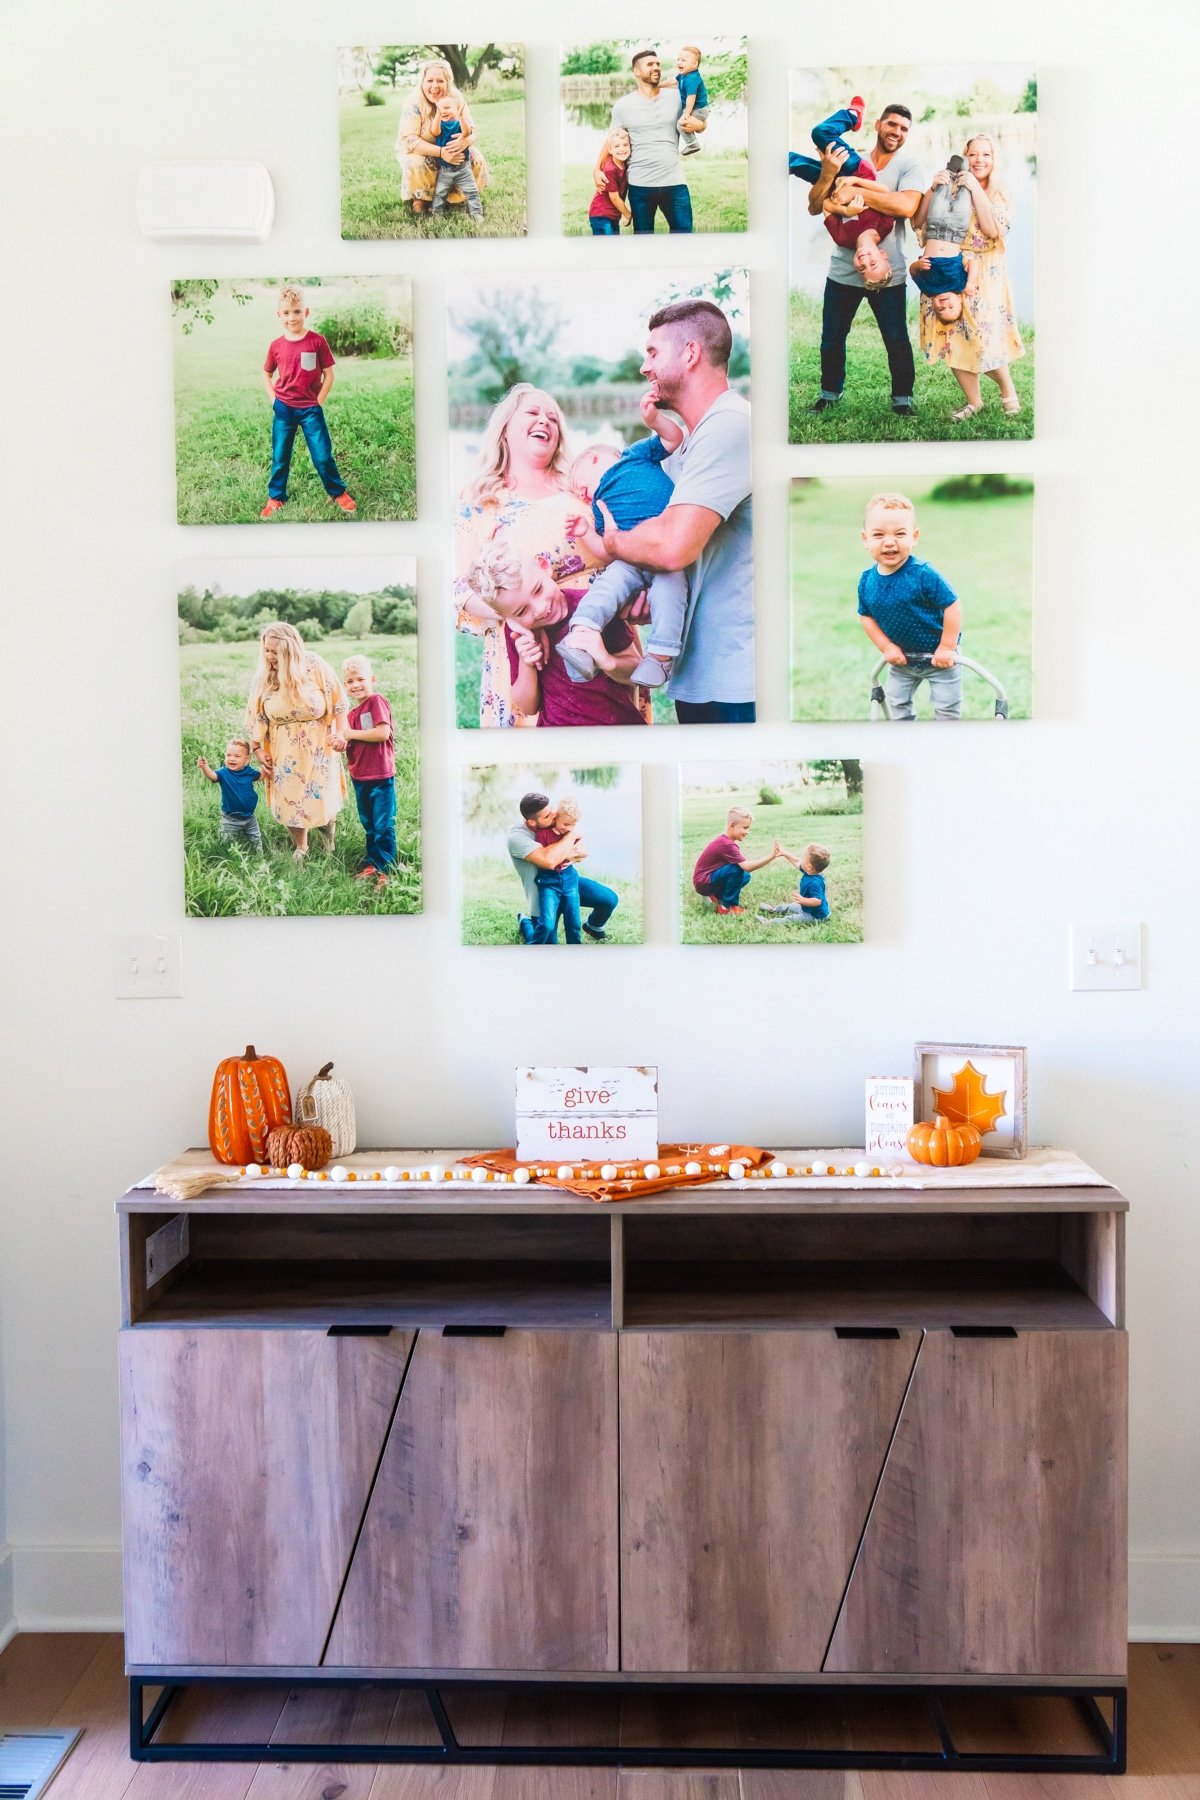
Since I got married almost 14 years ago, I’ve owned three different homes in three different states. This week was the first time I’ve ever put up family photos – ever. While I loved our time in the other places, it’s the first time I really feel settled and like we’re really putting down roots. Kids are playing on sports teams, we love our neighbors, we have tons of family here. It just feels right. So it was time to put up some family photos. We have a huge blank wall just inside our front door that was dying to to be the focal point of this DIY photo wall. I was a bit anxious about how it turned out or how difficult it would be. I mean this was a much bigger project than my DIY menu board. I was anxious for nothing. It was super simple to make, and I love how it turned out. I just told my husband this morning every time I see the family photos on the wall, it makes me smile. And we all need a little more smiling in 2020. I’m sharing a simple tutorial for how we made our DIY photo wall so you can make one too. I’ve included what we did as well as a few other options that might help you create a fun photo wall in your home!
Supplies
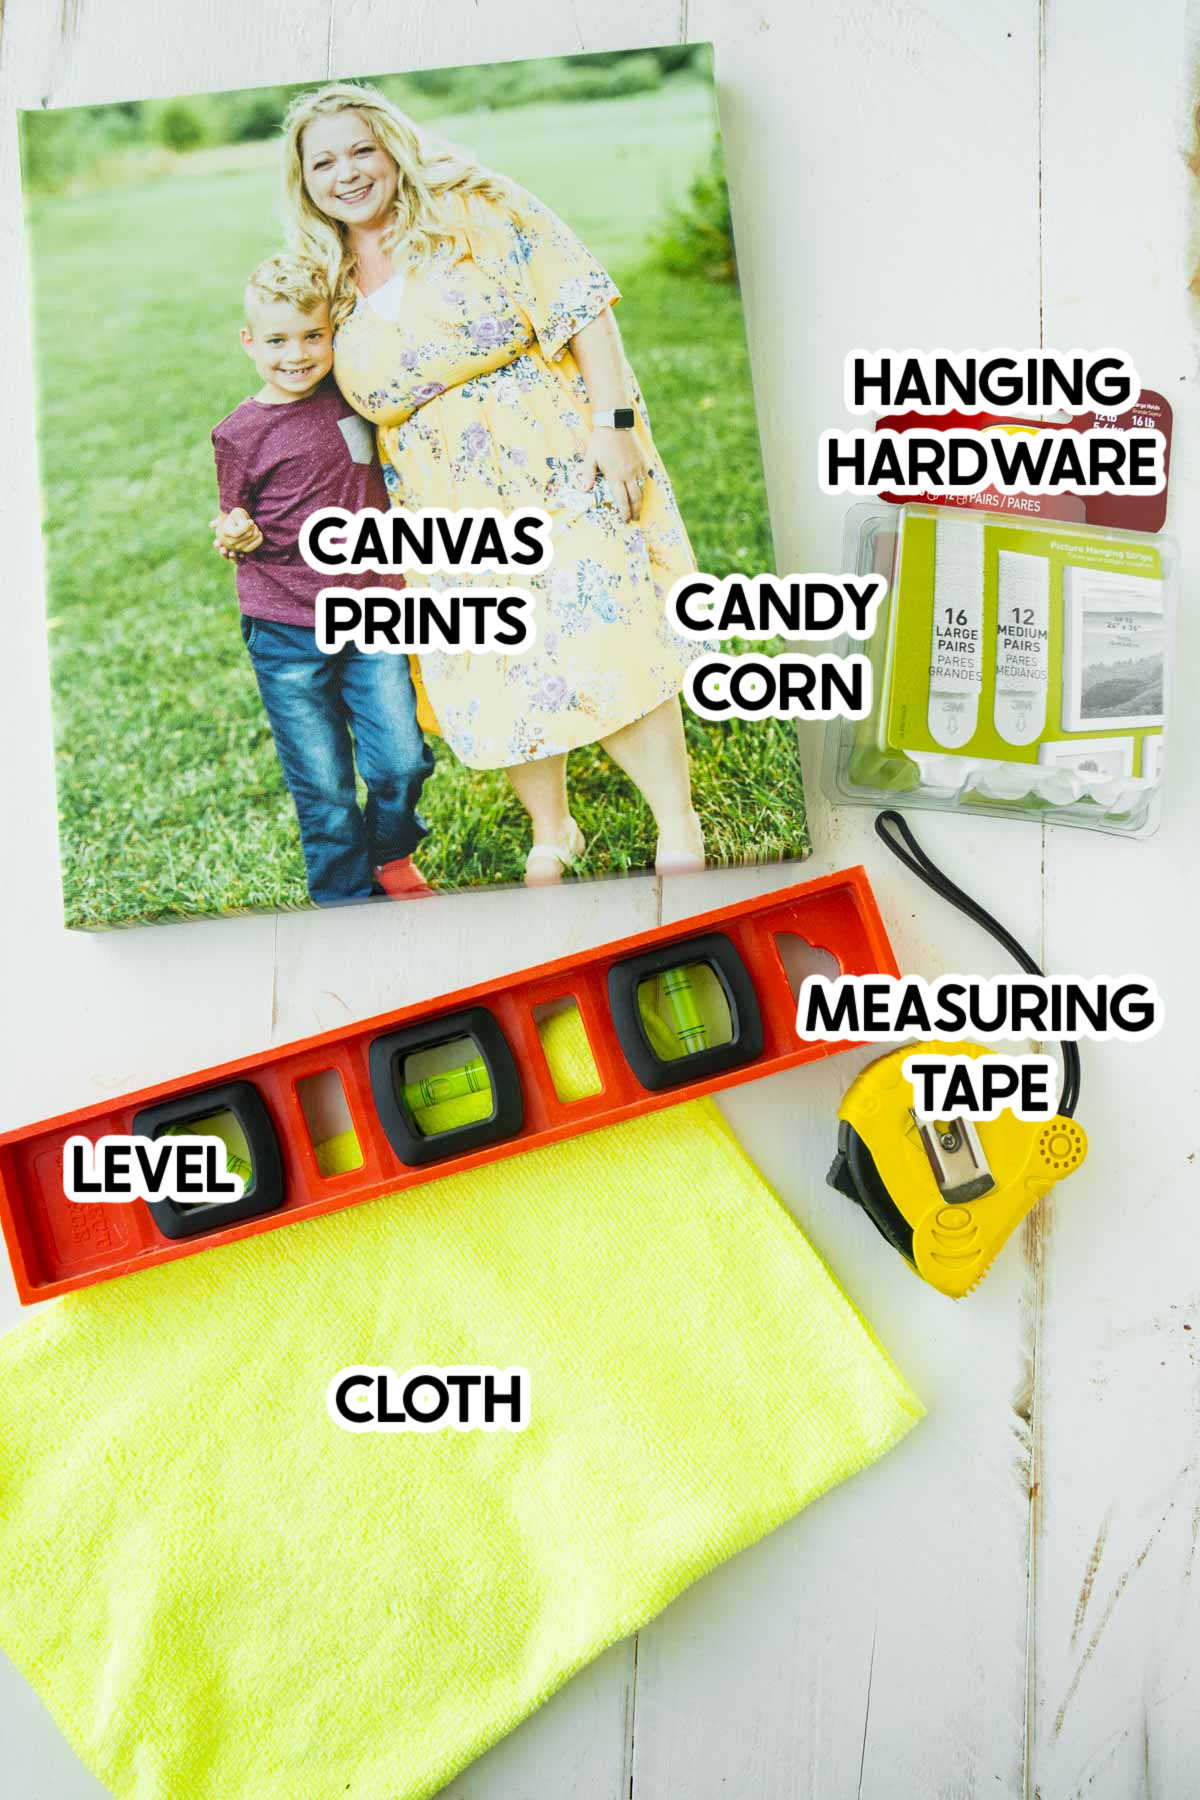
Supply Notes
Okay so all of these supplies are general things you’ll need – you can pick and choose exactly how you want to set things up. More on that later but real quick details on some of these supplies!
Canvas Prints – I’ll go into how we created these in a minute but the photo canvases give your photo wall a nice definition and are super easy (and light to hang) compared to frames! Use the code PLAYPARTYPLAN10 to get a 10% discount on your order! Hanging hardware – we wanted to avoid putting actual holes in the wall, so we personally just used 3M photo hangers. There are tons of ways you can hang the canvases on the wall, just pick one and make sure you have enough hardware for all of your photos!Level – we used a level to both space out our photos as well as obviously to make them level. You can use any kind of level. Measuring tape – a measuring tape can help you measure the space on the wall and spacing between photos. Super important to get correct measurements before you even order photos! Cloth – we used a microfiber cloth but it could really be any clean cloth. You’ll simply be using it to wipe the wall clean before you place the photos on the wall.
Instructions
Okay so now let’s talk about how to actually make your photo wall.
1 – Measure your space
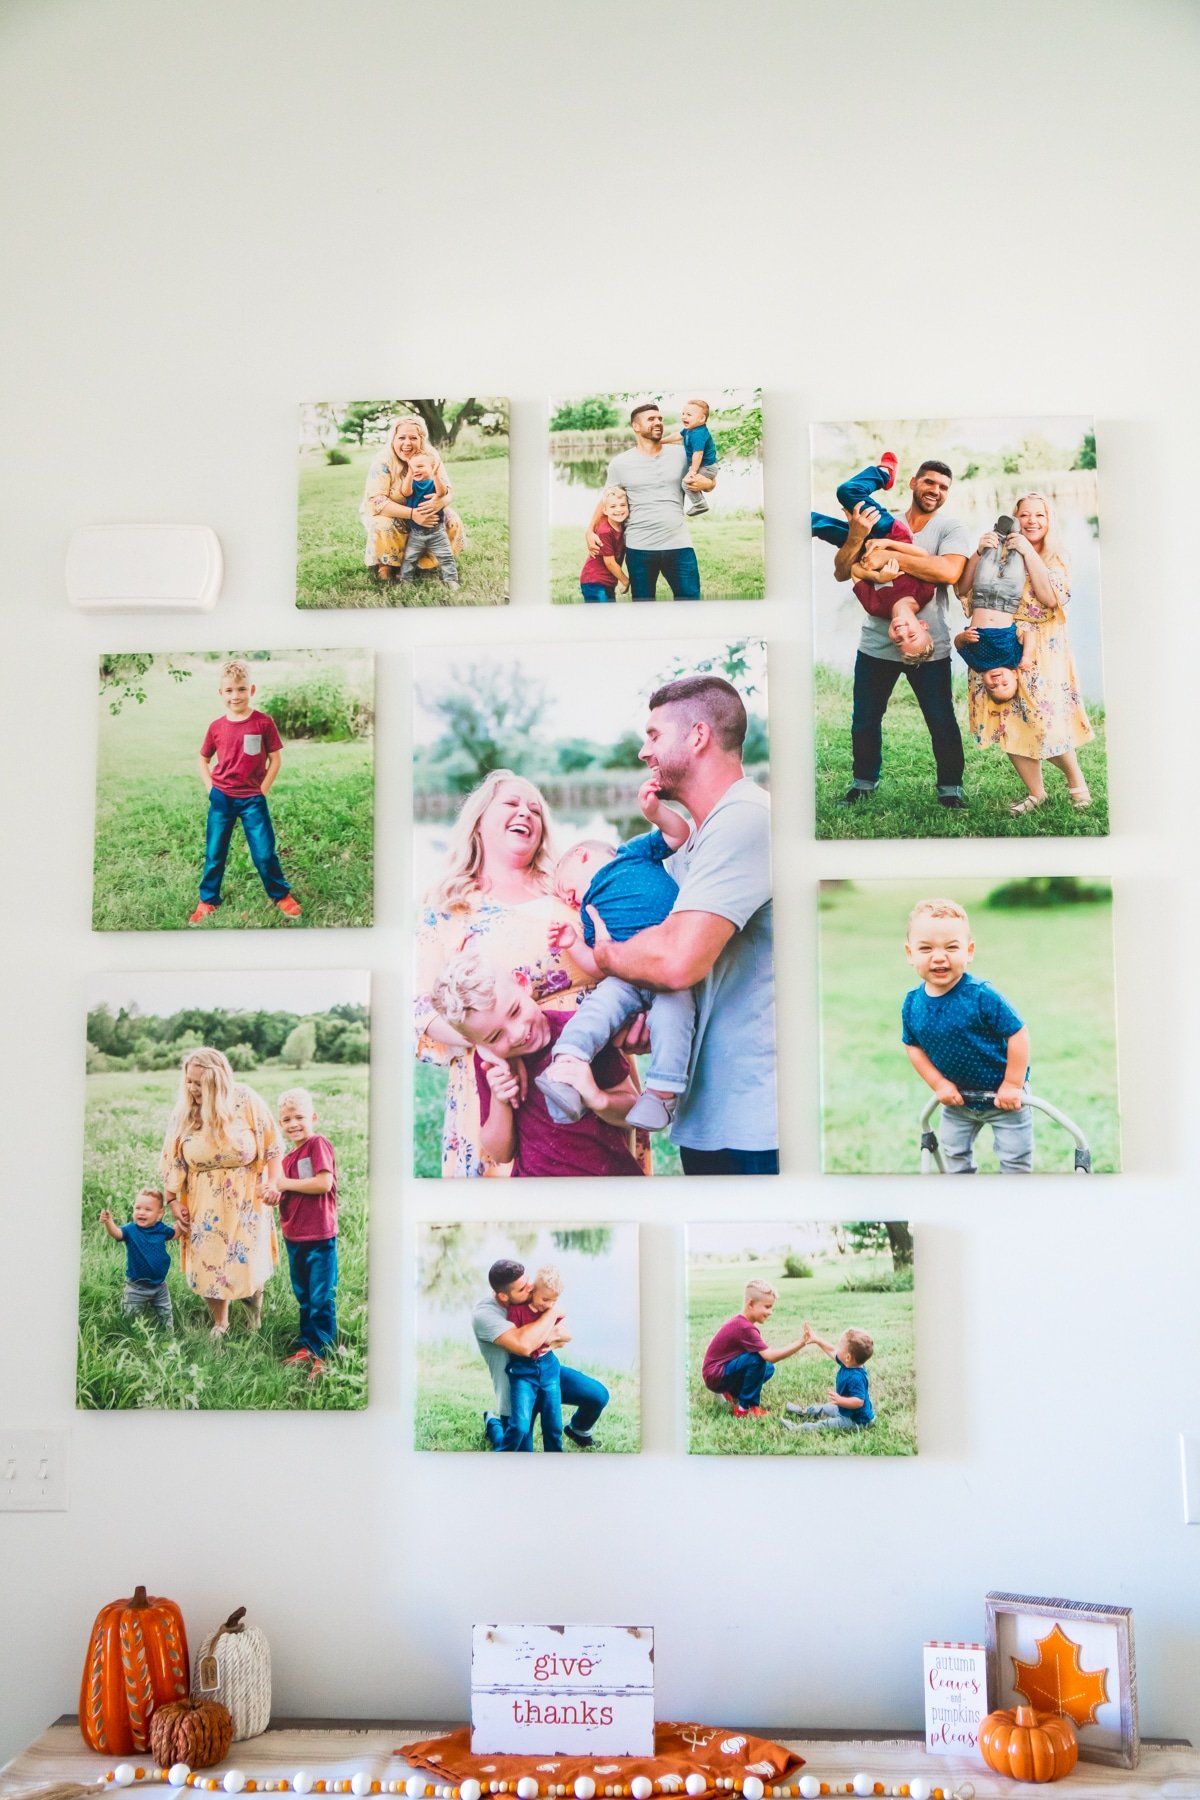
The first thing you need to do is measure the space that you want to cover with your photos. Make sure to look for any light switches, outlets, etc. that might need to be covered or worked around. For instance, you can see in the photo below that we had a couple of light switches, an internet jack, and a doorbell to work around.
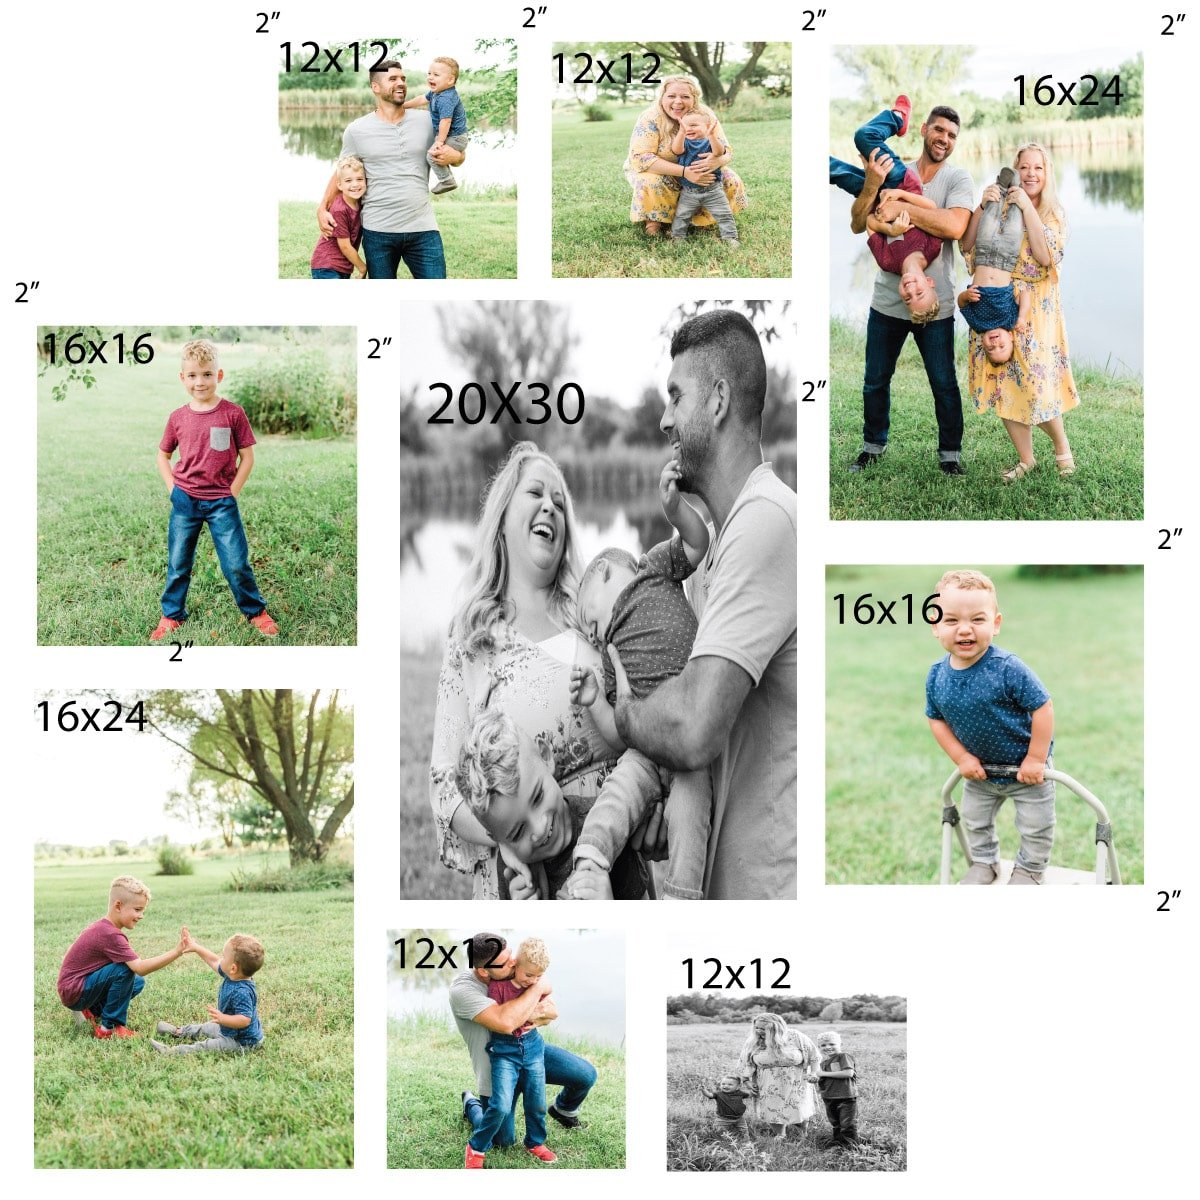
2 – Choose a layout
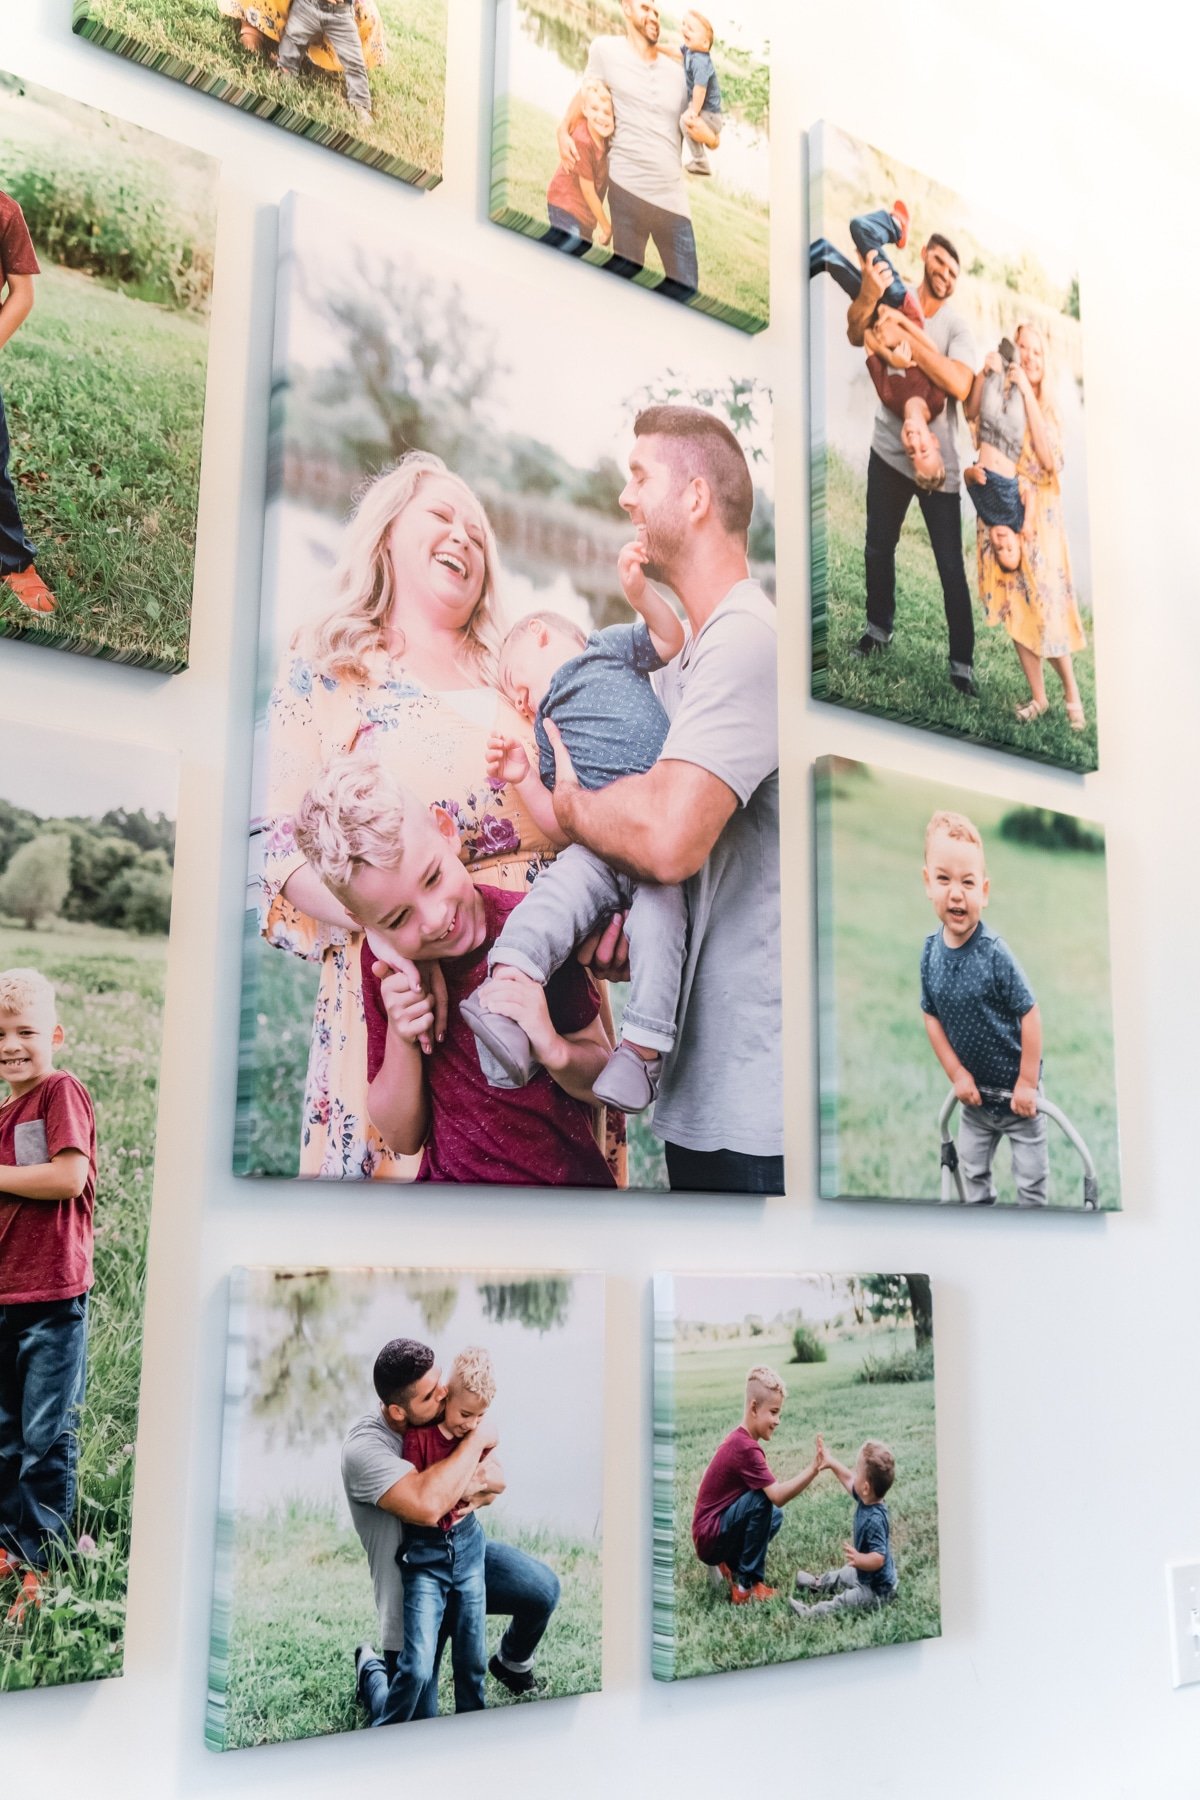
Once you know how large of a space you have, you can work on a layout for your DIY photo wall. I knew we had a large space to cover, so I wanted to find a layout that would work well for filling a large blank space. There are tons of different gallery wall layouts out there you can choose from. I used this website to get some ideas and ultimately choose the one that made the most sense for our space (we went with the spiral) . You choose whichever makes the most sense for you! Once you have your layout decided on, my recommendation is to create it digitally before you order anything. I basically recreated that spiral layout in Adobe Illustrator but you could use anything really – PowerPoint, PicMonkey, Canva, etc. to create your digital design.
3 – Pick Pictures
Now comes the fun part – choosing the pictures you want to use in your DIY photo wall. And when I say fun, I mean the most difficult part of the entire project. I knew we wanted to use our most recent family photos, so it was a bit easier for me. If you don’t have a set of family photos, you can choose really anything, but I recommend having some sort of theme or something cohesive (colors, etc.) so it looks cohesive up on the wall. Once you have pictures selected, put them into that digital design if you can.
4 – Order Canvases
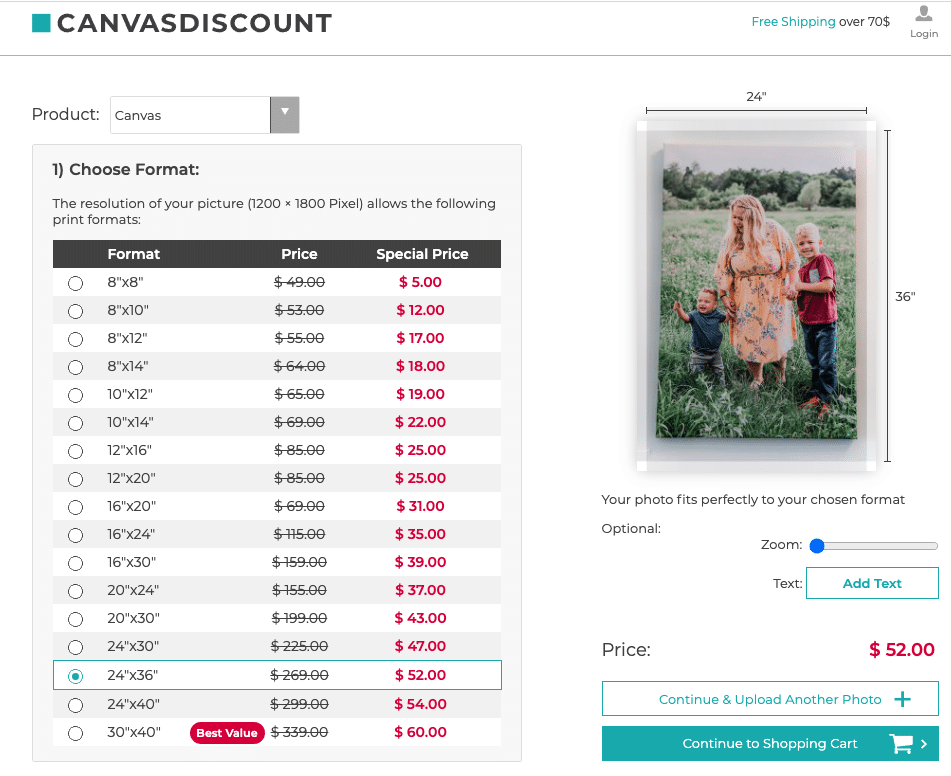
Once you’ve finalized your photos and layouts, it’s time to order your canvases!
We ordered our canvases from CanvasDiscount.com and the process couldn’t have been easier!
It only took a few minutes to order our canvases and they have a lowest price guarantee, so you know you’re getting the best price!
PLUS if you use the code PLAYPARTYPLAN10 you will get an additional 10% off your purchase!
If you want to go with a more traditional hanging hardware than what I did with the 3M photo hangers, CanvasDiscount.com also offers photo hanging hardware that you can get added to your canvas for simply shipping. That would make it much easier than adding the hardware yourself when the canvases arrive, it just personally didn’t work for our wall.
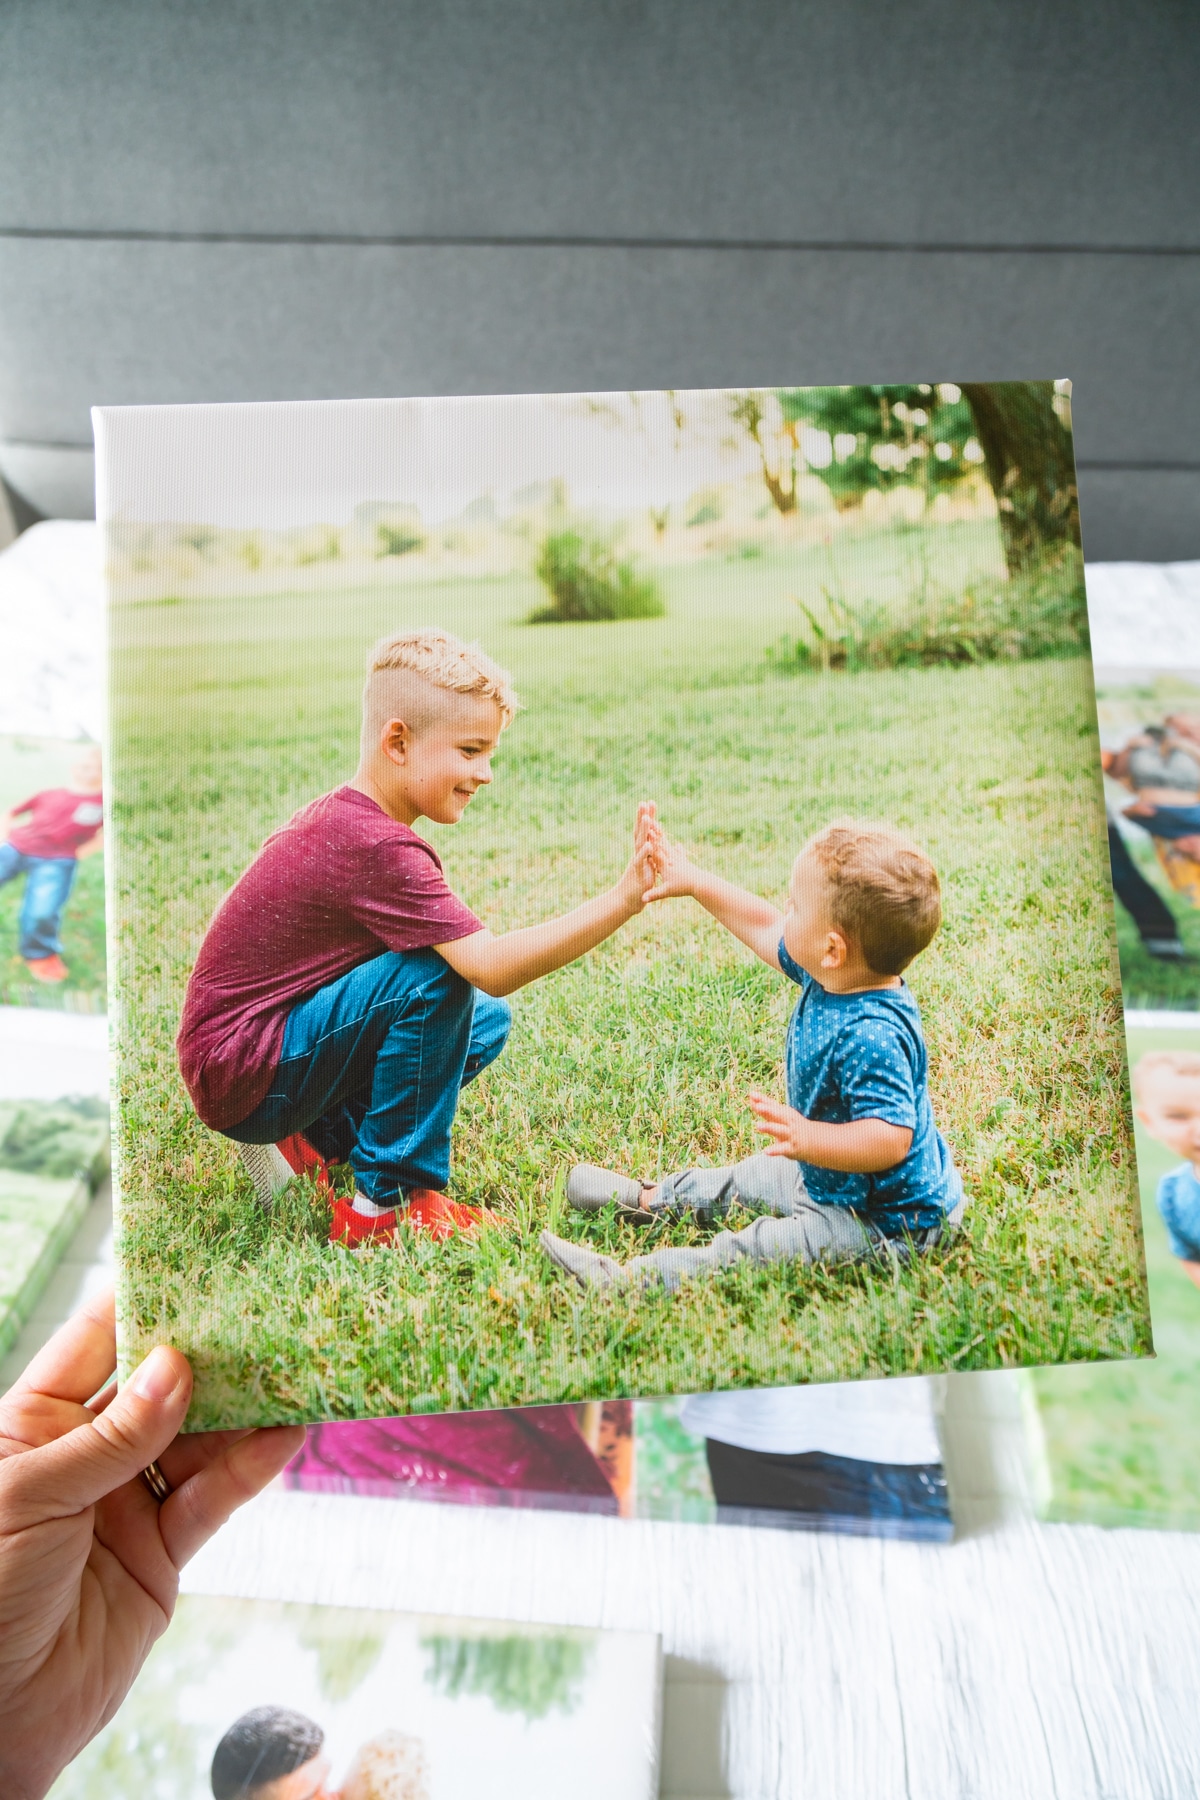
Our canvases arrived quickly, packaged carefully, and individually wrapped. And I’m already trying to decide which wall we need to add canvases to next!
I mean does it get any better than this??
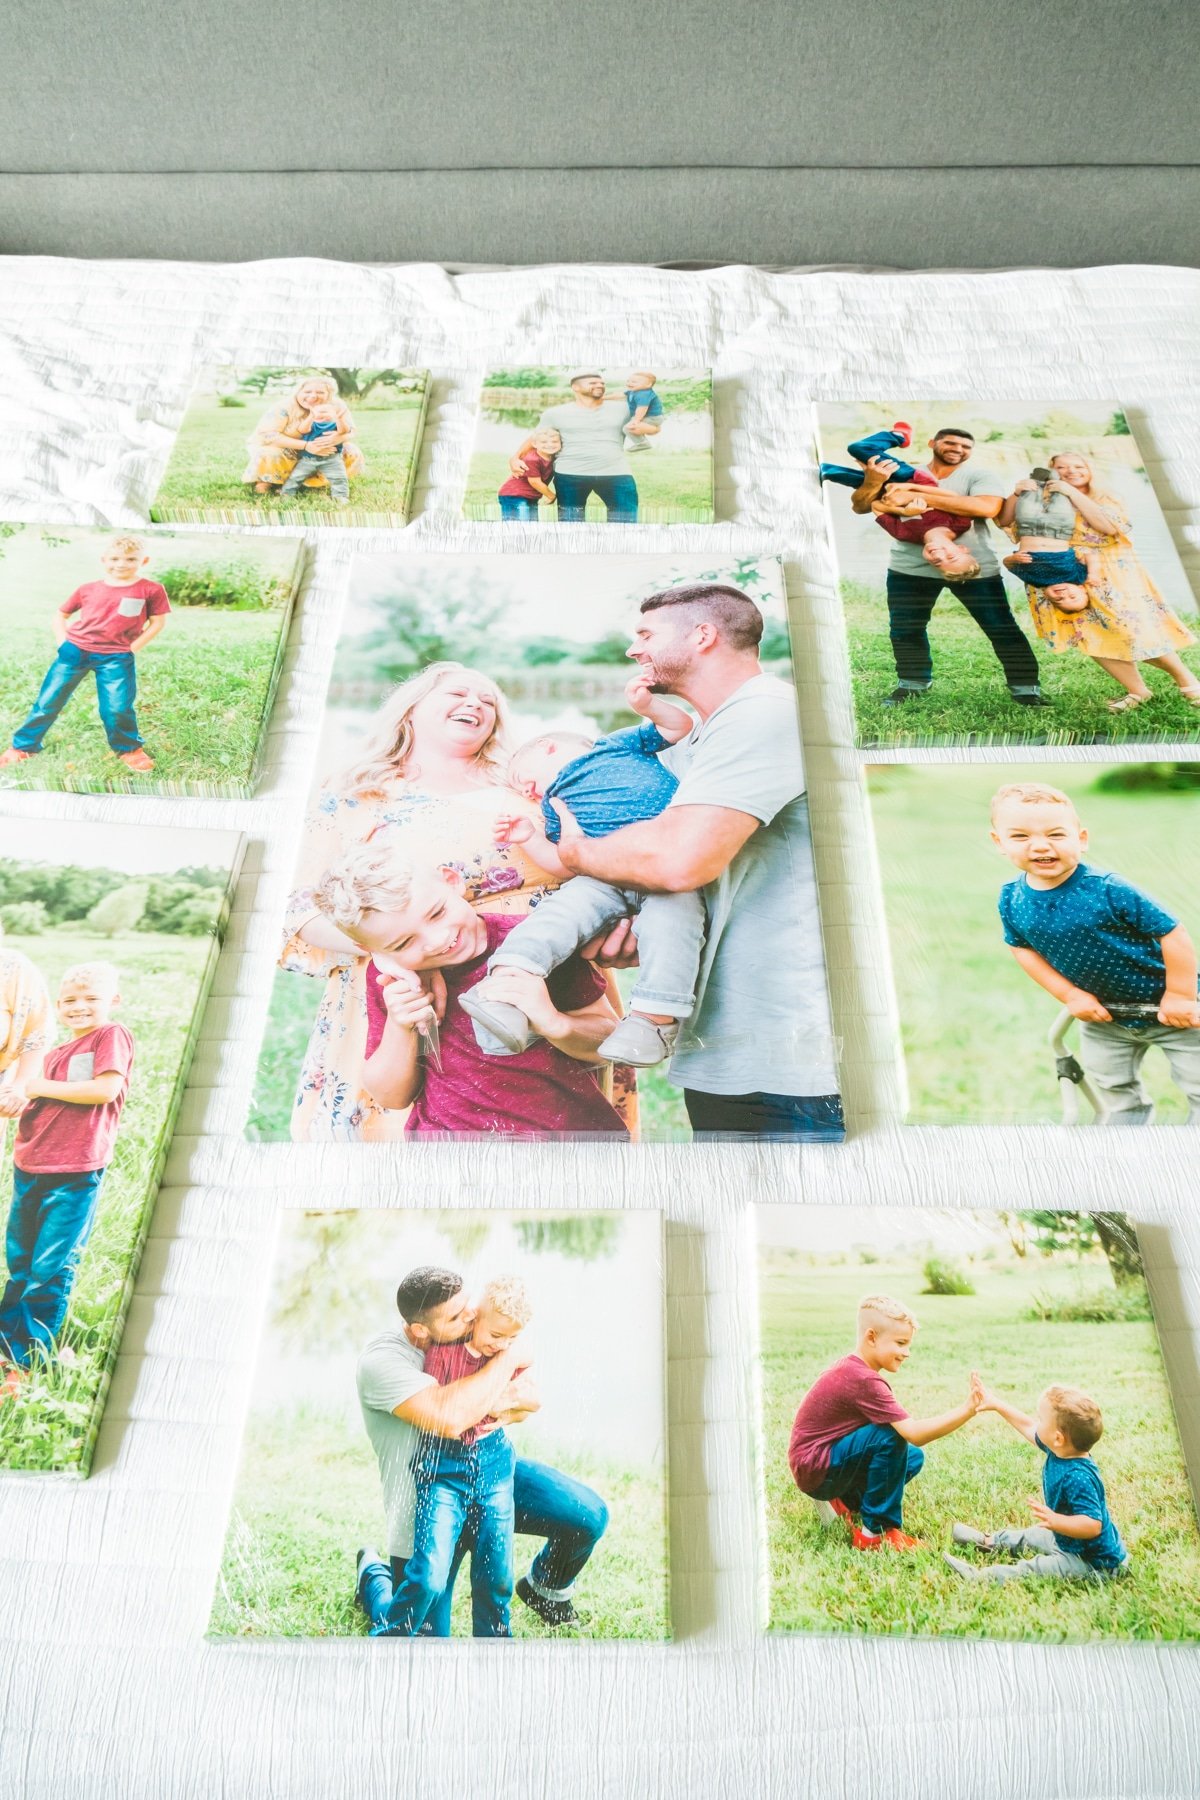
5 – Finalize your layout
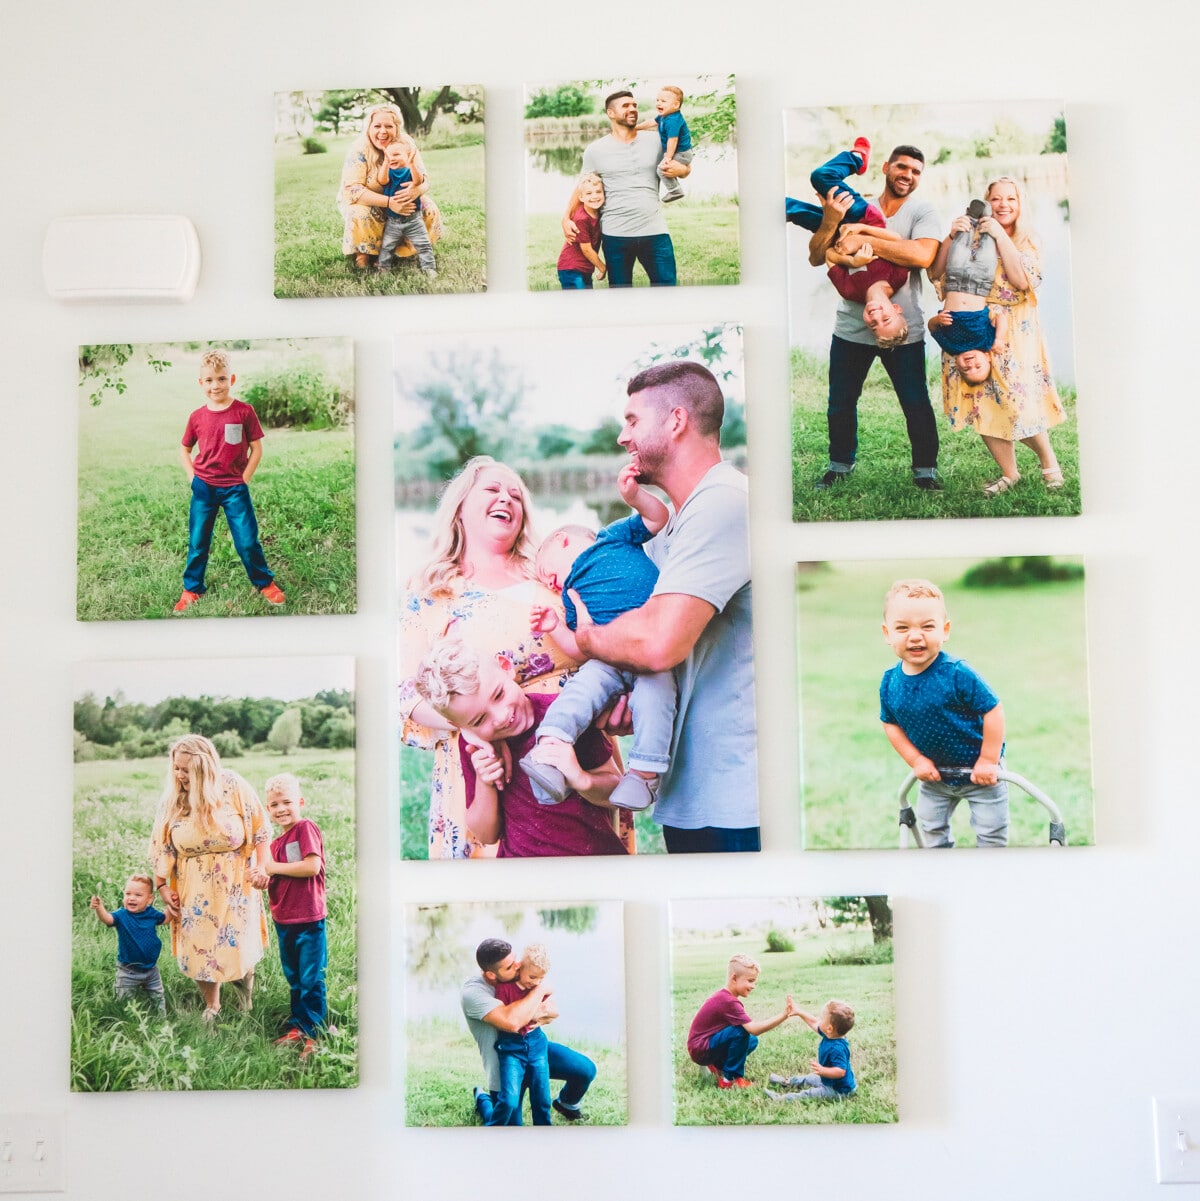
Once your photos arrive, it’s time to actually hang the photos on your photo wall. You’ve done all of the measuring and prep work before so this part should actually be pretty easy. I recommend laying out all of the canvases on a flat space just to confirm that everything measures correctly. And when you see things all together with the actual canvases, you may want to make a slight tweak here or there.
6 – Prep your wall and Photos
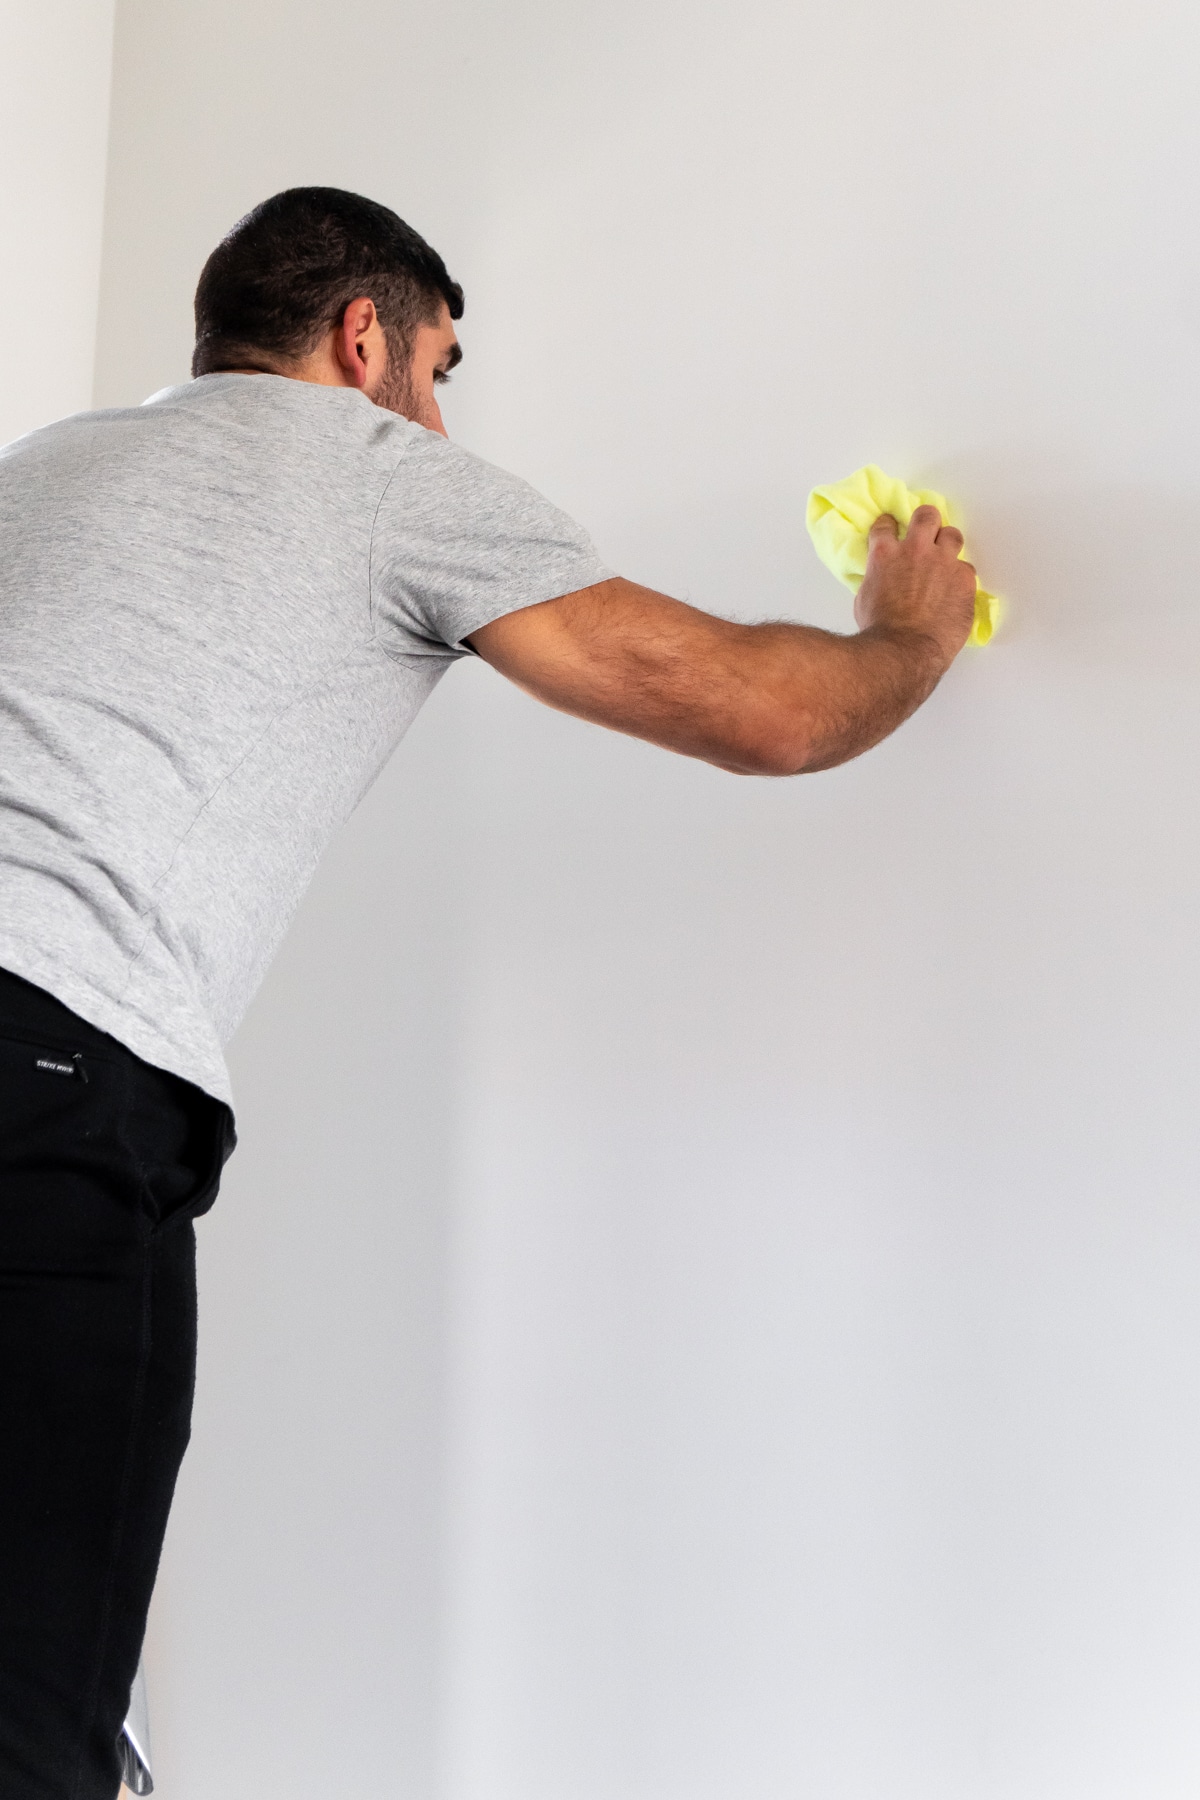
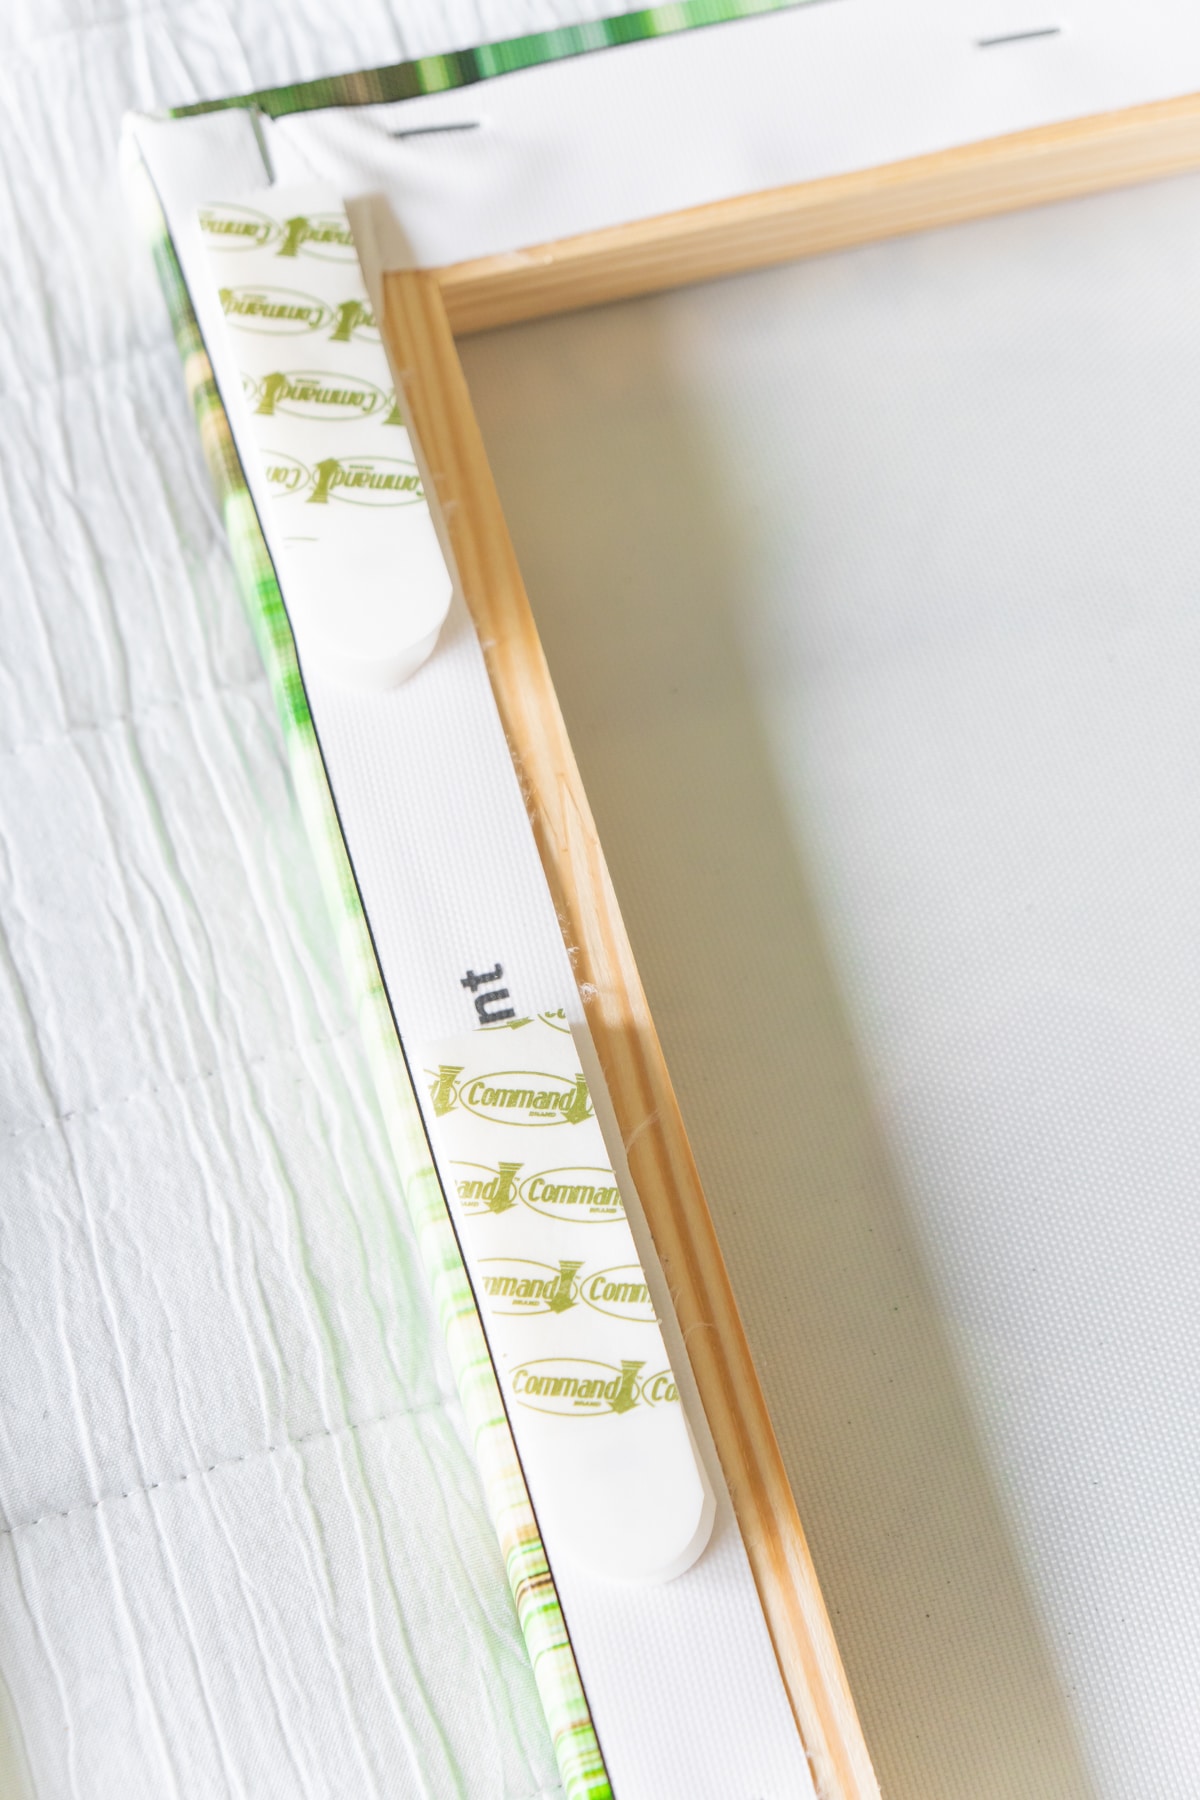
Before you start hanging anything, I recommend wiping down the wall either just with a microfiber cloth like we used or the hanging hardware we used actually recommended wiping it down with rubbing alcohol. The goal is to clean it so that there’s nothing on it to damage the canvases and so hanging hardware will stick (if you’re using sticking hardware). You also need to make sure your hanging hardware is ready to go. We added the photo strips to the back of all of the canvases according to the package directions (other than the final taking the backing off).
7 – Hang your first photo
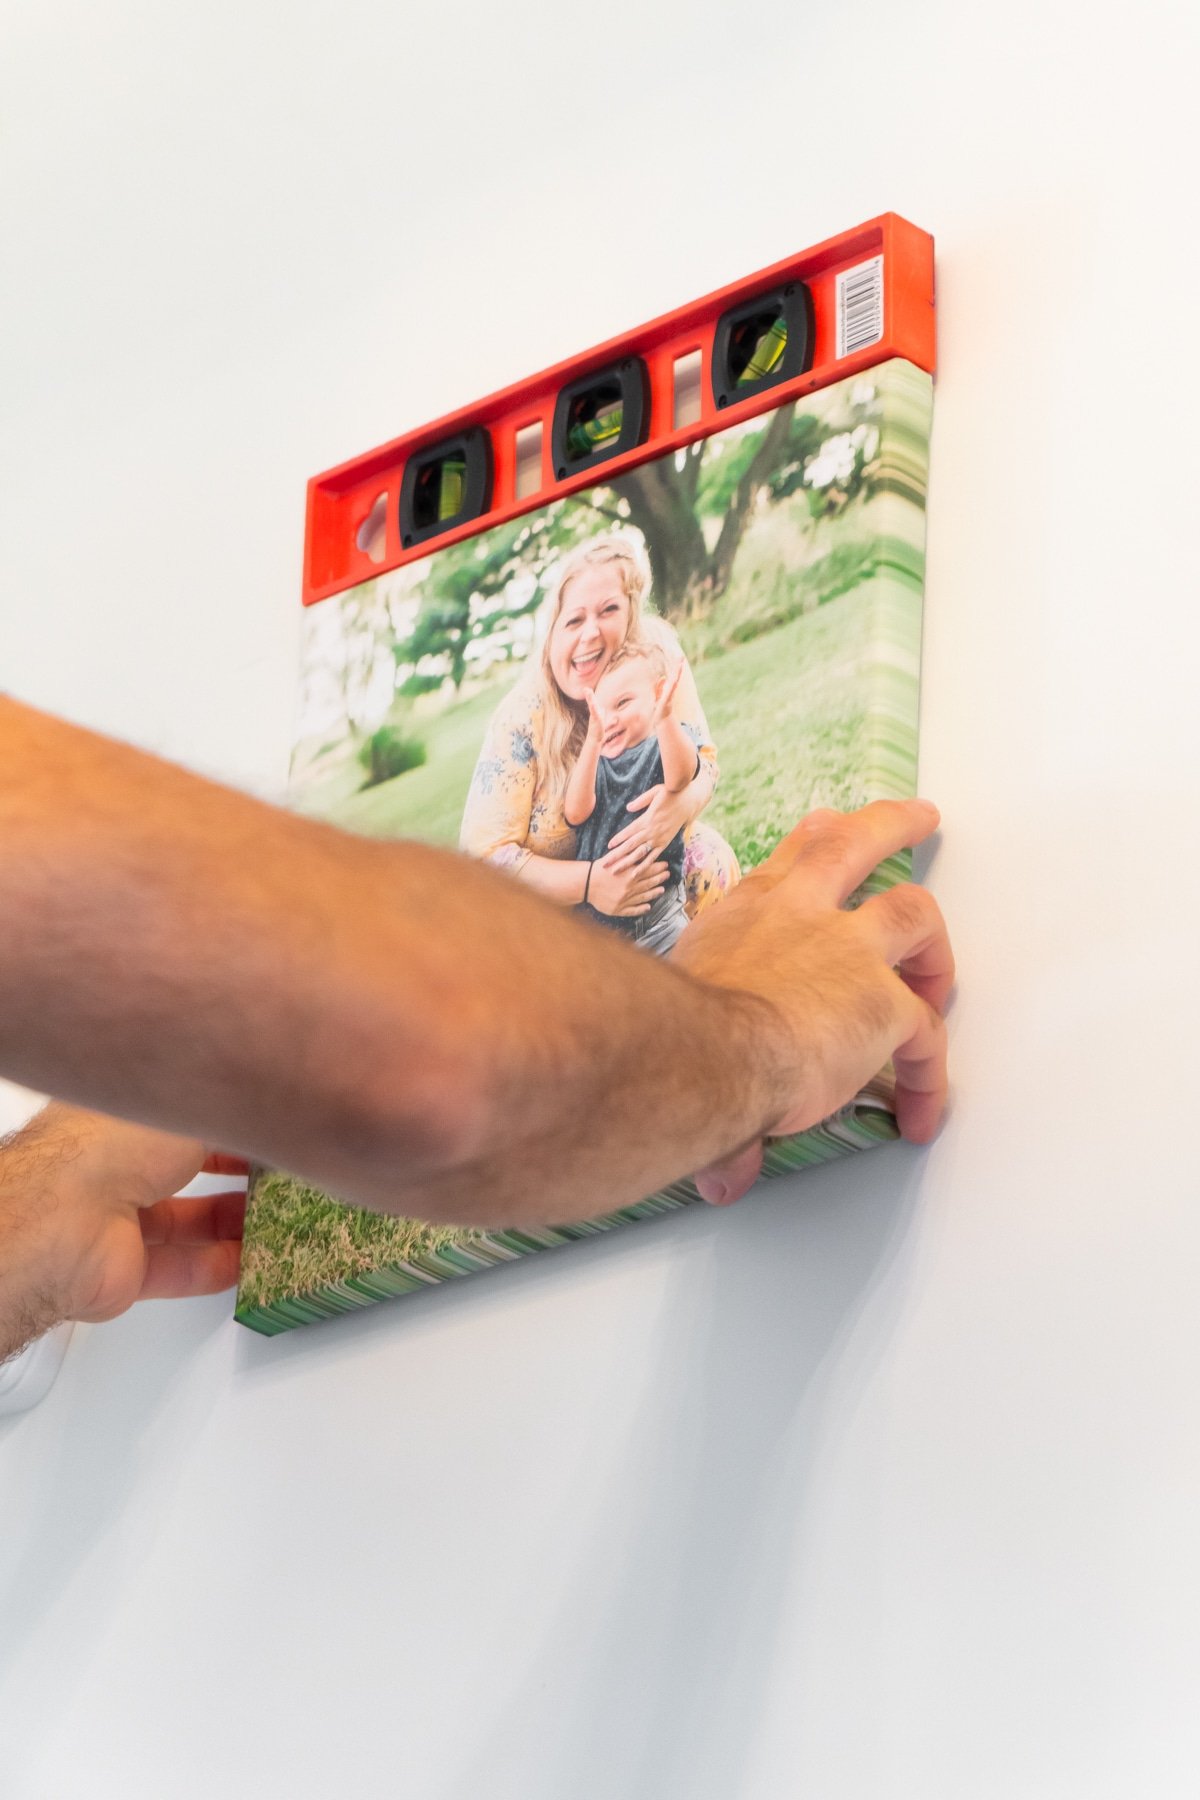
You’ve made it this far – now it’s time to start hanging those canvases! If you’re working around something on the wall (e.g., light switch or doorbell), I recommend starting by that item so you can guarantee you work around it. Using your measuring tape and level, hang the first canvas wherever you want it on the wall.
8 – Add more photos
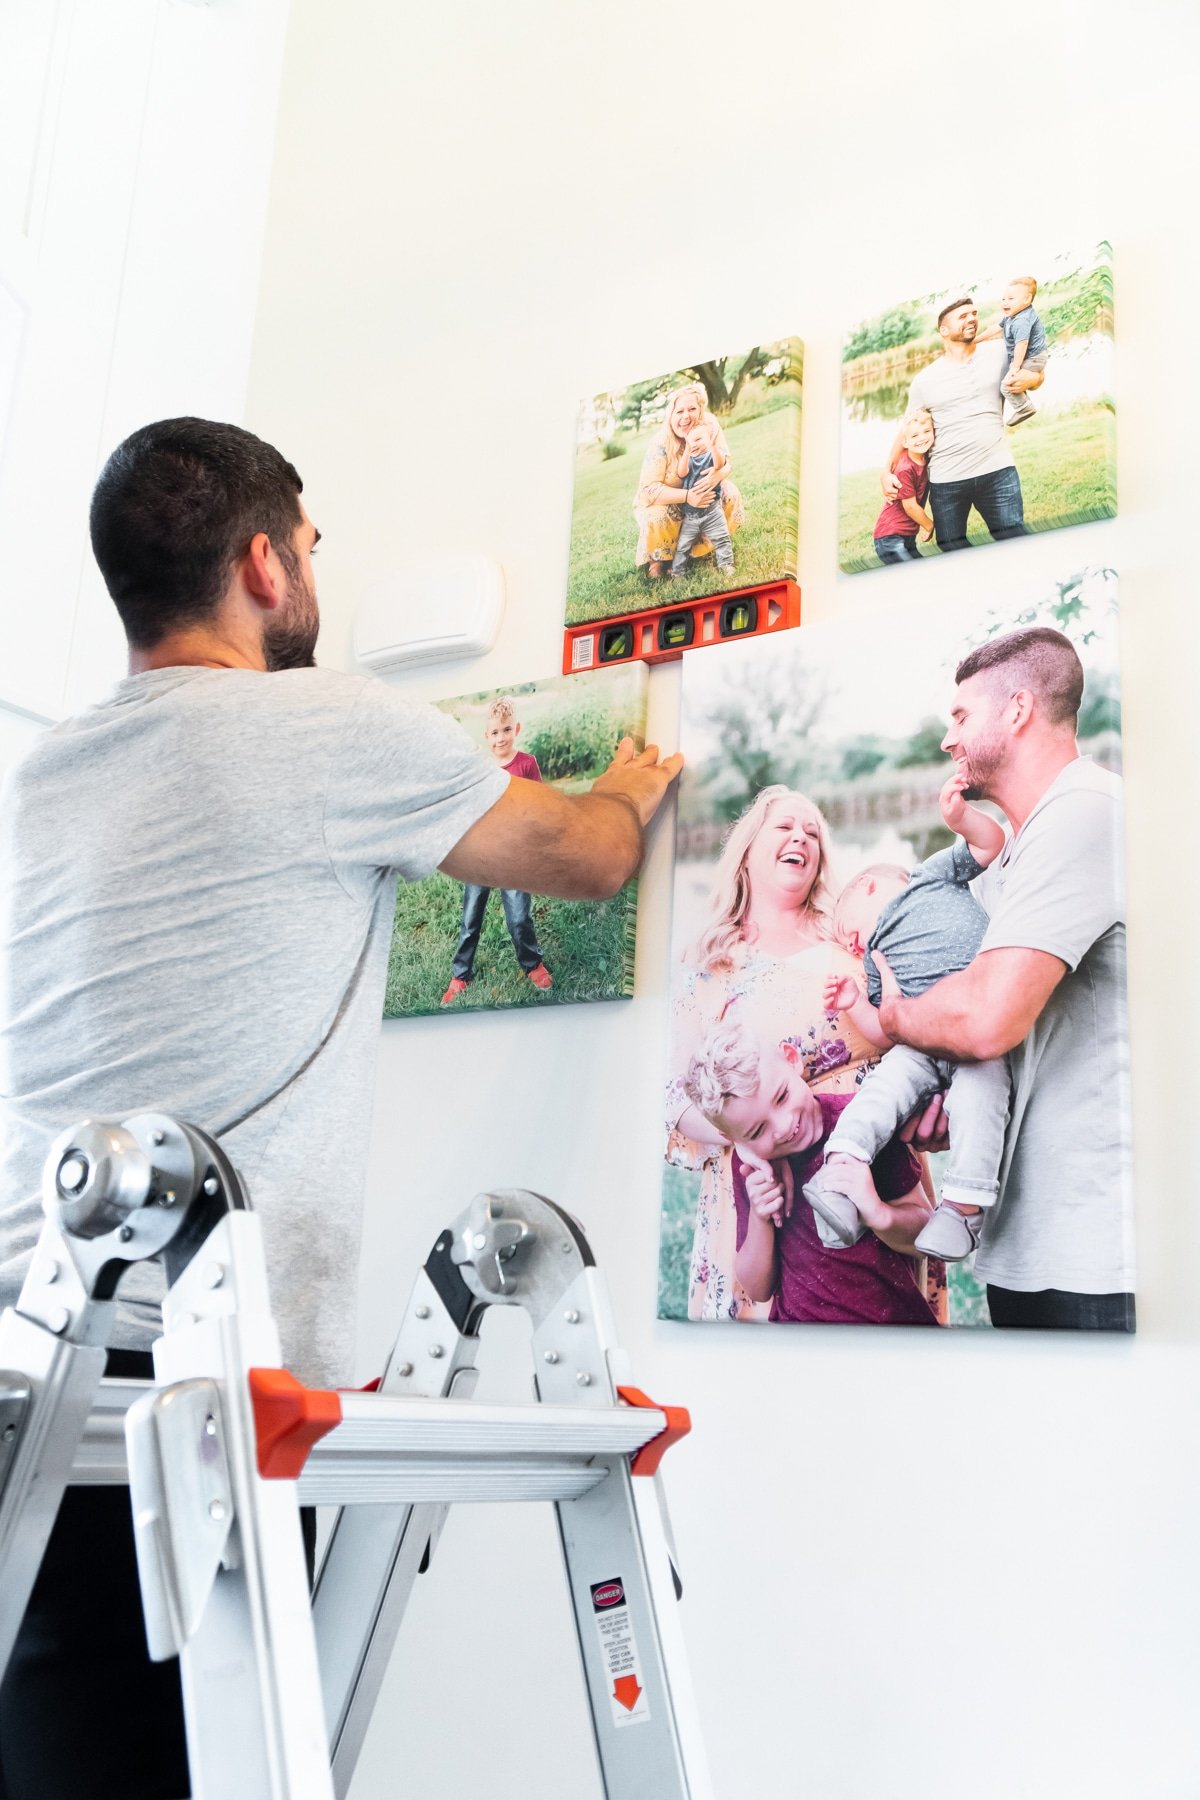
Move on to the next canvas closest to the one you just hung and hang the next one, making sure to measure it out and level it like the first. I highly recommend having a friend with you if possible to stand back and keep an eye on the overall design (and straightness of the photos) so you don’t have to keep going back and forth, especially if you’re on a ladder. My husband added photos while I stood back and made sure they were straight and looked okay. Definitely made it much easier than if he or I was doing it by ourself.
9 – Make any final Adjustments
Once all of the photos are up, step back and take a look at your completed DIY photo wall. Make any slight adjustments as necessary then just be proud of the project you just finished! I’m telling you – adding this photo wall to our home has made me so much happier, especially as I’m walking out of my office and the first thing I see if my happy smiling family. And my toddler, it’s his favorite thing to look at. After he wakes up every morning, he comes over to say hi to the photos and just grins at himself. Even the 7-year-old admitted this morning that having the photos there makes our house feel more like a home. Mission accomplished!
Expert Tips
Check out CanvasDiscount.com before finalizing your layout to see what canvas size options they have. There are definitely set sizes available, and you want to keep that in mind when creating your layout. Cut out a spacing card that’s the dimensions you want to space the pictures apart. We happened to space ours exactly the height of our level so we didn’t use one but normally we would. If you want your canvases spaced 1 inch from one another, cut out a card that’s 1 inch wide that you can use for spacing. So much easier than trying to use a measuring tape or ruler! Remove backing one photo at a time. If you’re using 3M photo strips or any other adhesive backing like we did, take it one photo at a time rather than removing the backing all at once. If you end up having to adjust things, take breaks to deal with kids, etc. you don’t want those backings off.
More Easy DIY Projects and Crafts
How to make a diaper cakeDIY Brick oven installationDIY field goal postDIY ring toss gameDIY cake topper