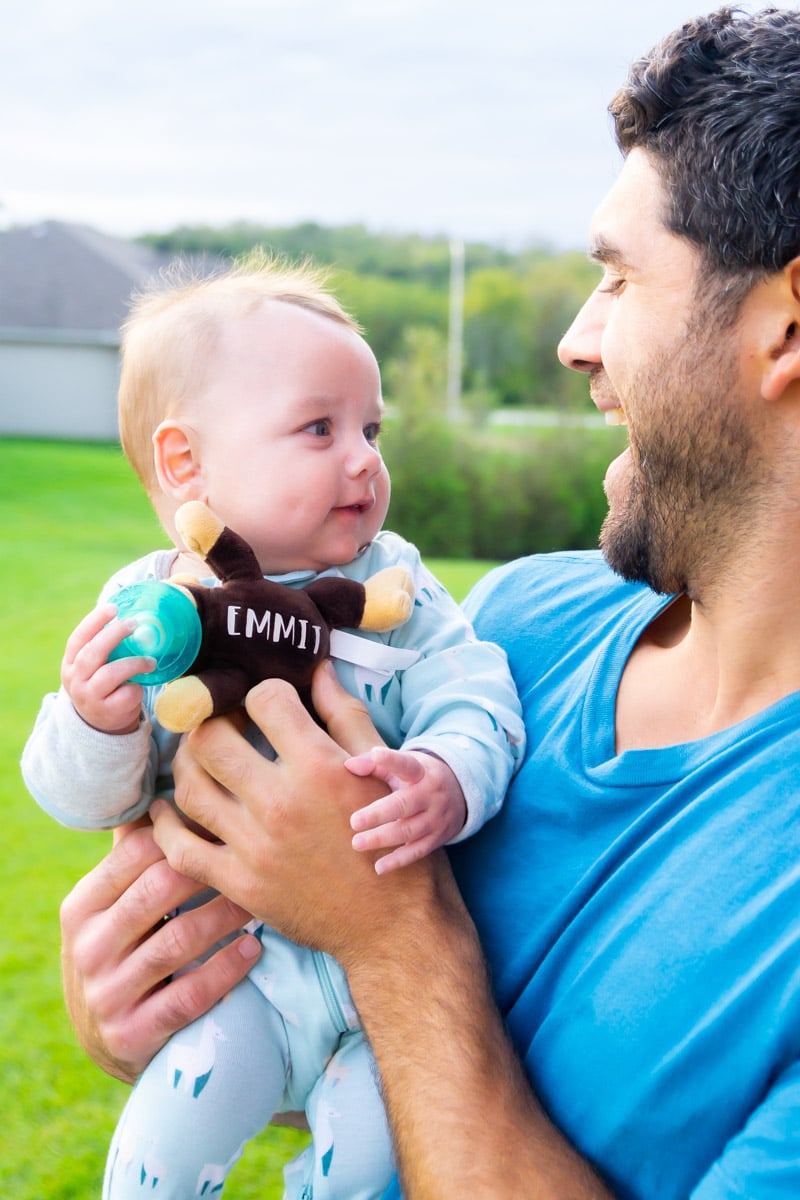
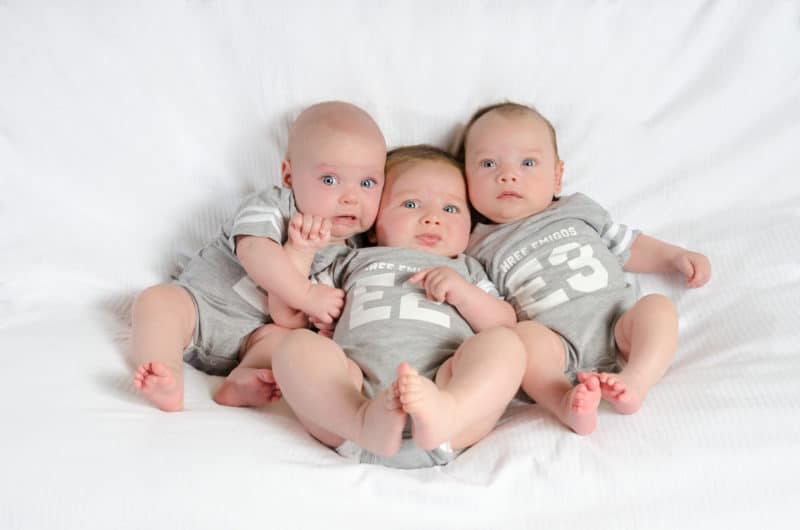
I received a complimentary Cricut EasyPress Mini for this post. All opinions are 100% honest and my own. This post also contains affiliate links. If you purchase via these links, I may receive a small commission at no additional cost to you. This spring my sister, sister-in-law, and I all had babies. Three babies within just over two months. It’s a lot of babies. It’s pretty much amazing since we all live within minutes of each other and can celebrate and commiserate about life with babies together. And when we find things we love, we tend to tell each other about them. Like all of these new mom must-haves. It also means we have a lot of the same things and when we all get together with the whole family, it can get confusing. Like the other day when I totally took my sister’s baby monitor home instead of mine because they look exactly the same. It’s definitely not the first time and likely won’t be the last. So I decided to use the new Cricut EasyPress Mini to add my baby’s name to some of the things we all have to avoid the confusion and try and keep track of our items. It’s not too hard to get them back, but it’s a lot easier to just keep track of them in the first place. Even if you don’t have three babies hanging out all the time, adding names is so easy with the Cricut EasyPress Mini, you’re going to want to do it anyway!
Introducing the Cricut EasyPress Mini
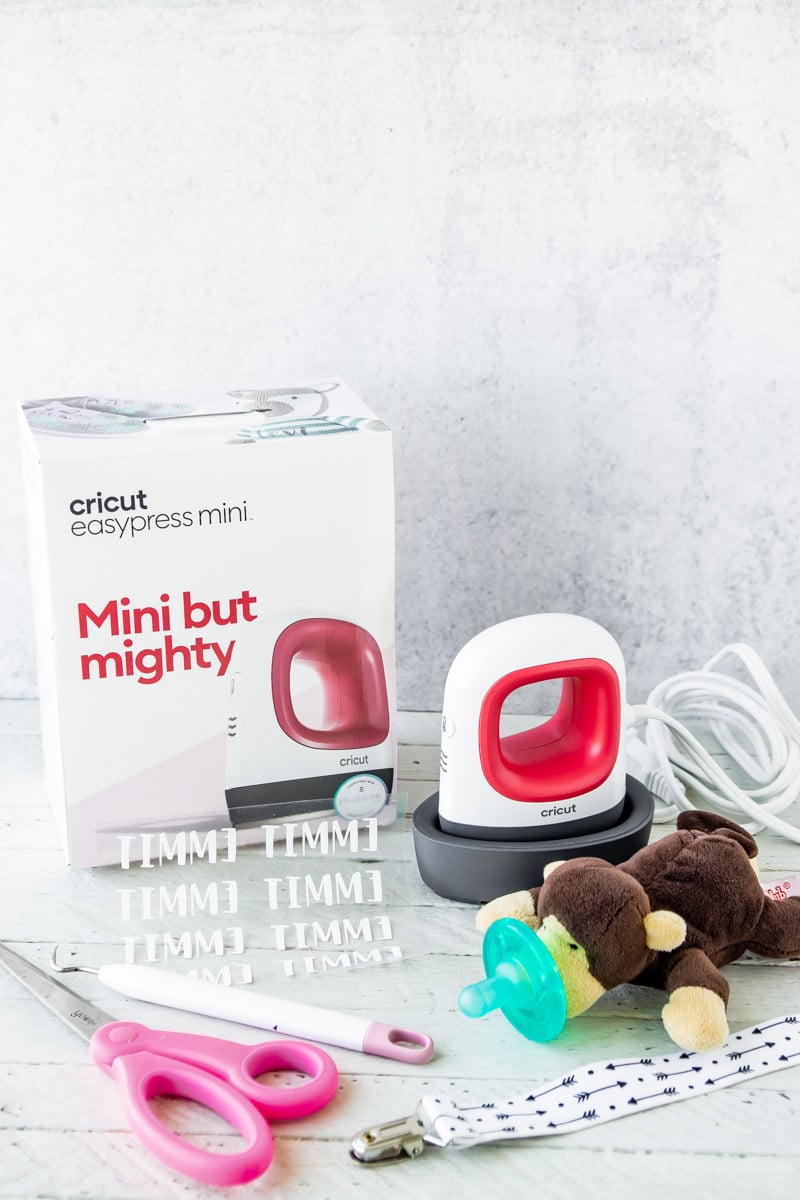
If you’ve read any of my DIY family shirt posts, you’ll know how much I love my Cricut EasyPress. If you haven’t, you can read all about it in this post here. I’m equally obsessed with the new Cricut EasyPress Mini because you guys, it’s made specifically for all the unique and hard to press places in your lives. Hats, check. Stuffed animals, check. Want to add an iron on design to shoes like these ones from my friend Heidi, the Cricut EasyPress Mini can totally do that for you. It’s got the same technology and power of the Cricut EasyPress 2 including an even heat plate and easy to use heat settings, all in one tiny little package. And it’s so easy to use! It’s the perfect companion for the original Cricut EasyPress (you’ll want one of those too if you don’t already have one!).
Personalized Baby Items Supply List
You won’t need much for this project but in case you don’t have these things already on hand, here are the supplies you’ll need for the personalization.
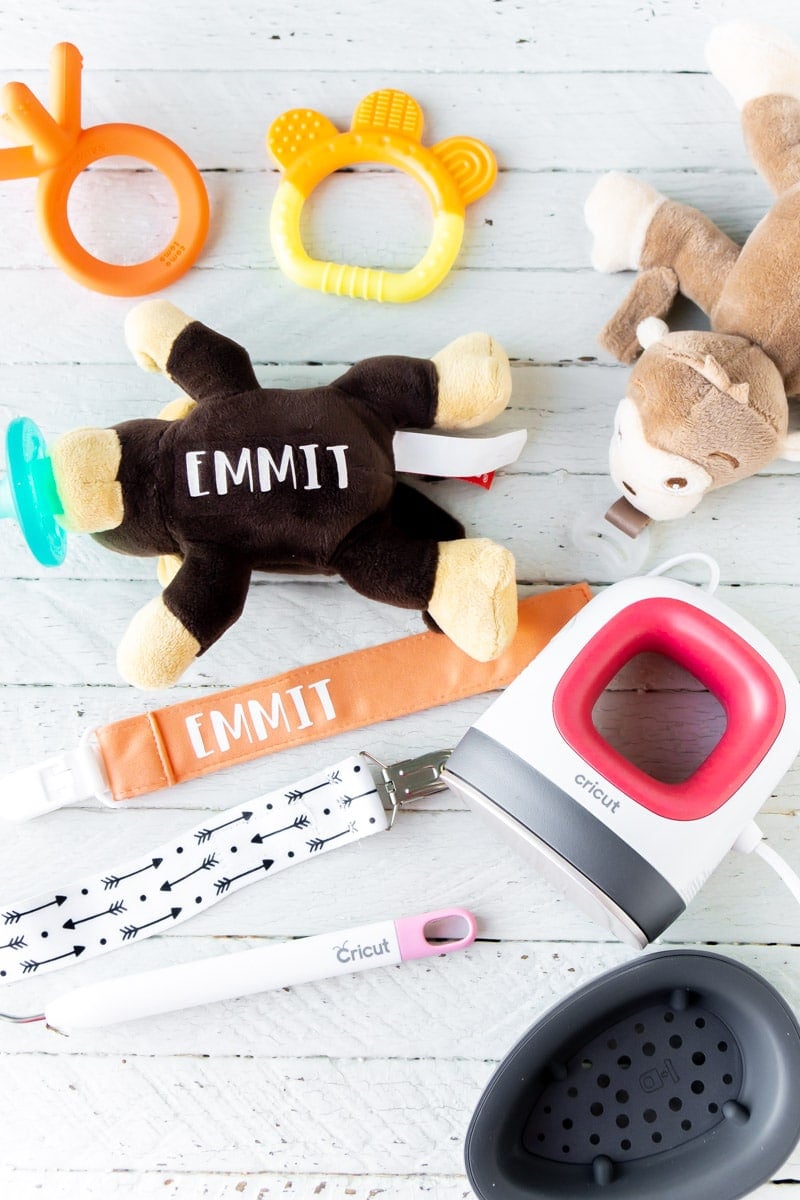
Cricut EasyPress MiniCricut Explore Air 2 Cricut Everyday Iron-On Vinyl (I used white) Standard Grip Cricut MatCricut Weeder (optional but highly recommended)items to personalize – I did a little stuffed animal and a binky holder
How to Personalize Items with the Cricut EasyPress Mini
For my projects, I went super simple and just added my son’s name to his items. I’ve written this post using the assumption that you’ll be doing the same – just adding a name. If you want to do a more complicated design or use an image or something from the Cricut Access library, you can totally do the same thing – just cut out whatever design you want and follow the instructions below.
Cut Your Iron On Vinyl
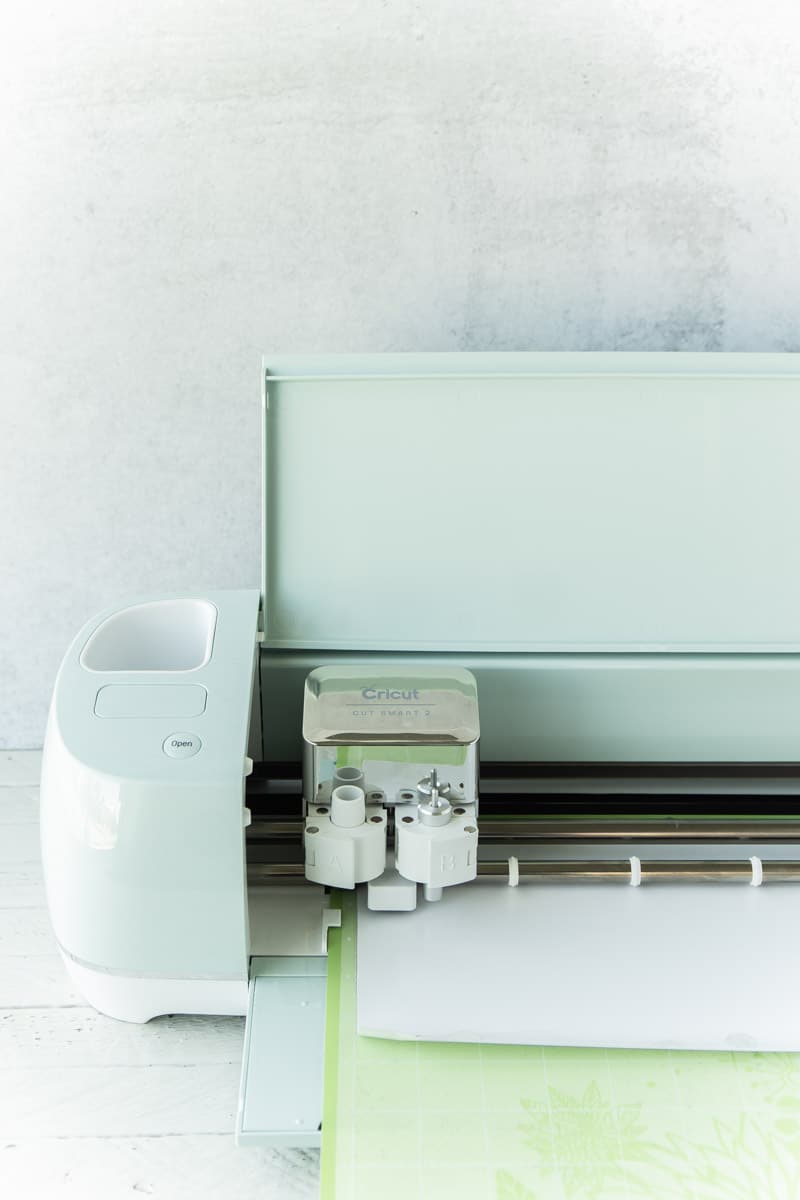
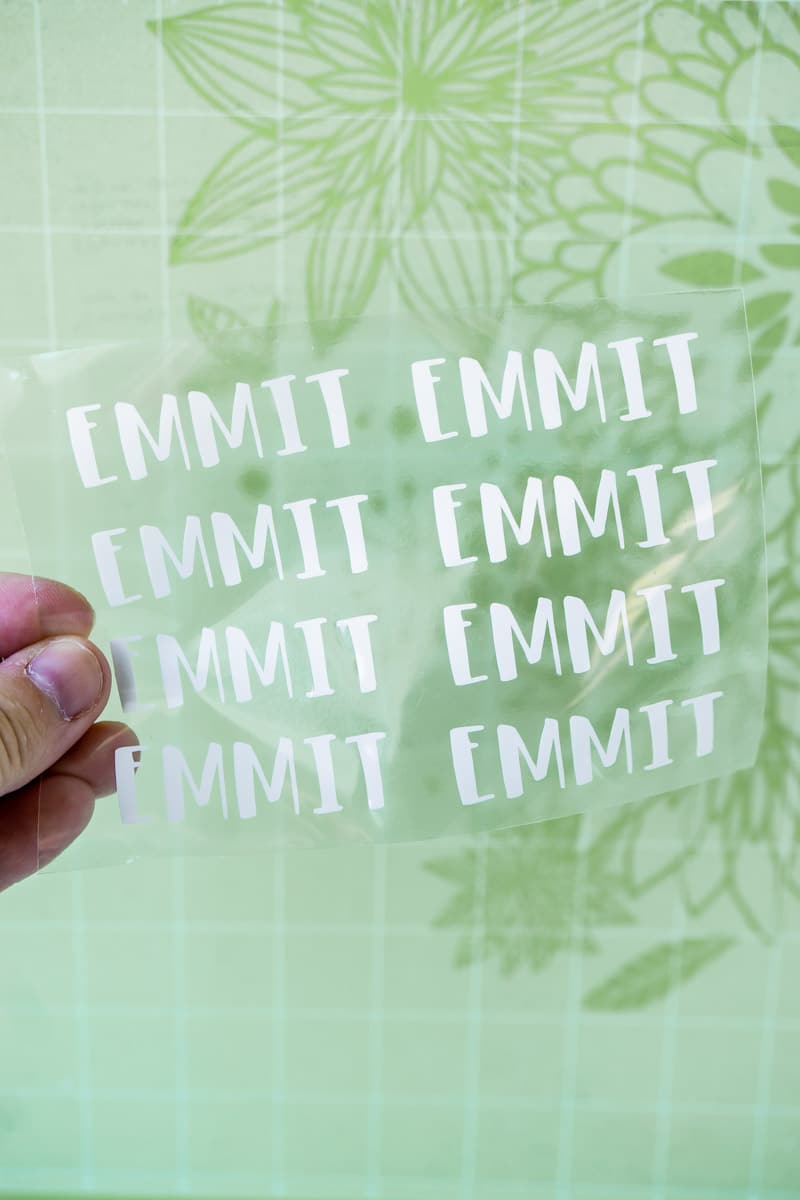
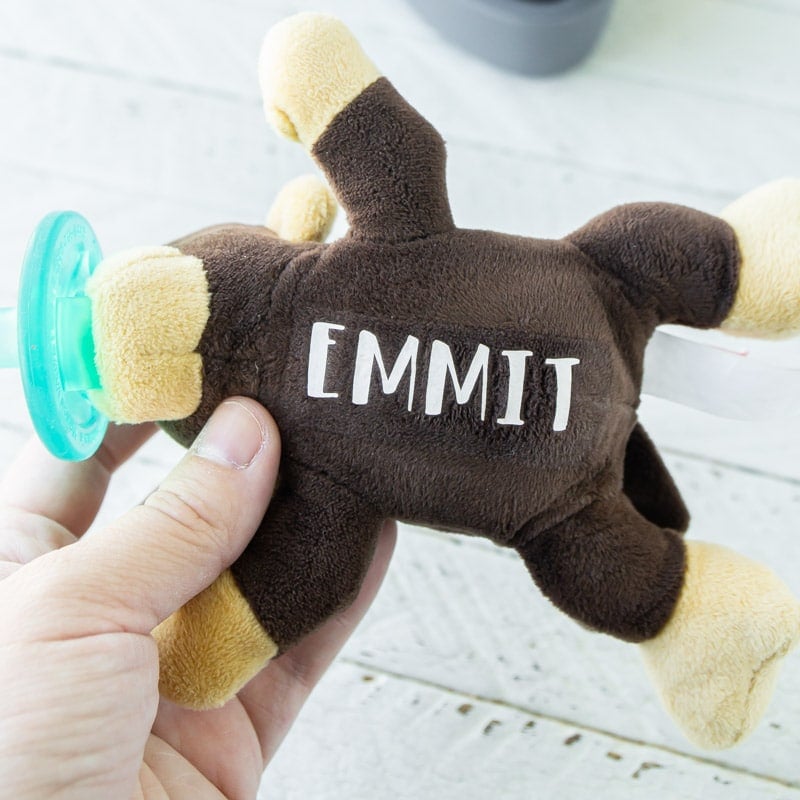
1 – Open Cricut Design Space and create a new project. Add text into the project window for your child’s name. Resize as necessary for whatever item you’re adding it to. If you’re going to add names to a number of different items, copy and paste the name as many times as you need. Then I recommend selecting all and clicking the “attach” button so that the words don’t get all scrunched together and switched around on the next page. By clicking the attach button, the design will be previewed and cut as you’ve laid out on the design screen. 2 – Click Make It in the top right hand corner. Click the “mirror image” button then make sure your design looks right in the preview window before clicking “continue.” 3 – Load your iron-on vinyl onto a regular Cricut cutting mat, making sure it’s placed on shiny side down. 4 – Make sure your Explore Air 2 is connected and that the dial on the machine is set to iron-on. Follow the prompts on the screen to send your cut to the Explore Air 2 and let the iron-on cut. 5 – Once the vinyl is cut, remove the outside portion that is not cut with the help of a Cricut Weeder until you have just the vinyl words left.
Iron on Vinyl with EasyPress Mini
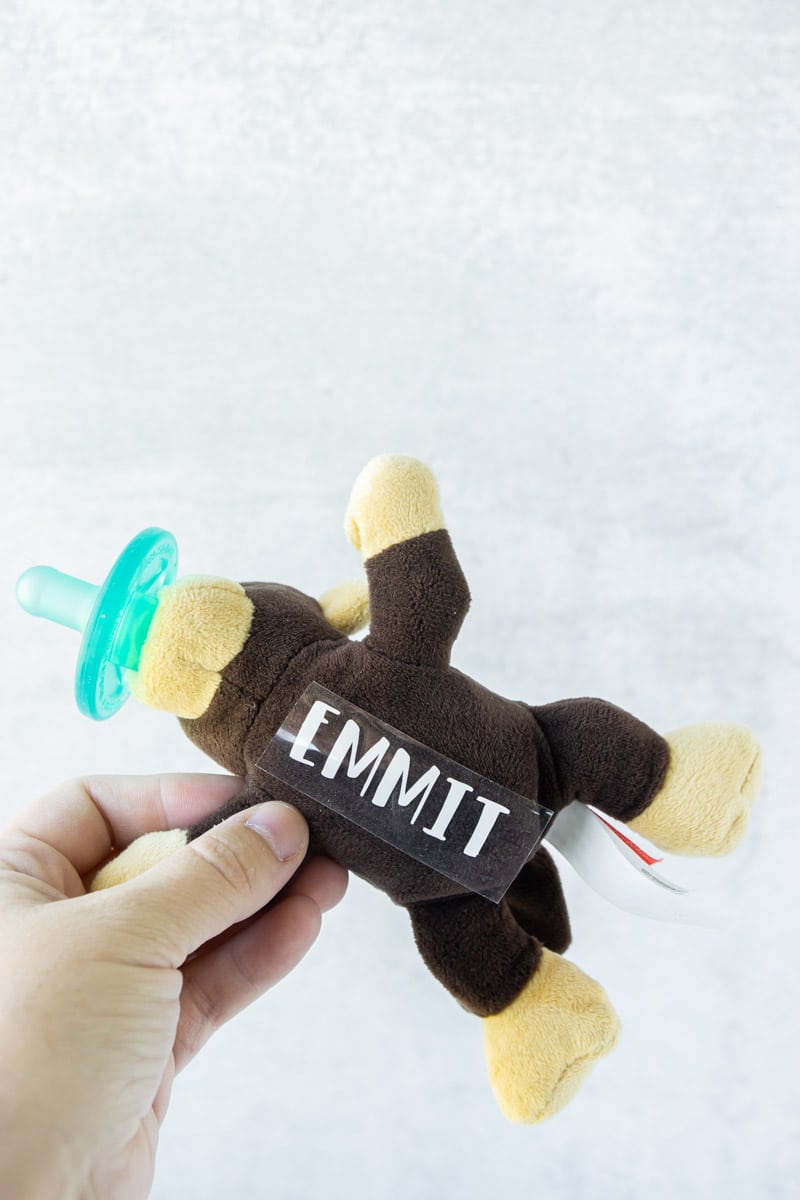
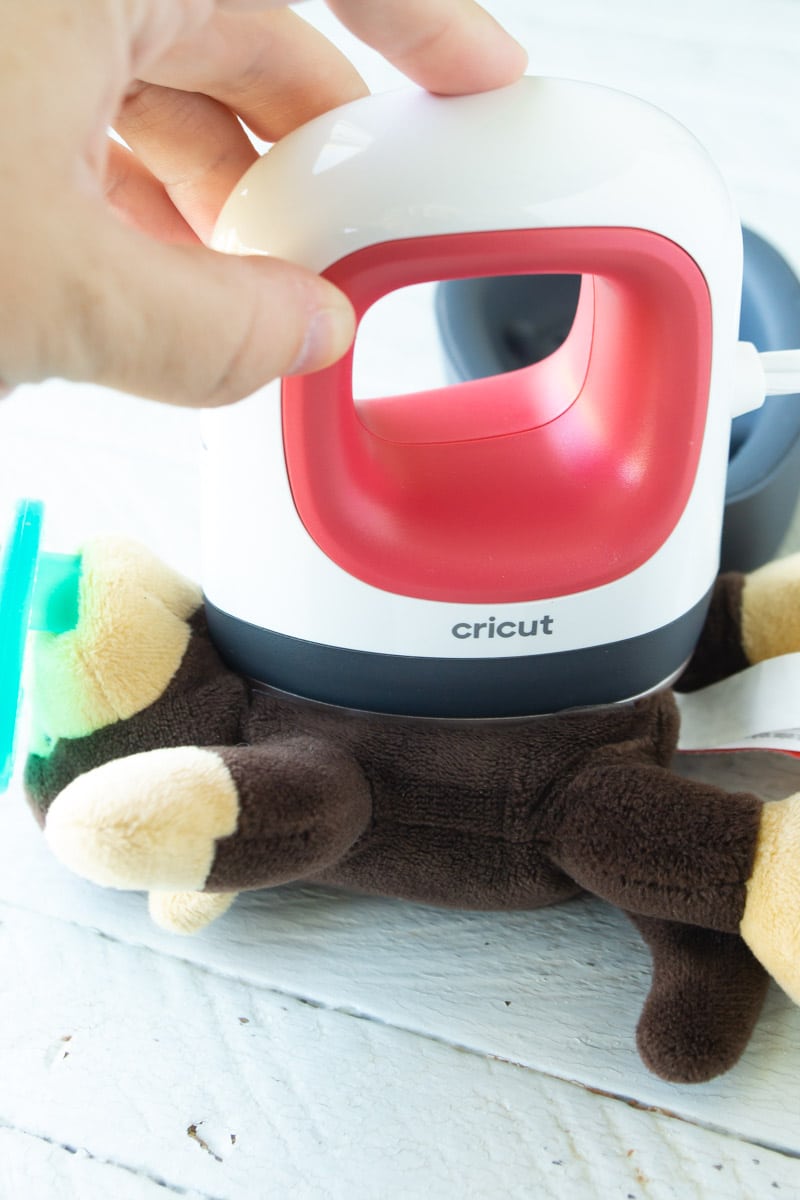
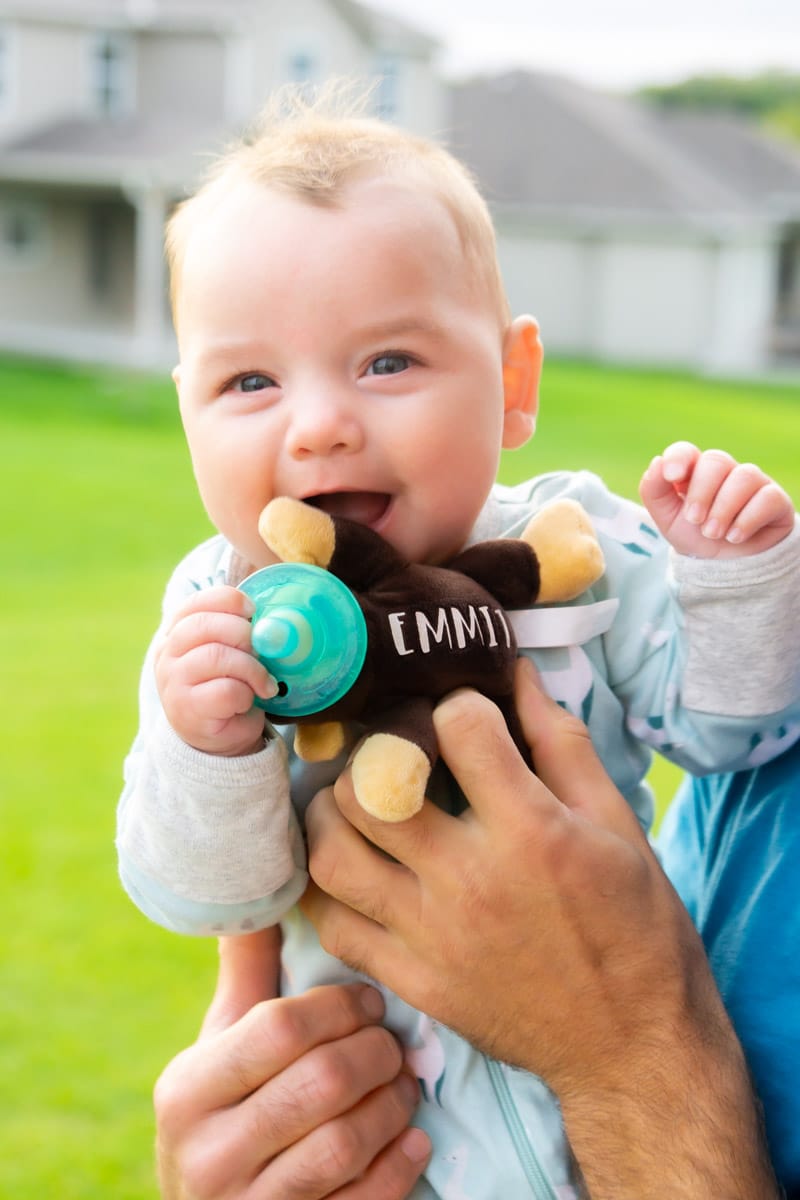
1 – Once you have your vinyl all cut out and ready to go, plug in the Cricut EasyPress Mini. Press the button to turn it on and press again to determine the heat settings. There are three heat settings depending on what material you’re ironing on to – get recommended settings for your material here. For my project, I used a medium setting with constant movement and light pressure for 25 seconds. Unlike on the EasyPress or EasyPress 2, there isn’t an actual timer on the EasyPress Mini, so just count to yourself. 2 – Add your iron-on vinyl face down (liner side up) and tape down if necessary. I didn’t because my stuffed animal wasn’t going anywhere. 3 – Using constant movement similar to if you were using a standard iron, use the EasyPress Mini to iron-on the design. Continue for the recommended amount of time then if peel slowly (if warm peel recommended) or wait until the vinyl has cooled if it calls for a cool peel. 4 – Repeat as many times as objects you want to personalize. It literally takes less than thirty seconds – it’s so quick! And the possibilities of items you can now add iron-on designs to is endless. I’m personally excited to personalize a hat for my 6-year-old and maybe even add his favorite character to his new red shoes. I’m pretty sure Emmit loved this little monkey even more after I put his name on it. I don’t know how he knew it was different, but he was way more excited to see it this time around than normal.
EasyPress Mini Project Ideas
Need more ideas of unique ways to use the Cricut EasyPress Mini? Here are some fun ideas from my other blogger friends! Or you can get more inspiration here!
DIY Spider-Verse shoes from Geek Family Life (you need to make these then play these superhero games) Striped infant body suit from Moogly BlogDIY baseball mom baseball cap from Casa MoncadaCandy favor bags from Giggles GalorePersonalized luggage from 100 DirectionsWreath and home decor from Our Thrifty IdeasDIY napkins from The Idea RoomQuilted eye mask from Sew Much AdoPocket pal t-shirts from That’s What Che Said
Other Cricut Project Ideas
There are so many projects to make with a Cricut machine, especially now when you add the Cricut EasyPress Mini into the mix! Here are some of my favorite projects I’ve made so far!
DIY luggage tagsDinosaur gamesFelt St. Patrick’s Day gameDIY puzzleDIY superhero costume (masks + capes) Easy banner ideasDIY shirts
Don’t forget to pin these tips for personalizing with Cricut EasyPress Mini for later!
This is a sponsored conversation written by me on behalf of Cricut. The opinions and text are all mine.