Why DIY Labels?
For my birthday this year I asked for one thing. I asked my parents to take my two boys or 24 hours so my husband and I could organize my house. When I told my neighbors about what I was doing, I realized I wasn’t the only one purging my house in 2020. With all sorts of new organizing shows coming out this year (Home Edit, I’m looking at you), it seemed like everyone I know was trying to make their house more organized and functional. I spent my birthday weekend organizing everything I could get my hands on. Then I tried to buy labels for all of the bins, buckets, and breakable jars that I bought during my organizing. The problem is that the labels already out there don’t necessarily fit the labels that I needed. Things like Oreos, bath bombs, and millions of bags of Goldfish didn’t show up in those huge sets of pre-made labels. I could buy ten different sets of pre-made labels and they’d still not have what I needed.
Make Your Own Labels
Since I couldn’t find what I wanted, I decided to make my own with my Cricut Joy. And once I made mine, I decided to make personalized sets for neighbors, family members, and friends. The Cricut Joy makes it SO easy to make your personalized sets of labels for people whether you want to do vinyl letter labels or sticker labels that look like they are hand written. I’ve included instructions in this post for how to make both (plus a video if you want to watch the walkthrough for help with Cricut Design Space). I’ve also included a few notes on how to personalize these to turn them into a super thoughtful gift idea. So here we go – easiest holiday gift ever!
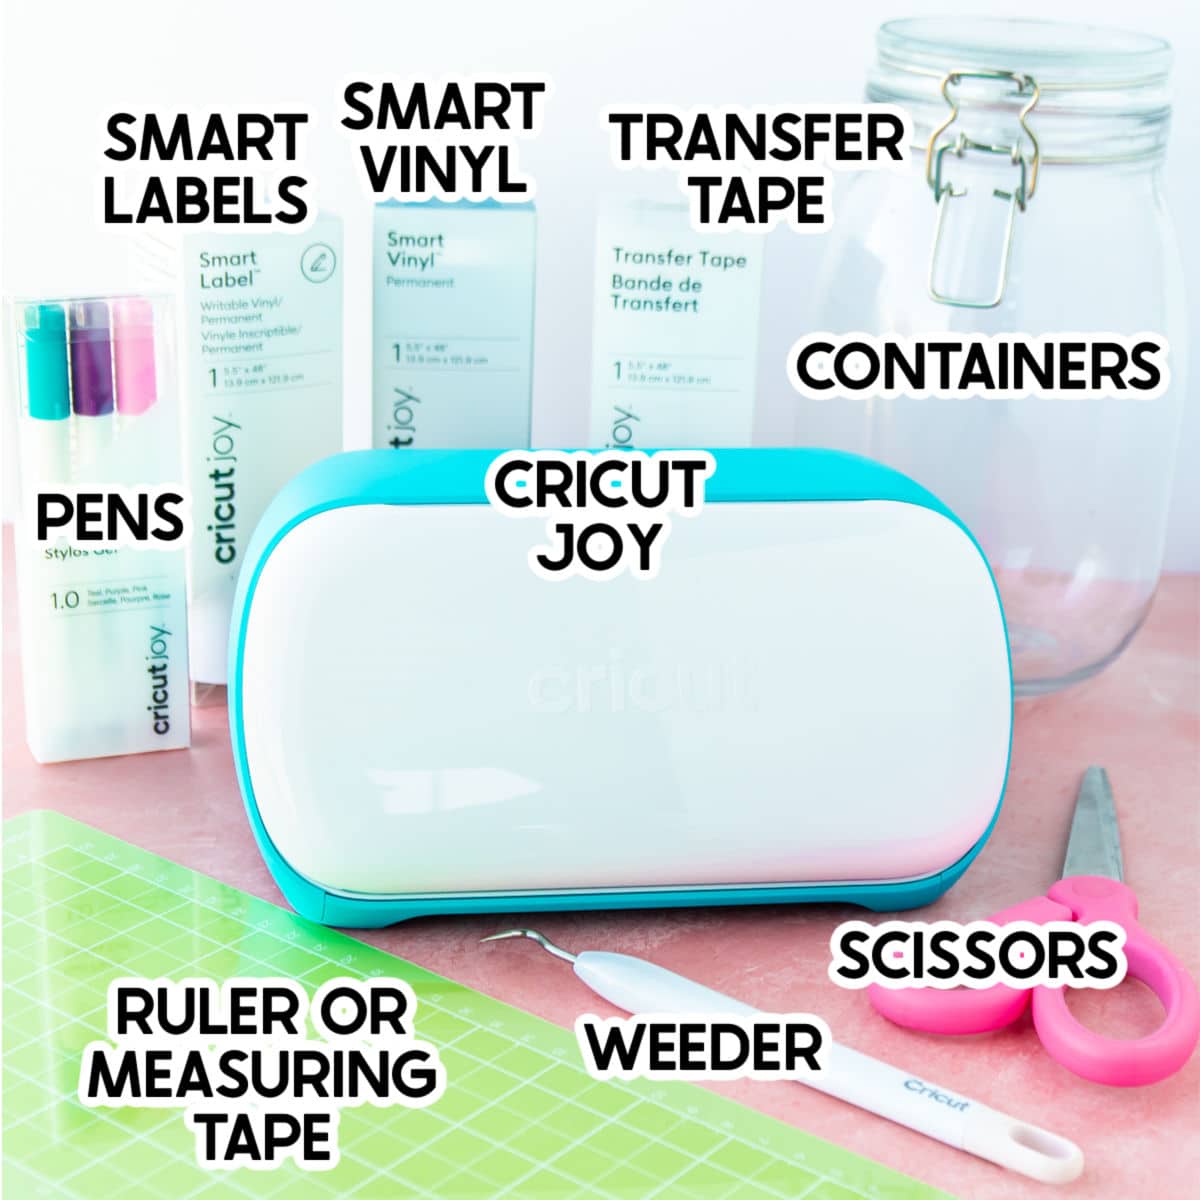
Supplies
Supply Notes
The supplies will be slightly different depending on whether you’re making DIY labels with vinyl or using the Cricut Joy Smart Label to make your labels. If you click on the item in the list below, you can buy it directly from the Cricut website. They’ve always got great deals going on, especially right during the holidays!
Supplies For Smart Label DIY Labels
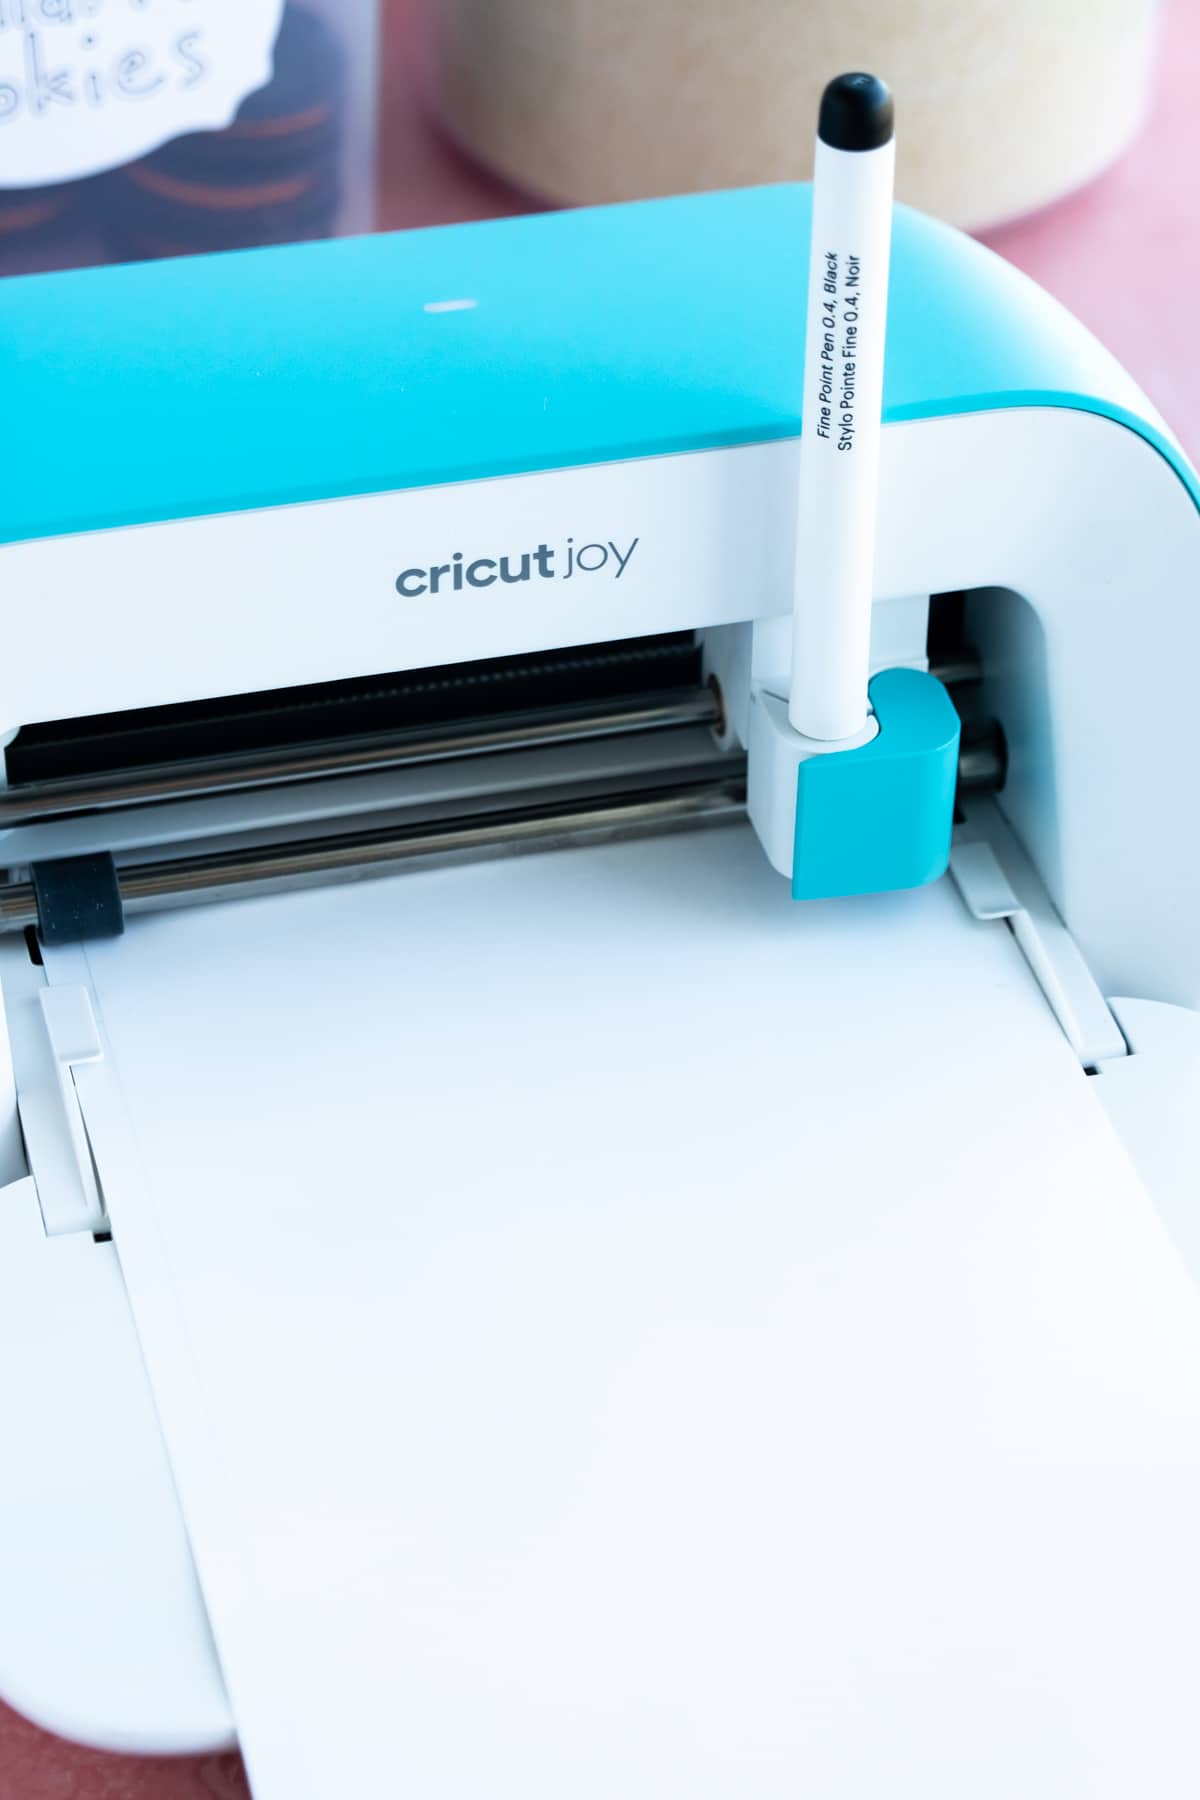
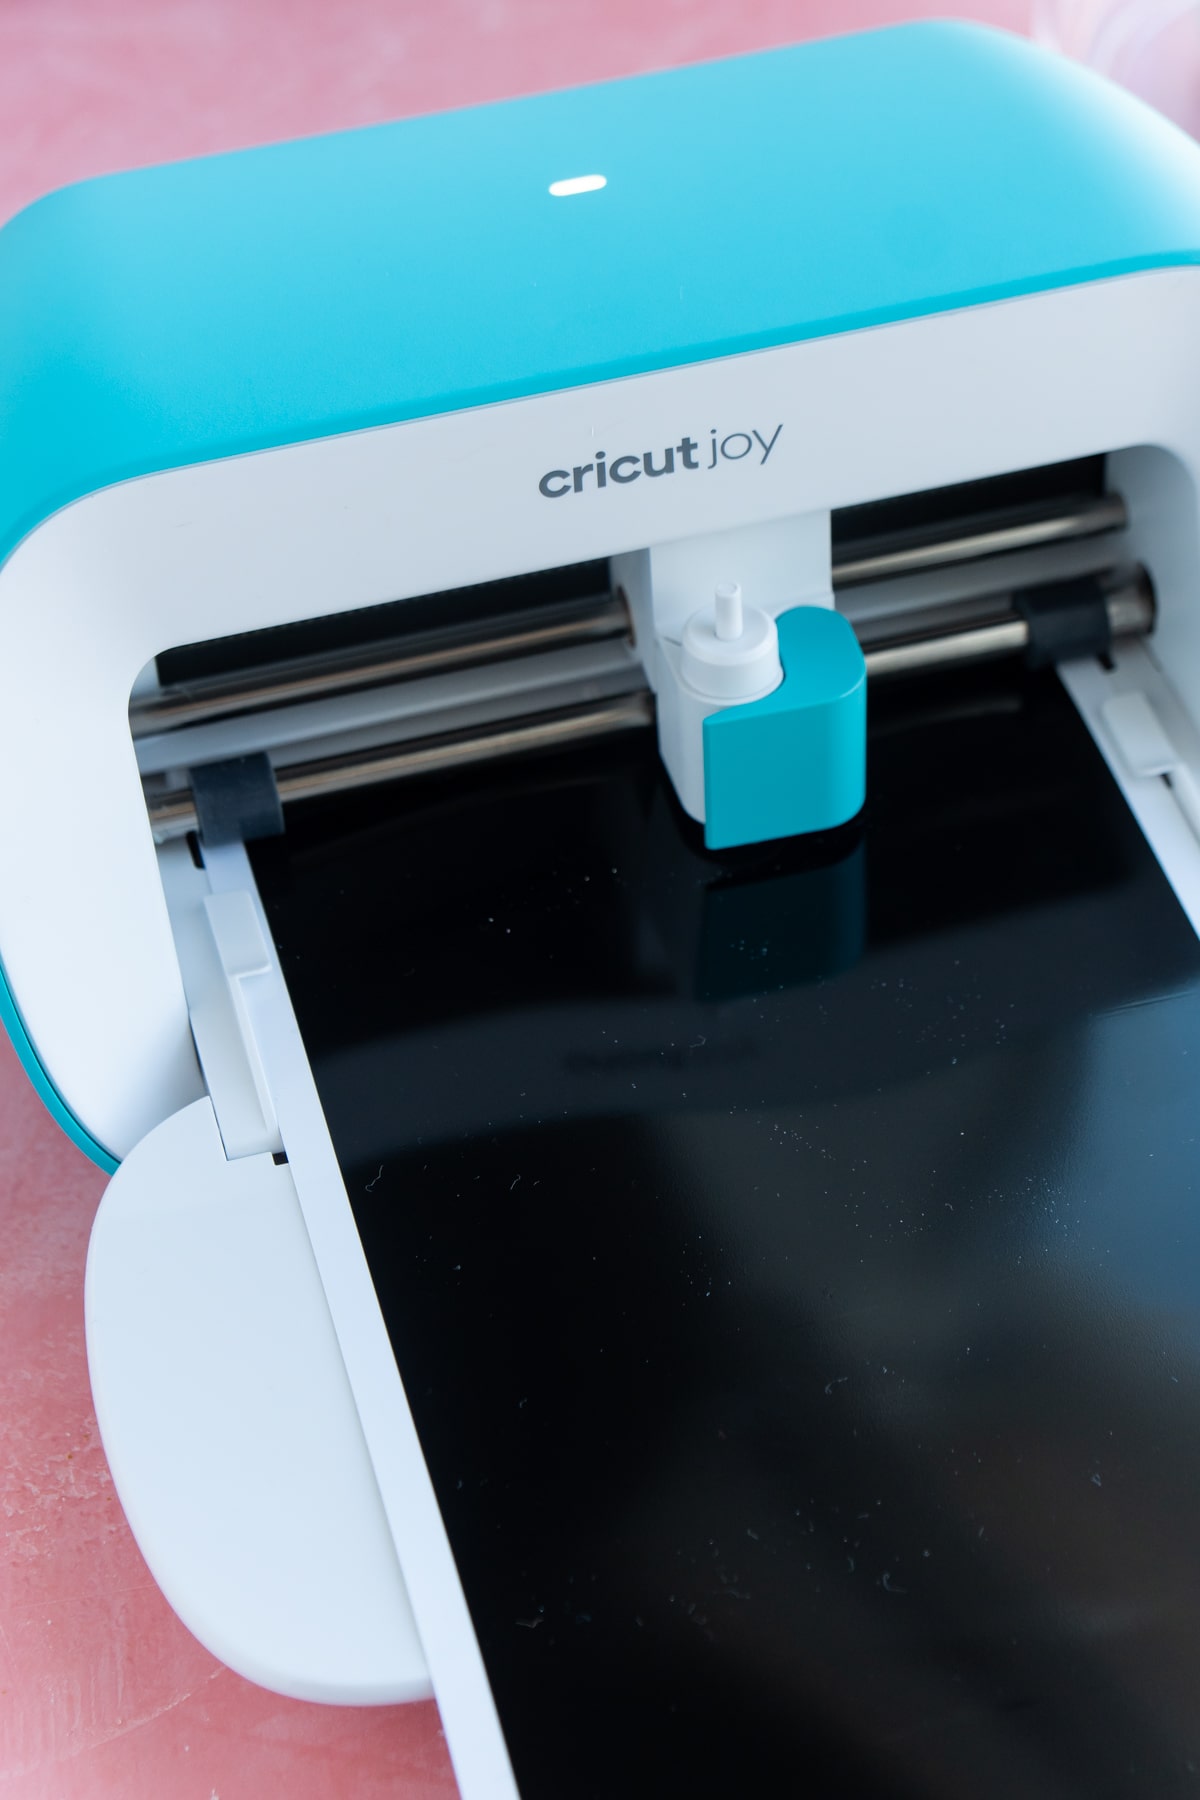
Cricut Joy – the newest of the Cricut machines, perfect for making simple vinyl crafts, cards, and more! See why the Cricut Joy makes a great gift! Cricut Joy Smart Label Writeable Vinyl – these are great because you can write on them with Cricut Joy pens and make it look more like a handwritten label Cricut Joy Fine Point Pens – make sure they are Cricut Joy pens and NOT gel or metallic pens as those smear on the labels Containers – whatever containers you want to use. They could be glass jars, buckets, boxes, you name it. Do whatever makes the most sense for the person you’re gifting this to.
Supplies for Smart Vinyl Labels
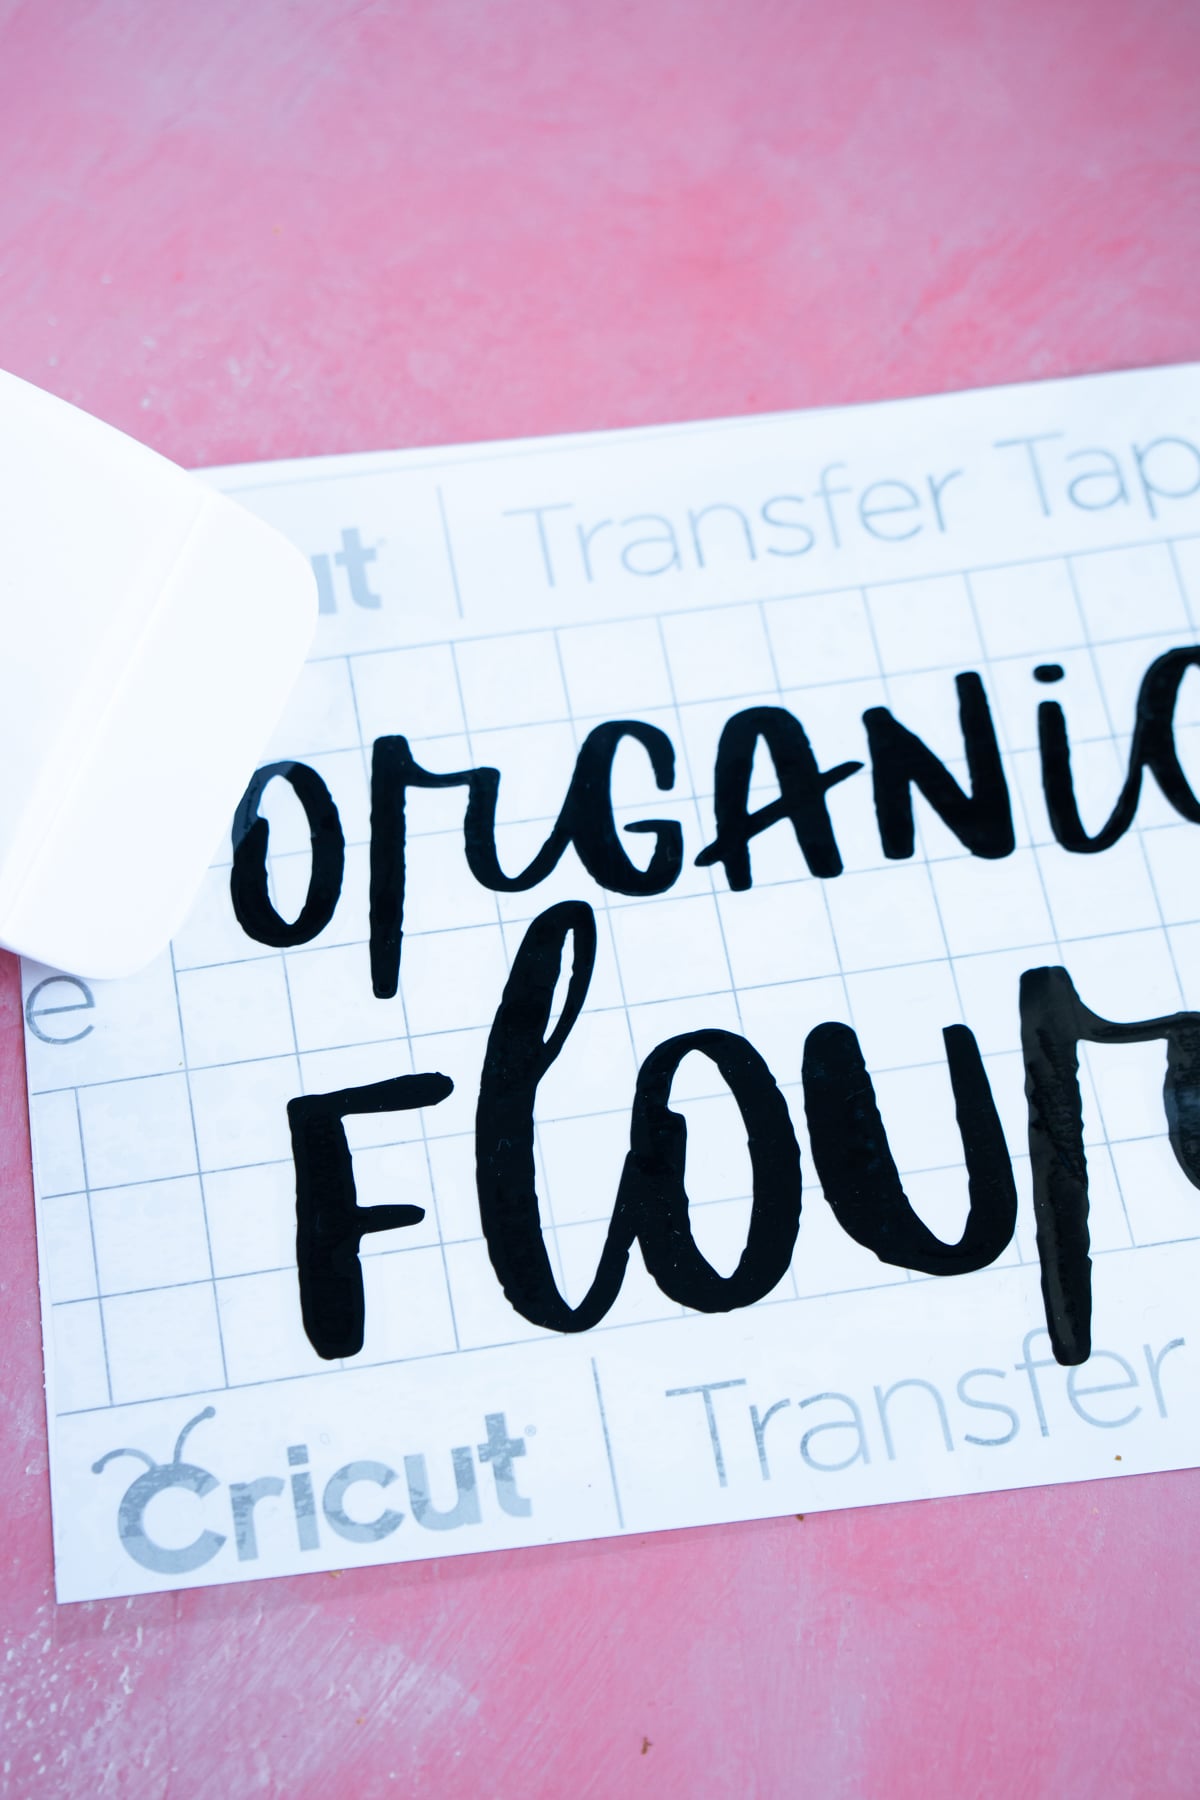
Cricut Joy – the newest of the Cricut machines, perfect for making simple vinyl crafts, cards, and more! See why the Cricut Joy makes a great gift! Cricut Joy Smart Vinyl – the Smart Vinyl is awesome because it feeds right into the Cricut Joy without having to use a mat! It’s sized just for the Cricut Joy and makes cutting vinyl SO easy! You can see all the color options here. Cricut Joy Transfer Tape – any Cricut transfer tape works, this is just cut to the size of Cricut Joy materials so it takes less work. Definitely one of the most essential Cricut Joy accessories. Cricut Weeder – one of my must-have Cricut accessories, you’ll want the weeder to help get all the little pieces out of your letters Cricut Scraper – this is optional but nice to have to help transfer the vinyl to the transfer tape and then from the transfer tape to your jar. You can also use a credit card, gift card, or even your fingernail. Containers – whatever containers you want to use. They could be glass jars, buckets, boxes, you name it. Do whatever makes the most sense for the person you’re gifting this to.
How to Make DIY Labels
Okay so I know some people prefer the look of handwritten labels and some people prefer the look of vinyl, so I’ve included DIY instructions for both. Choose what makes the most sense for whoever you’re making these for or mix and match both!
1 – DIY Labels with Smart Labels
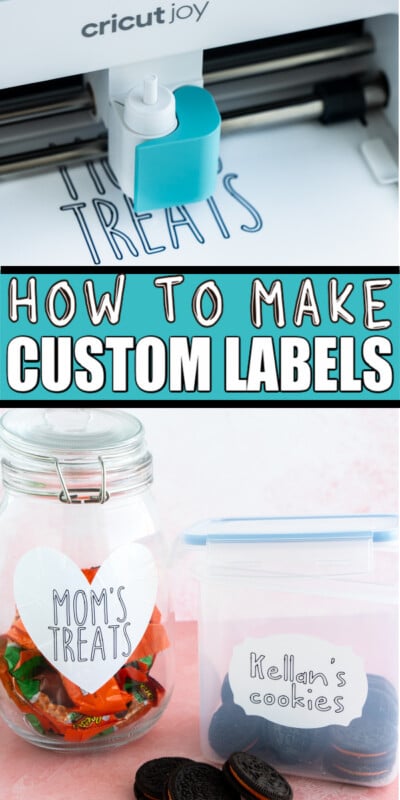
The Cricut Joy Smart Labels make creating DIY labels so easy! They’re designed specifically to be used as labels and peel right off, kind of like stickers, so you can put them on whatever containers you’re using without dealing with transfer tape.
Plus, the Smart Labels are made with writeable vinyl so you can use the Cricut Joy fine-point pens to write, draw, and add any embellishments you want to make them look hand drawn and personalized.
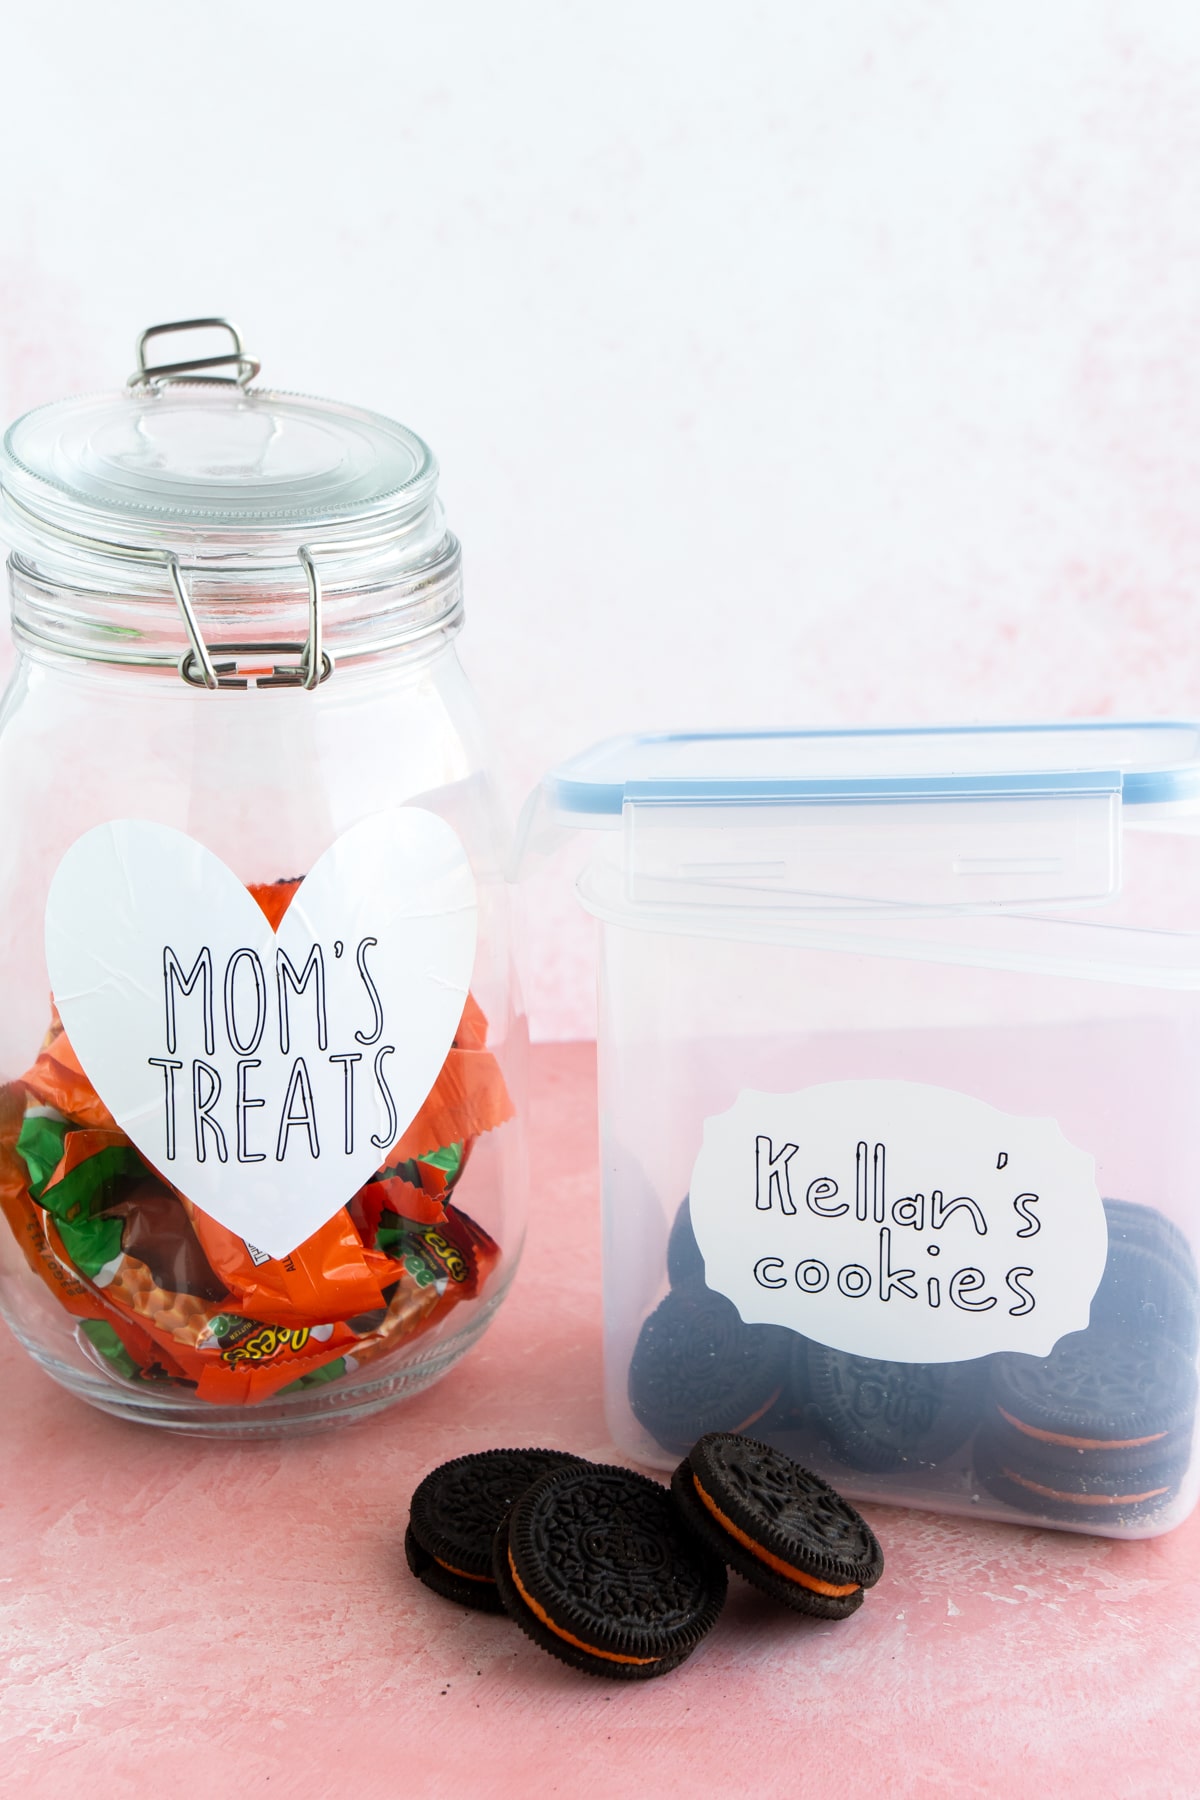
For my project, I did a couple of treat jars – one for my son and one for my mom.
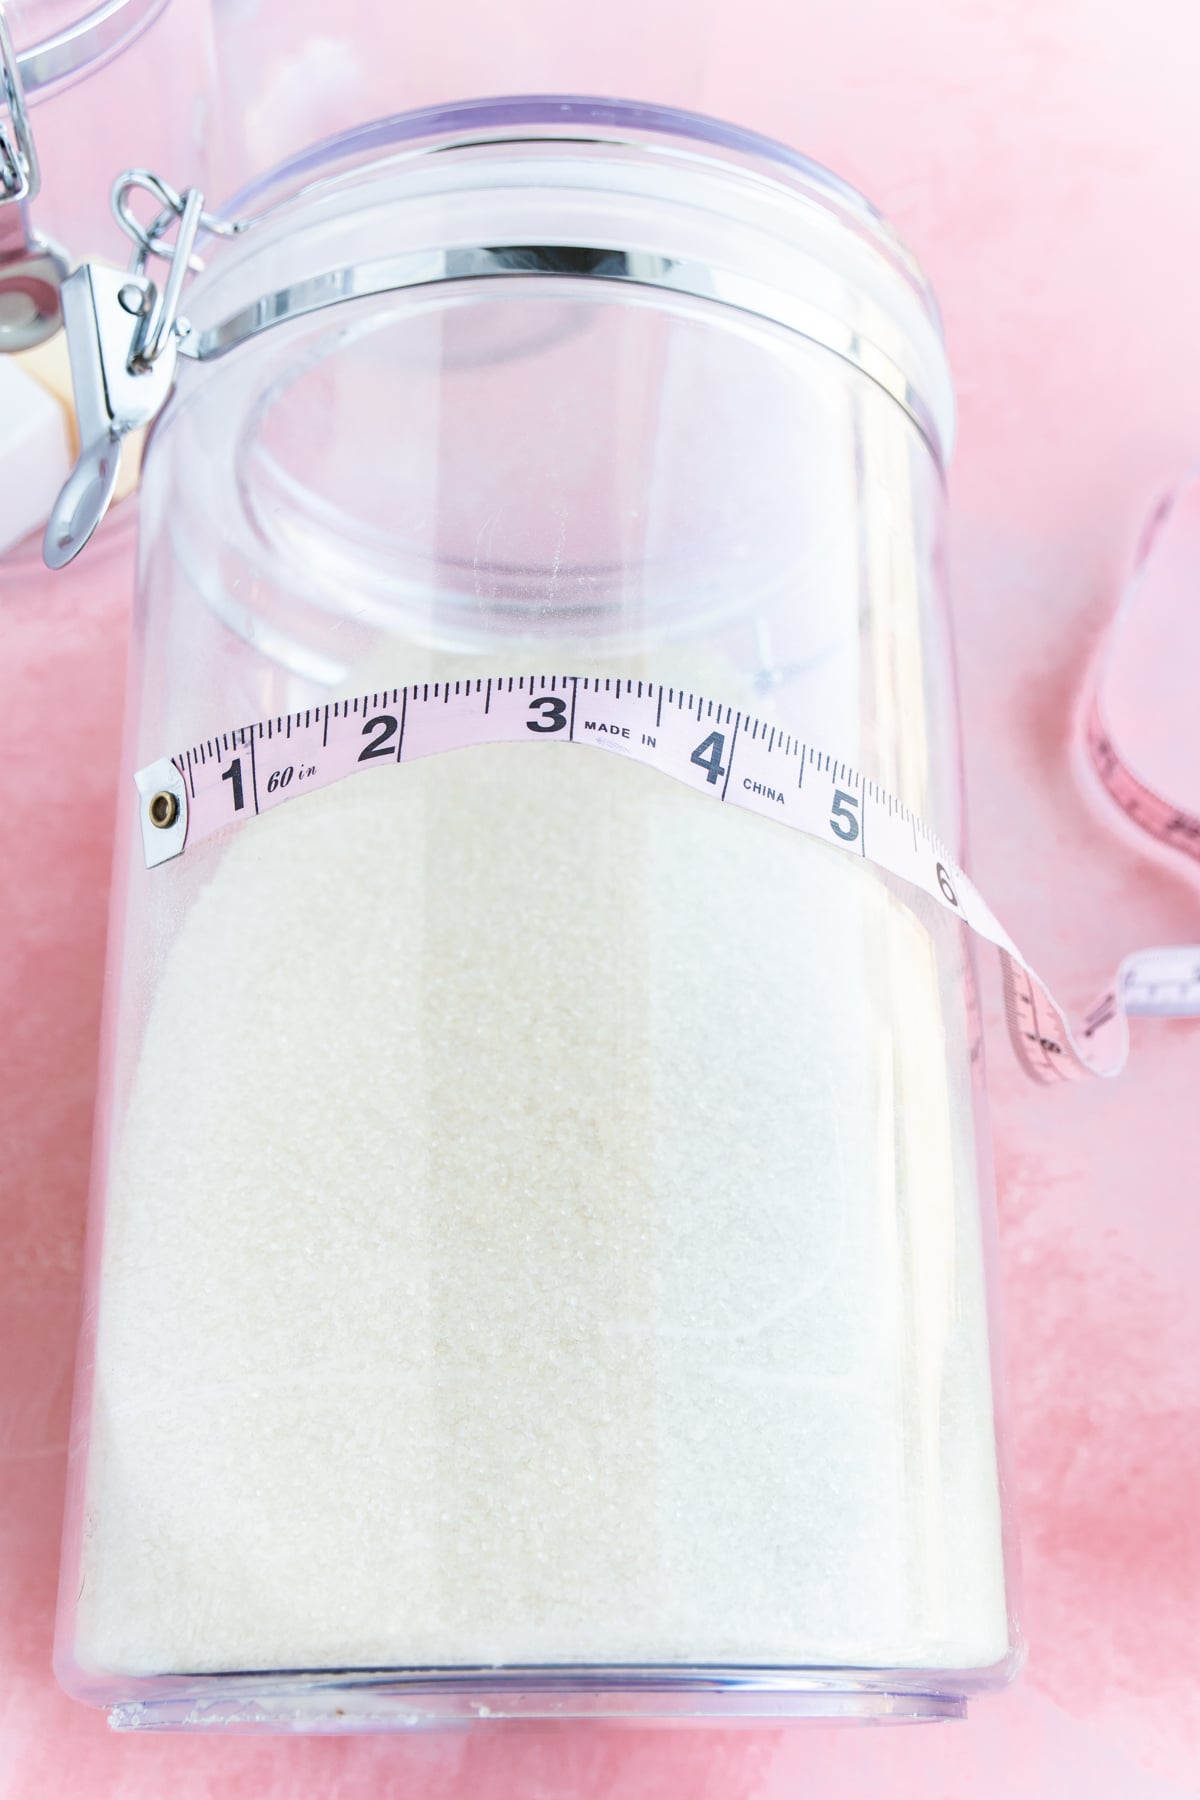
Start by measuring the jar to see how big you want your label. I recommend doing something smaller for round jars so that it’s not wrapping around the sides as much.
Next open up a new project in Cricut Design Space. Before you get started make sure that your project is setup for Cricut Joy if you have multiple machines. This will change the settings when you get to the make it stage of the project.
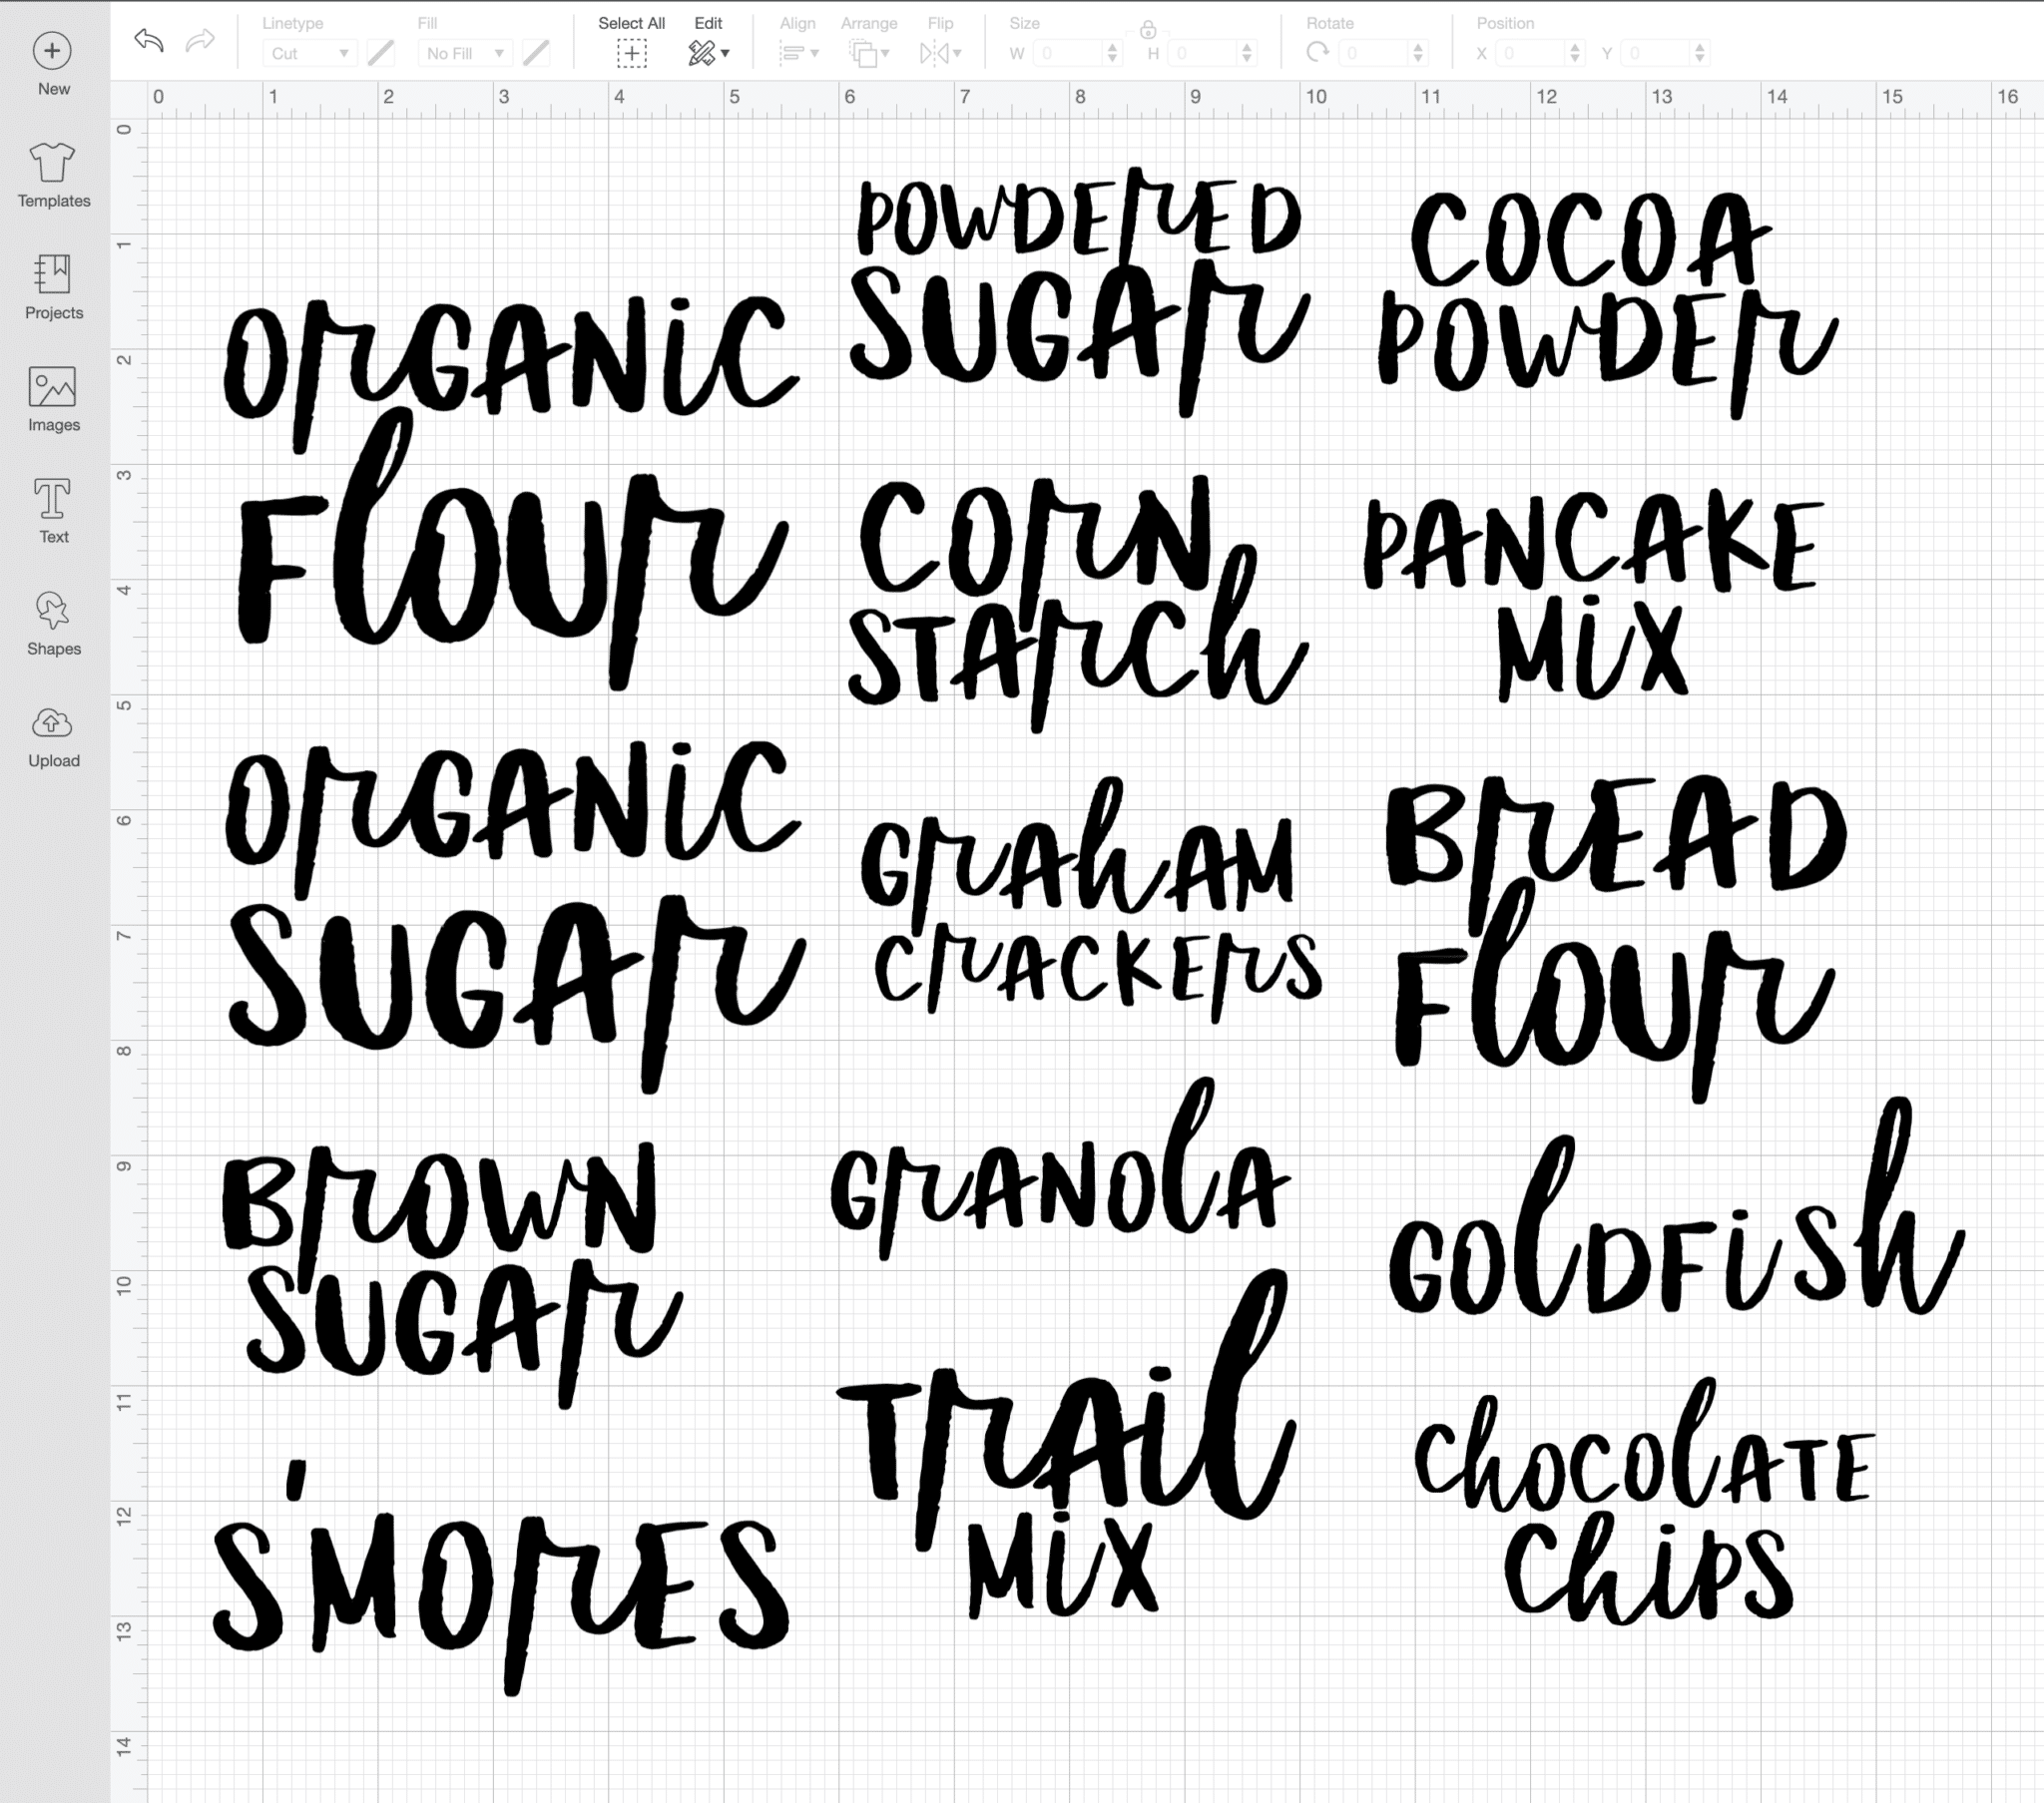
Click on the images button and type “labels,” in the search field.
There are a ton of label options there to choose from if you want to use one of the pre-made options. Otherwise, you can just create your own by adding a shape to your project.
Once you have your base label, add text to the label in whatever font and size you want. Make sure you change it to draw rather than cut under linetype so that it draws the text rather than cuts it.
Select both your label and your text and center align the two so that the text is written in the center of the label.
Finally, select everything and click the attach option in the bottom right hand corner of the screen. This will keep the text and label attached when you make your project rather than having them separated to save cutting space.
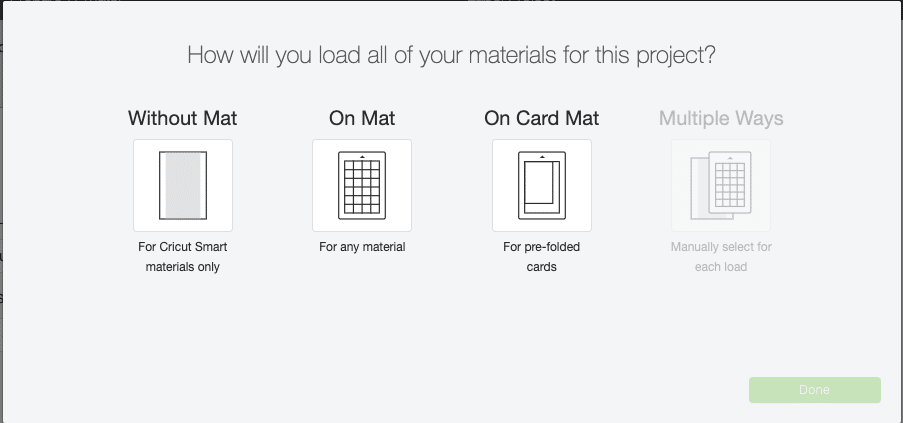
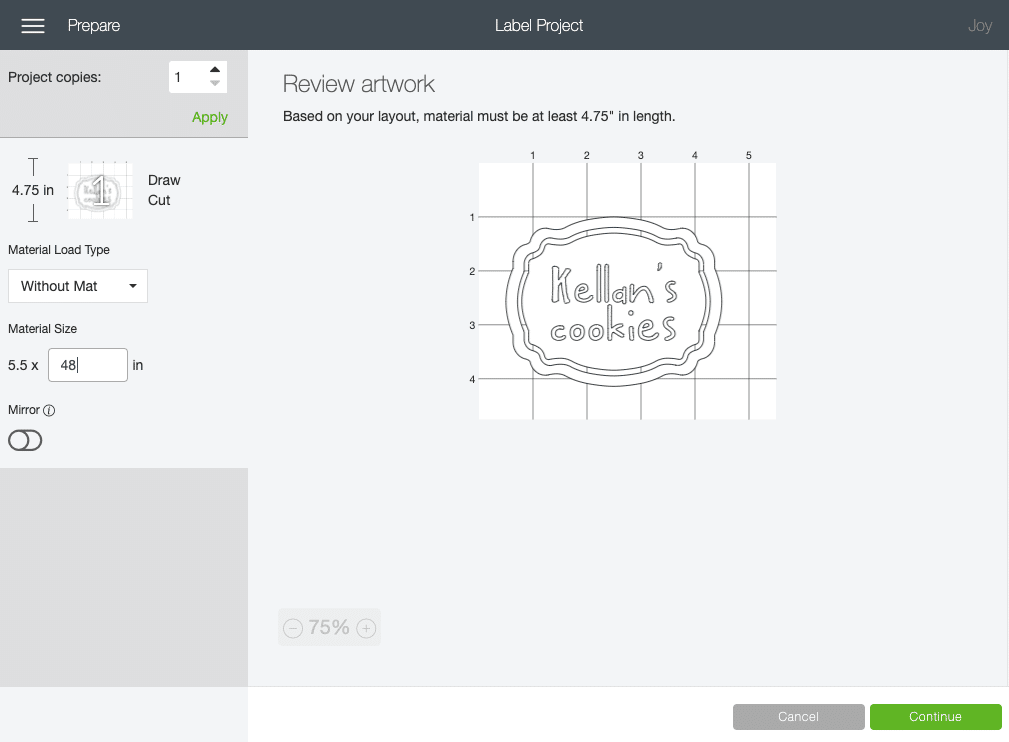
Now you’re ready to make it! Click the green make it button in the top right hand side of the screen and it’ll give you some options.
Choose the option to cut with no mat since we’re going to be using Smart Labels that cut with no mat.
Change the size of your material if necessary then click continue.
Once your Cricut Joy connects via Bluetooth, choose your material (Cricut Smart Labels with Writeable Vinyl) then continue to follow the prompts to make the project.
The first thing you’ll do is add whatever color fine point pen you want to use for the labels. I went with black so that it matched all of the other items in the pantry. You could easily personalize this part however and use their favorite colors, colors that match their house, etc.
Load the Smart Labels into the Cricut Joy. Unlike with the Cricut Maker, the Joy will pull the label in automatically (no need to hit any buttons to load). Make sure that you put it in flat and even so it pulls in that way – otherwise, unload and try again.
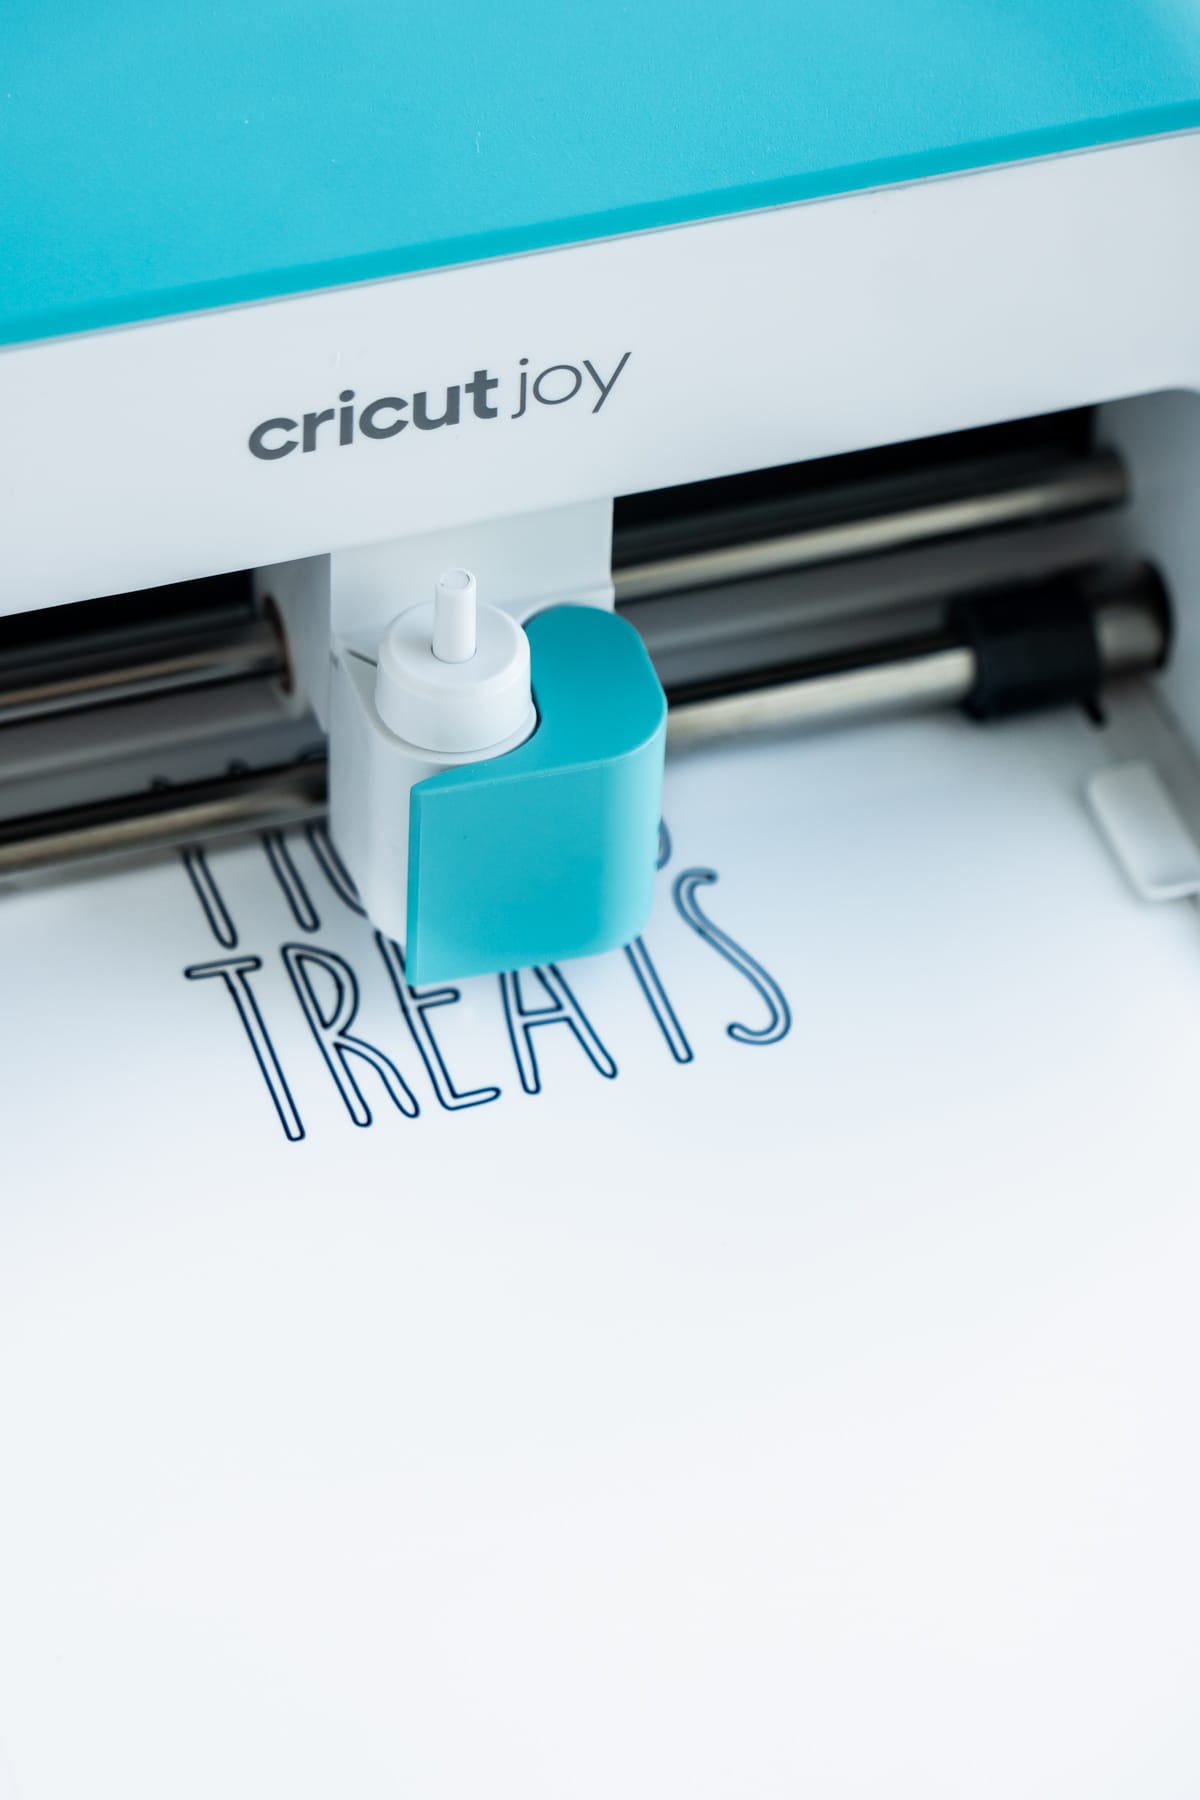
When your material is all loaded, hit the go button and it’ll write your label(s).
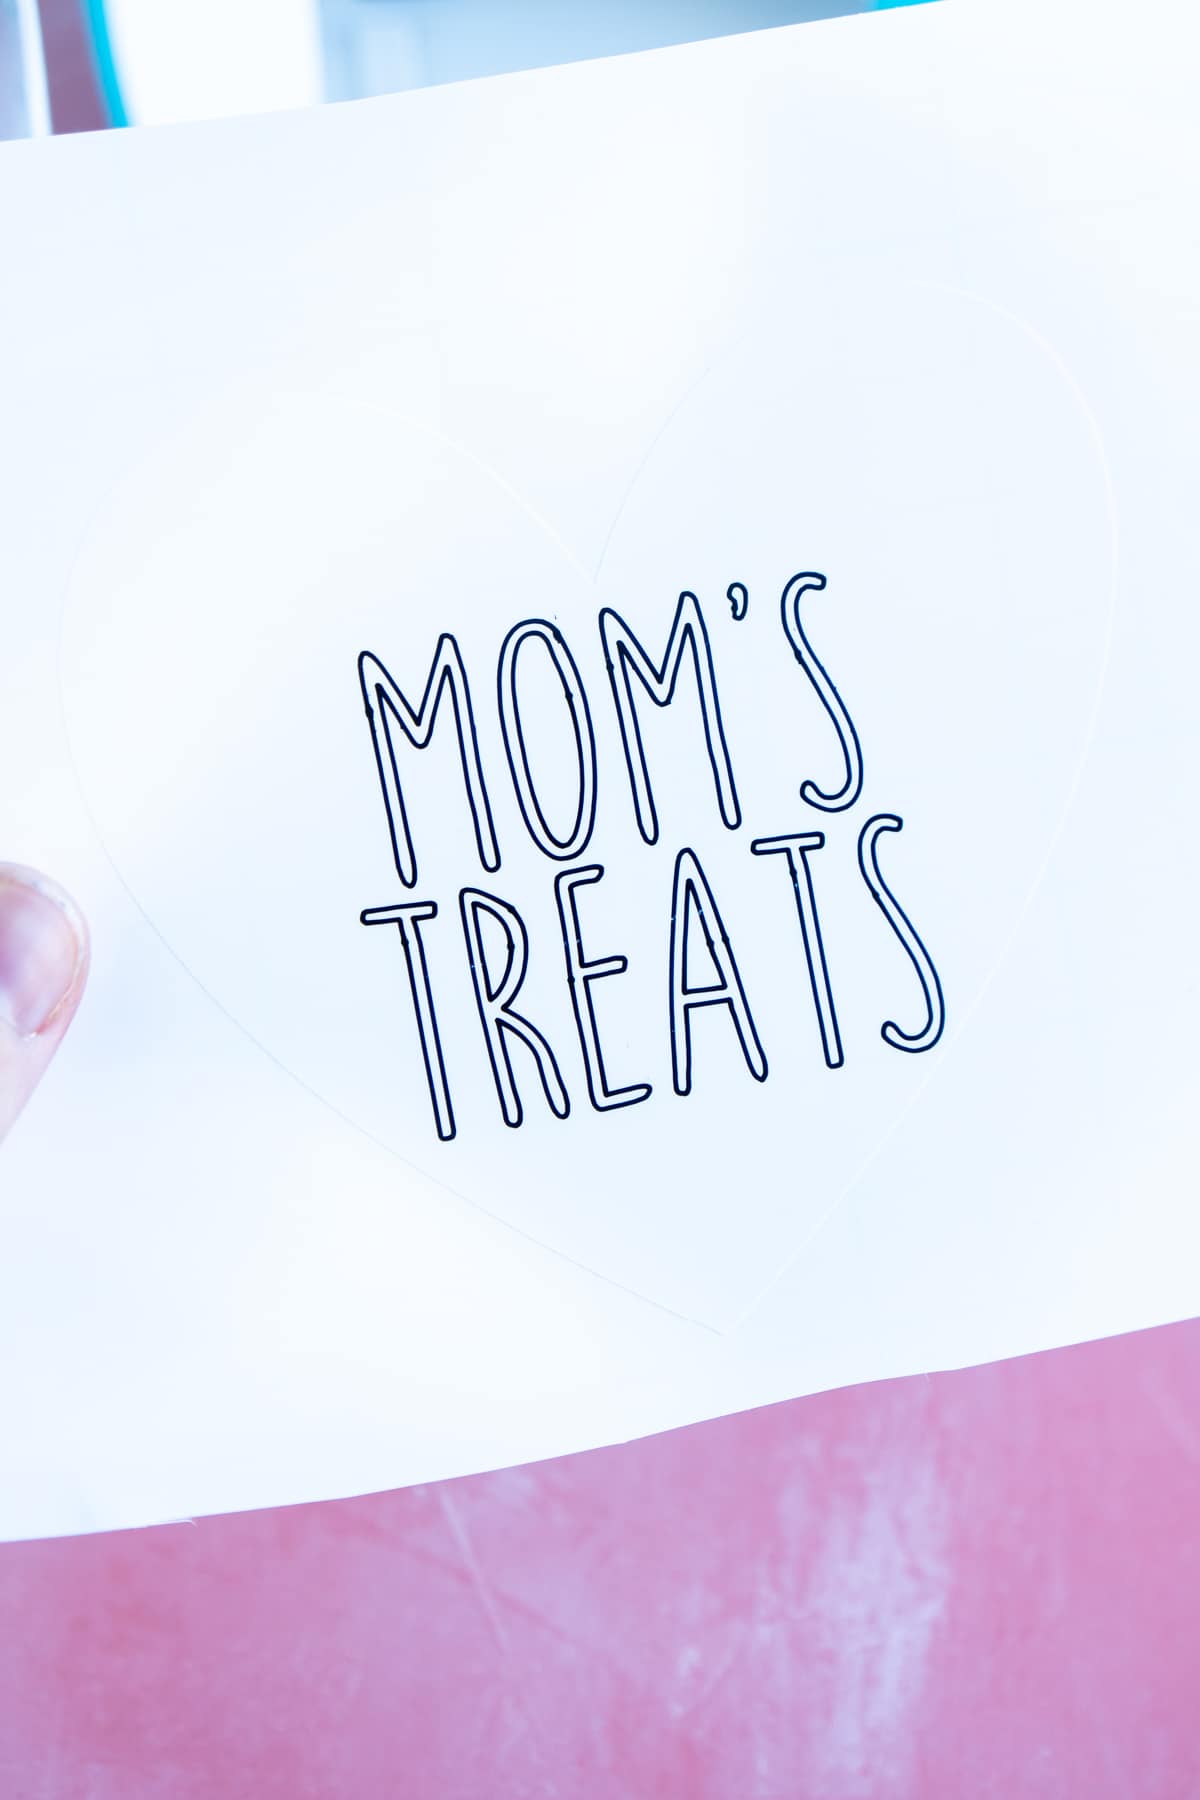
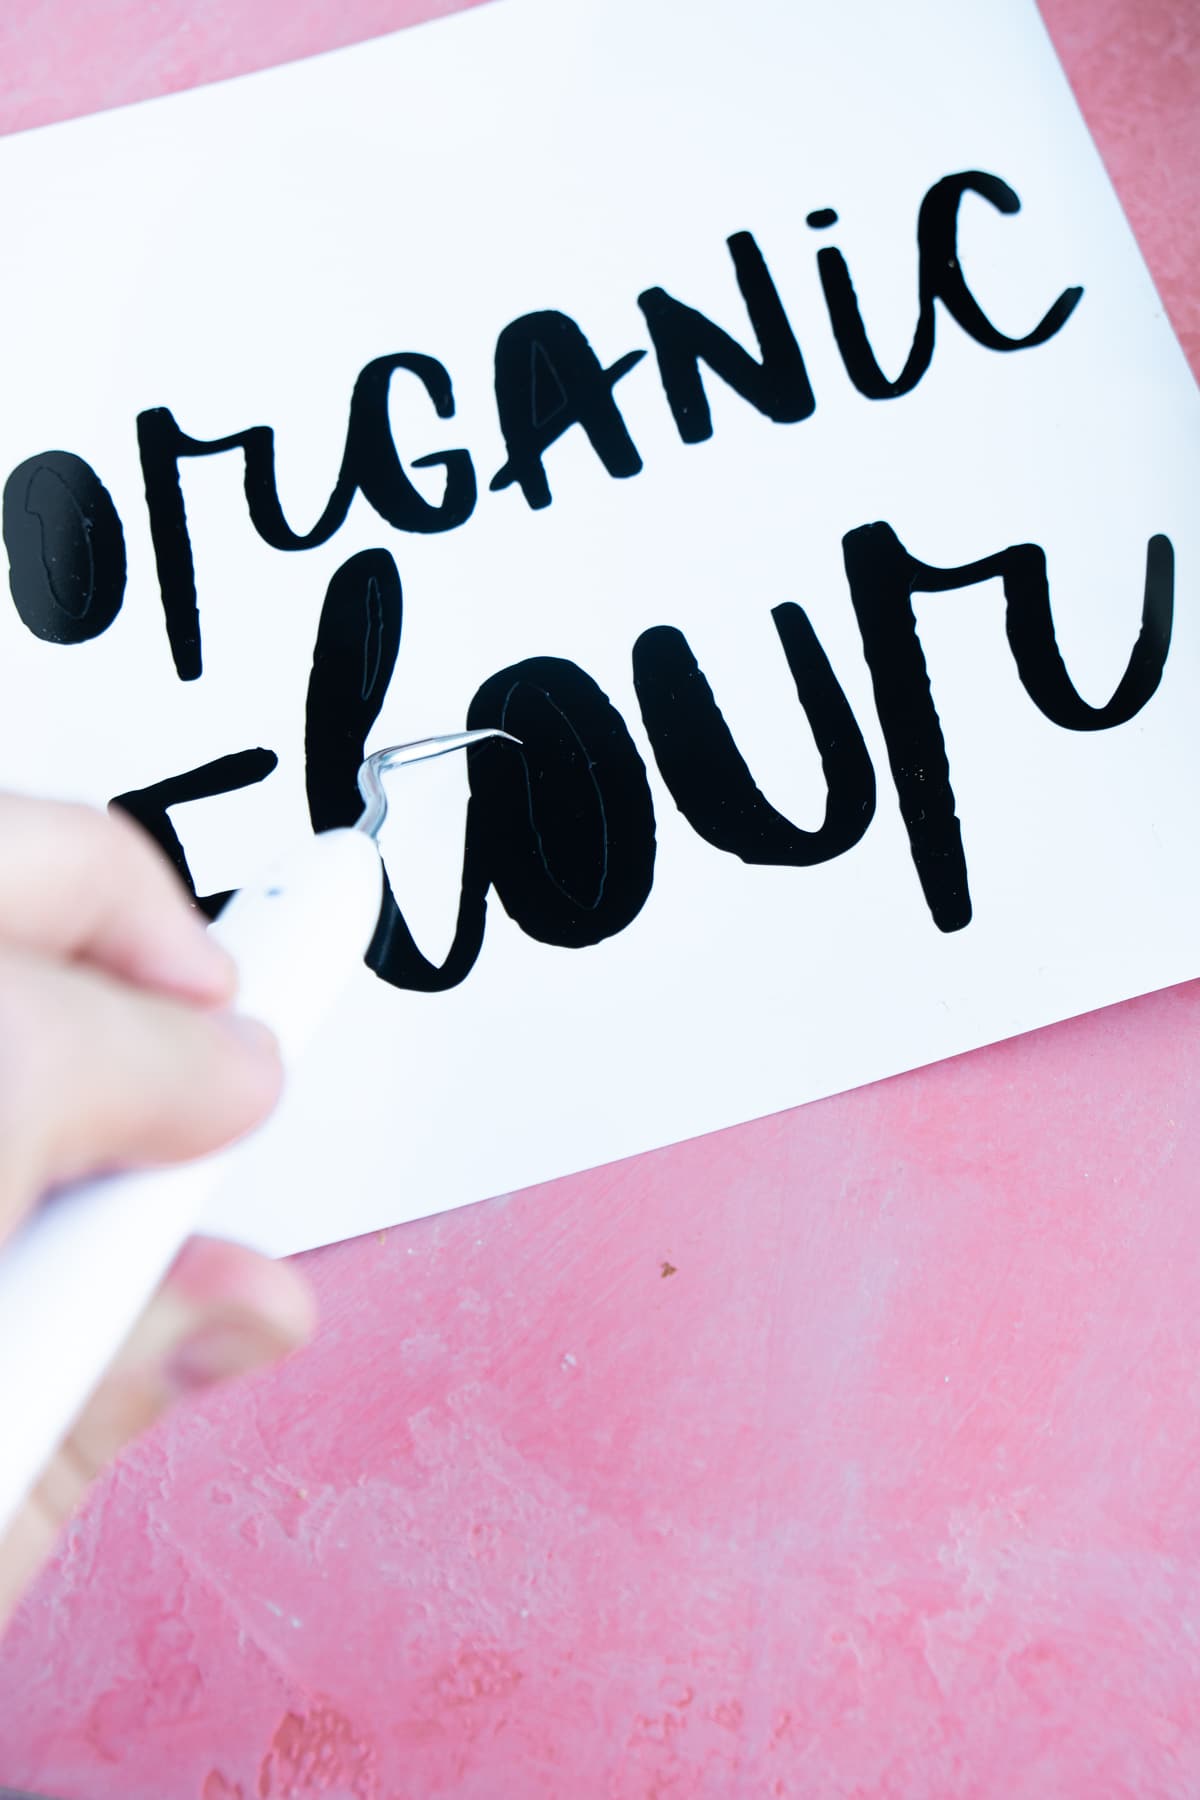
Then you need to swap out the pen with the fine-point blade and hit go again. This will cut around your label. You can barely see the line of the heart around my label, but it’s there!
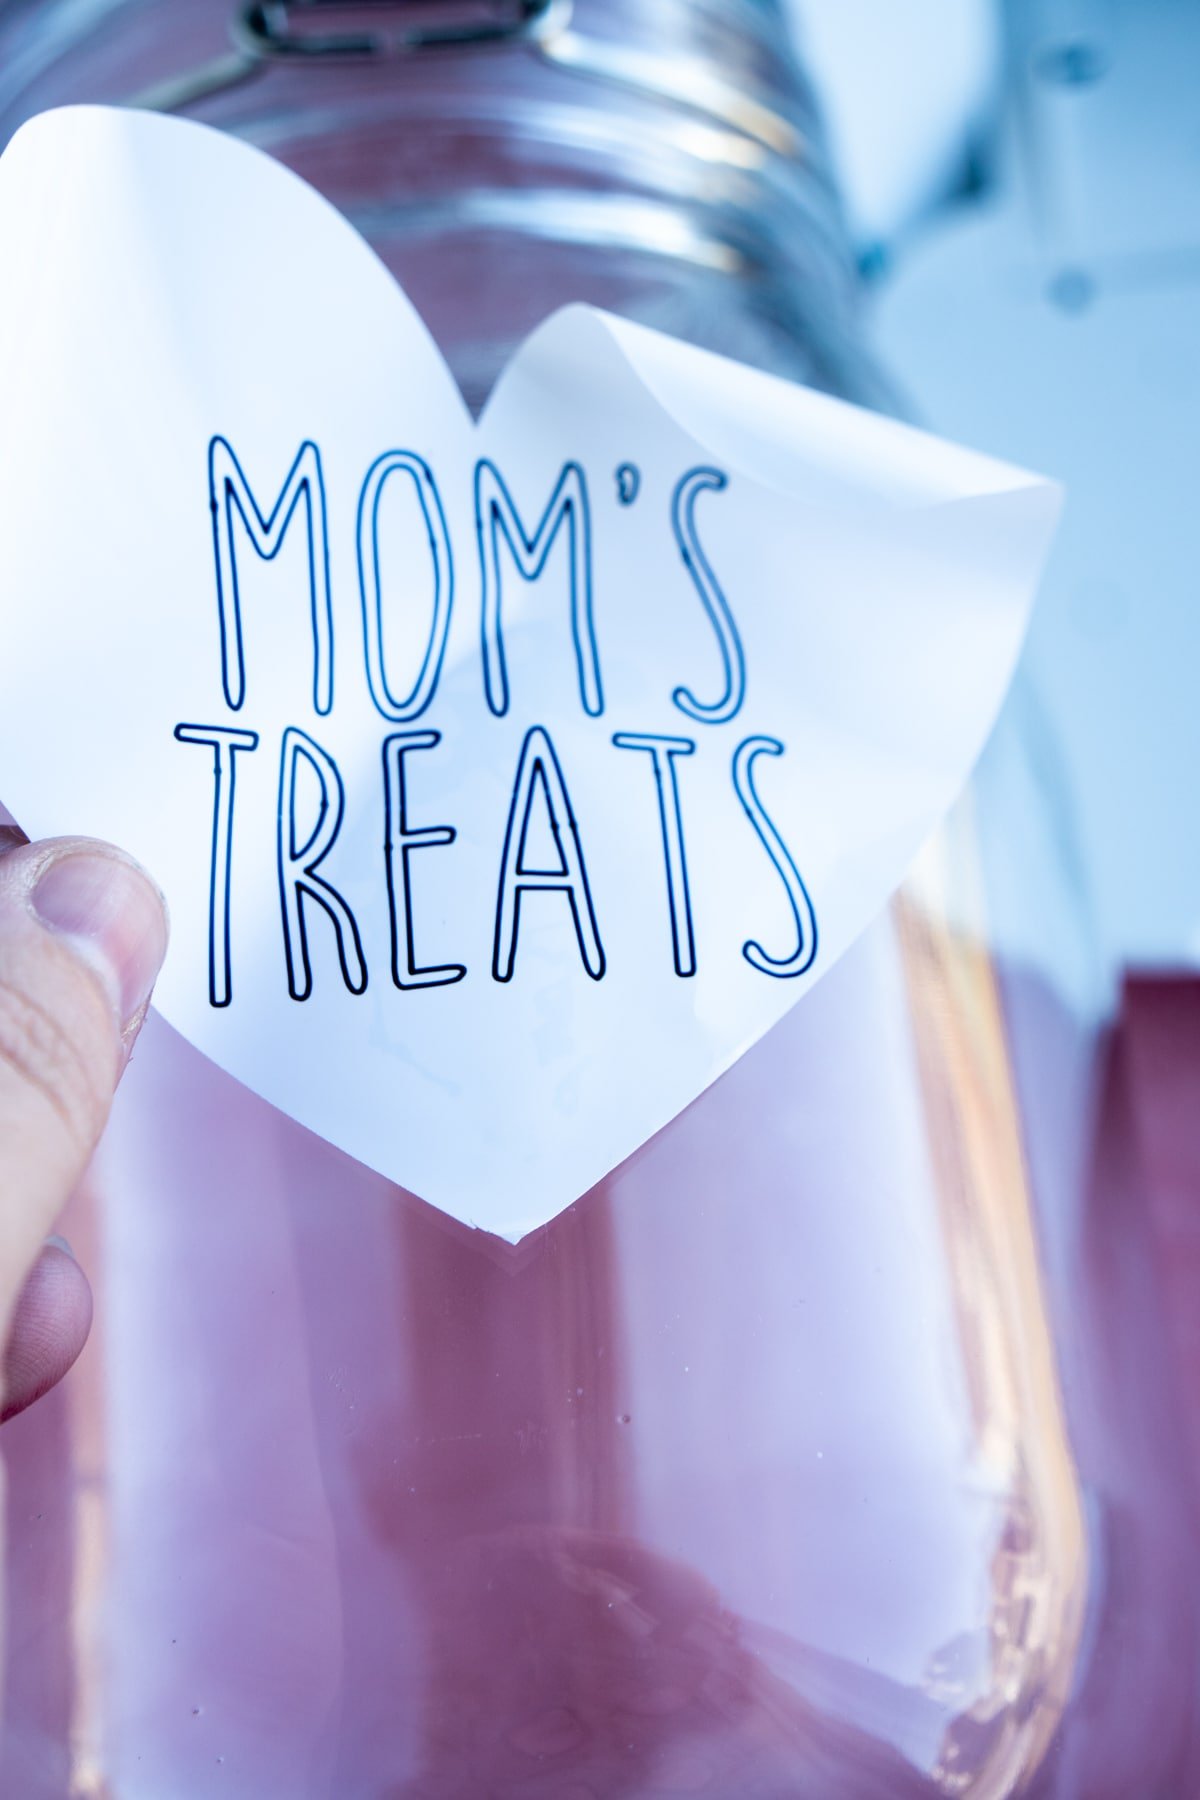
Now all that’s left is cutting that section off of your Smart Labels (assuming you didn’t use it all), peeling, and sticking your new label onto whatever container it is you’re using.
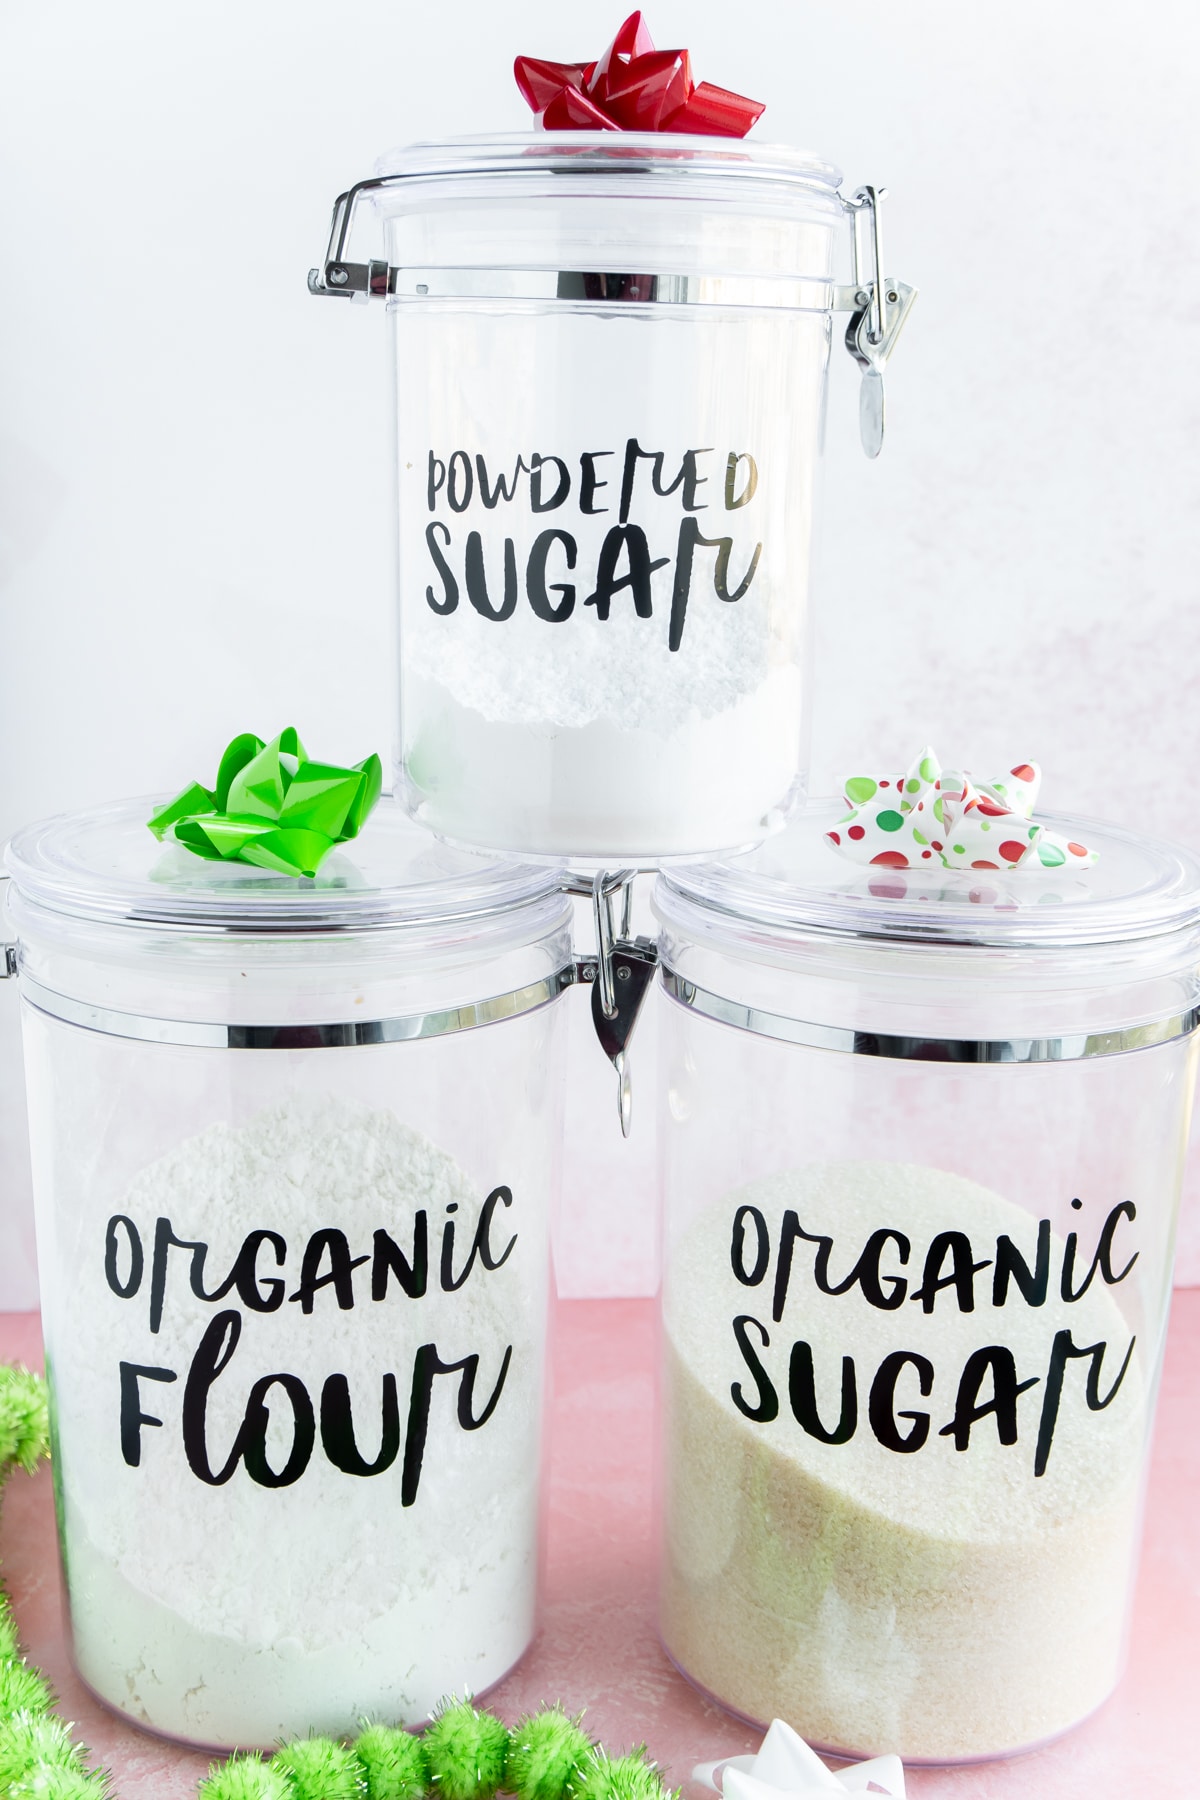
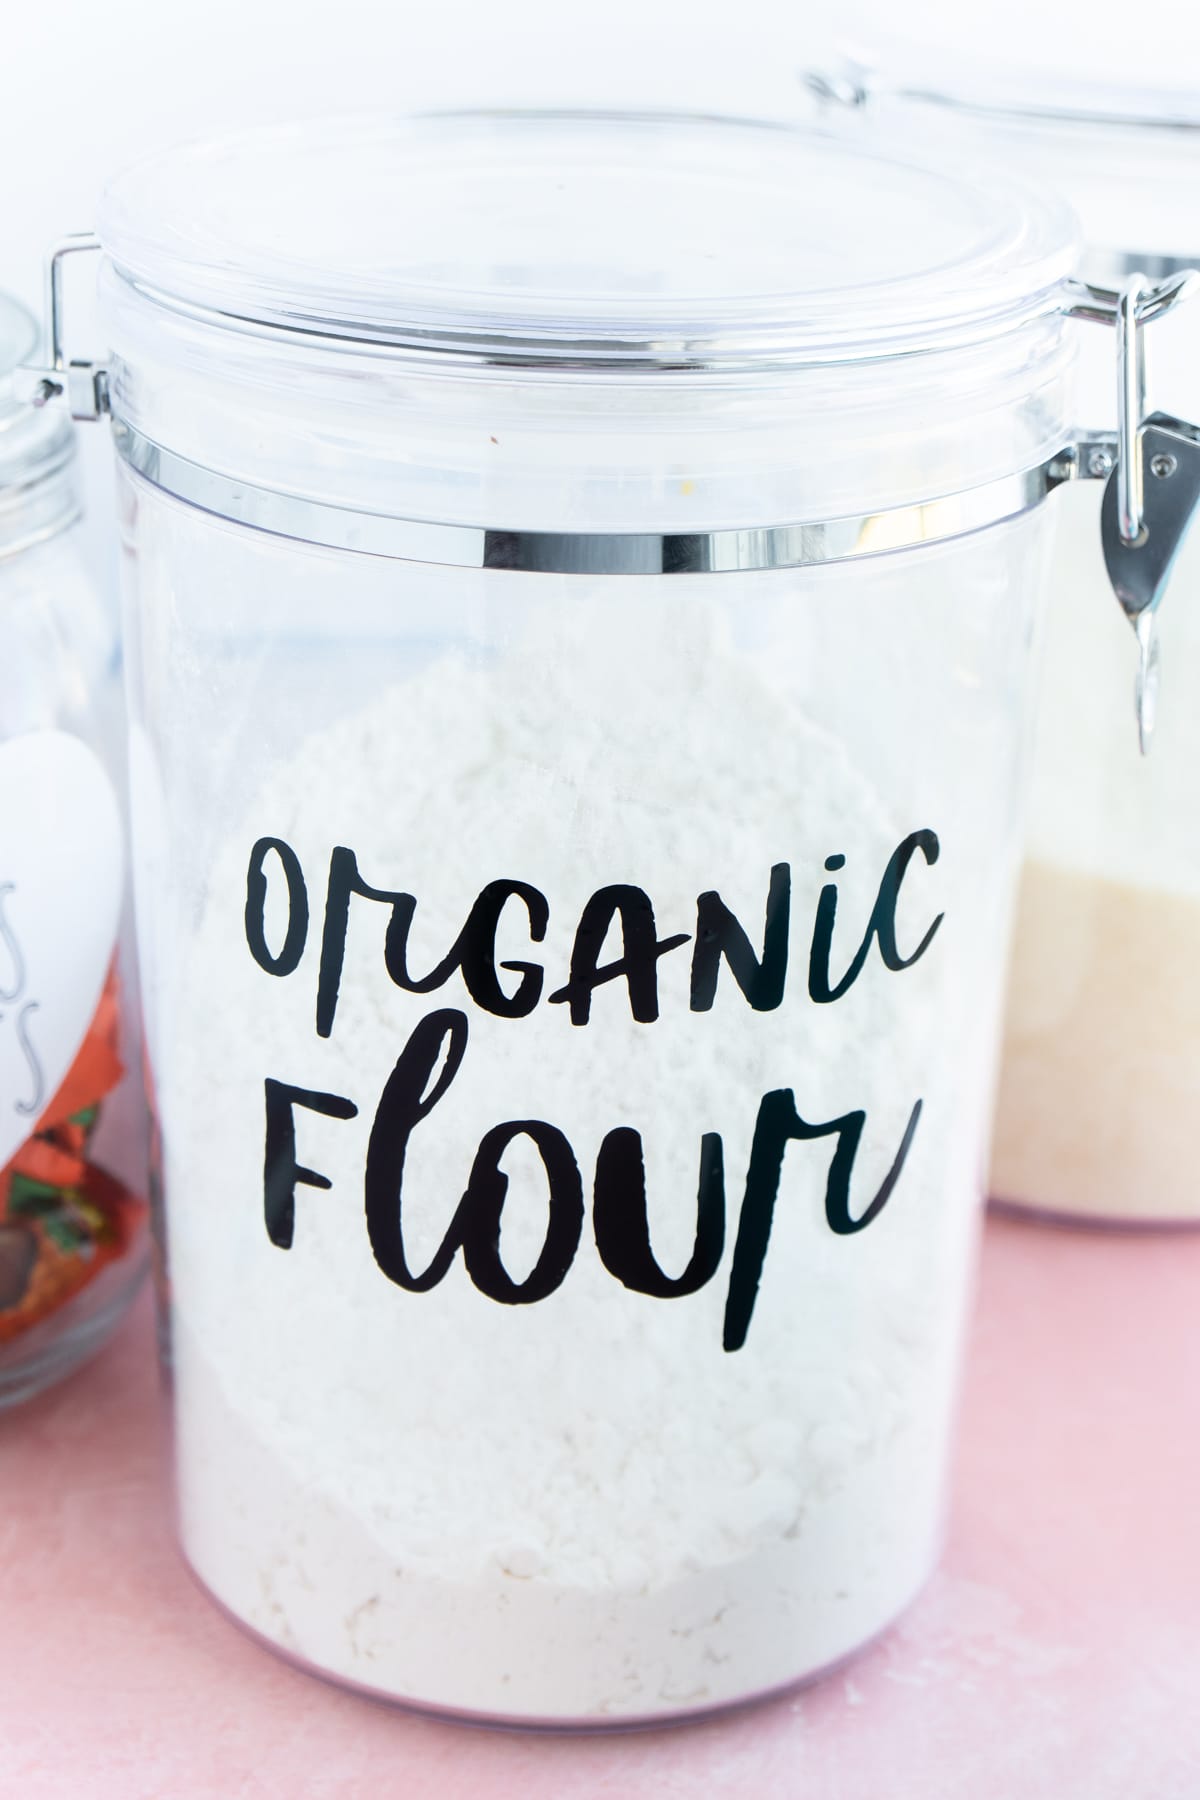
I did a container filled with Oreos that says “Kellan’s Cookies,” as a gift for my son. And a container that says “Mom’s Treats,” filled with my mom’s favorite treats for mom.
They only took me a few minutes the smile on my son’s face was priceless when he saw it! I mean who doesn’t love something with their name on it? I know personalized gifts for kids are always a hit in our house!
1 – DIY Labels With Smart Vinyl
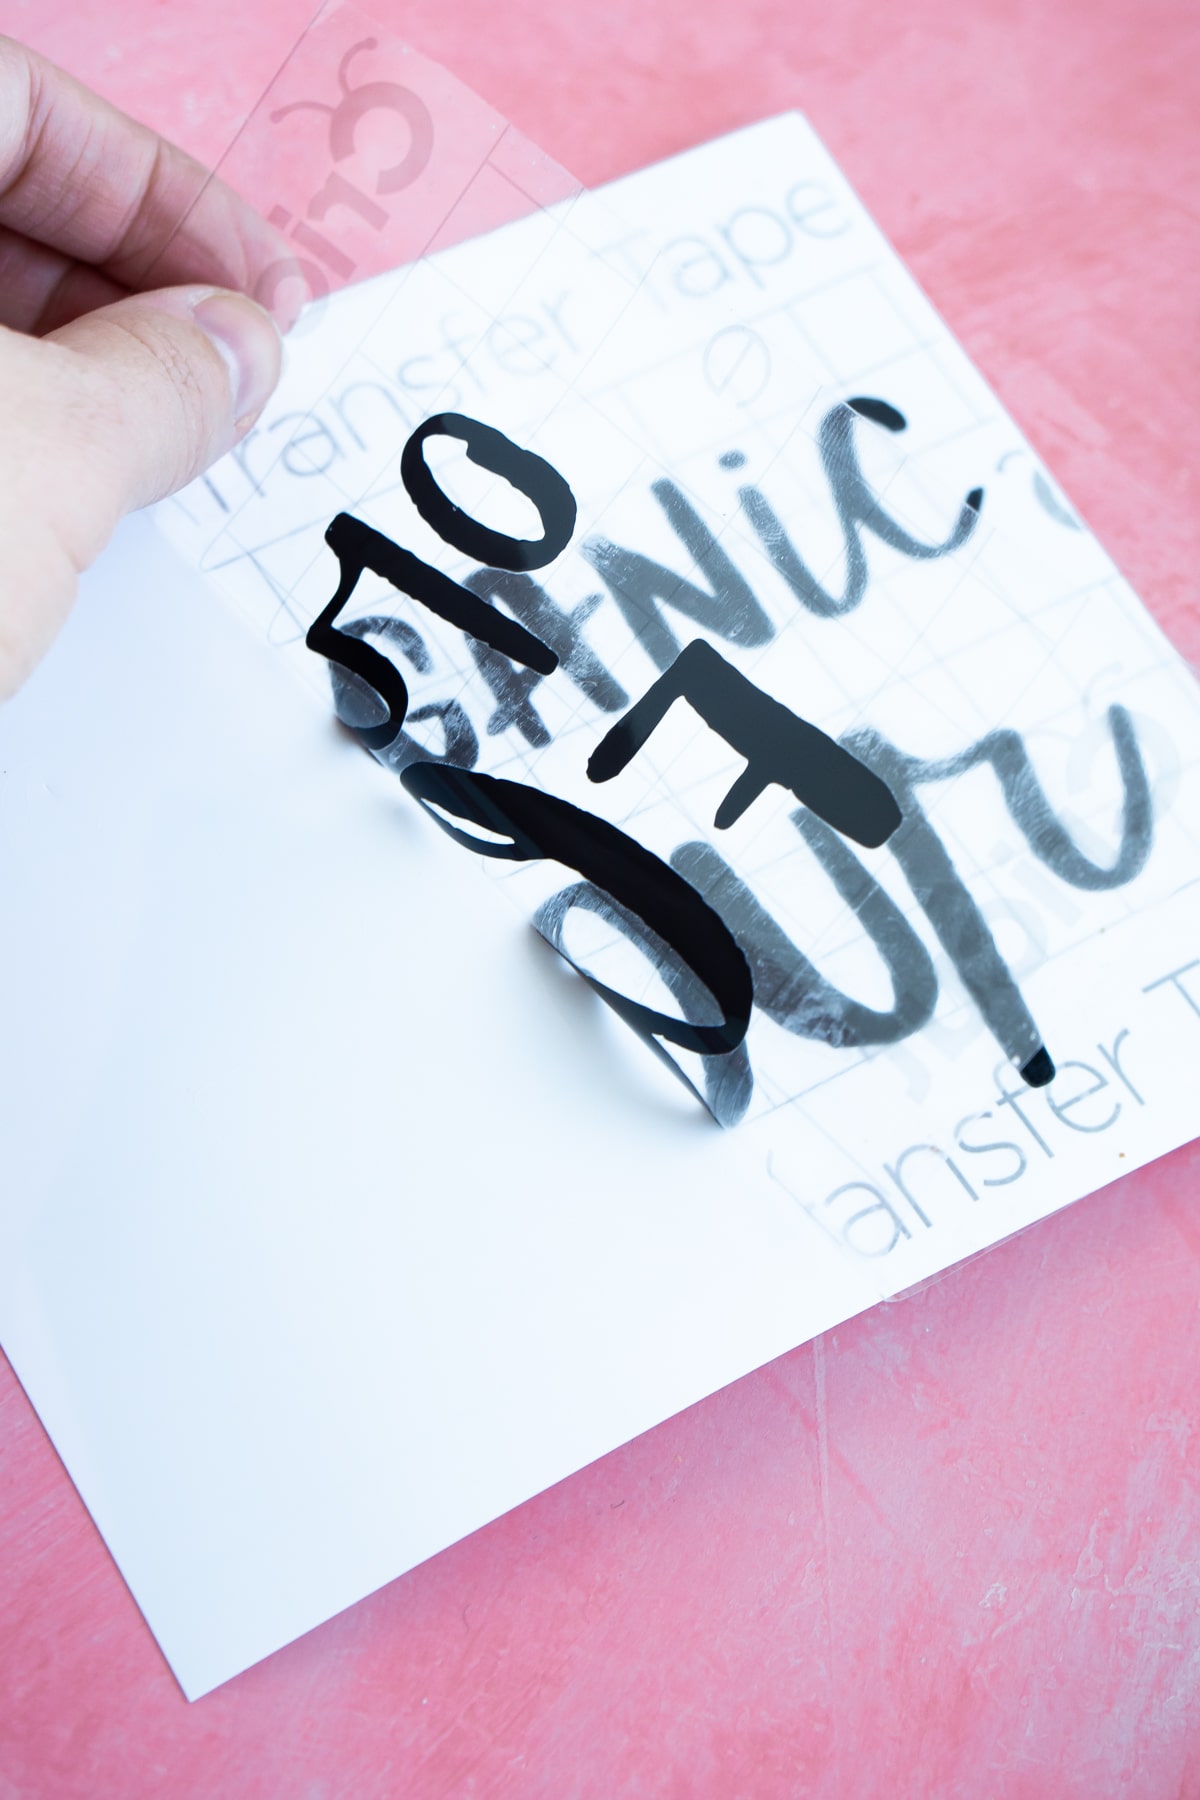
Okay now the second option – making DIY labels with Smart Vinyl instead of Smart Labels. Both options are super easy, just choose the one that goes with the look or feel you want to achieve with your gift. For the vinyl labels, all you need to do is create a new project in Cricut Design Space. Choose the text option and add your text on the page. Choose whatever font and size you want, change up the spacing, and make sure it is set to cut (not draw). When you’ve created your text, click attach so that your label gets cut as is rather than the letters/words being switched around to maximize space on the vinyl. If you’re making multiple labels, I recommend making all of them in one project and cutting them all in one shot. One of the best things about the Cricut Joy is the new Smart Vinyl options including rolls up to 10 feet long. Since you don’t need to use a mat, you can literally put the 10″ Smart Vinyl in and it can cut a ton of labels without having to switch it out and load more in. It’s also great if you wanted to do something like a sign that needs longer words all cut together. Definitely one of my favorite things about the new machine! Click the green Make It button to make your project. Just like above, make sure it connects to your Cricut Joy, change the material size if necessary, and load in your fine-point blade. No need to mirror the image since it’s not heat transfer. If you were making something like these Disney family shirts, you’d need to mirror it. Once all that is done, you’re ready to cut! Choose your material – Smart Vinyl, load your material, and send it to your machine. Sit back and watch while it cuts and cuts and cuts. Once it’s done cutting, I like to cut each individual label into its own section before weeding away the excess vinyl. This helps with the weeding when you have a really long piece of vinyl. Use the weeder to remove any excess vinyl on your label so that what’s left looks just like what you want on your container. Remove the backing from the transfer tape and place the sticky part of the transfer tape on top of your label. Use the scraper or a credit card to rub the transfer tape down onto the label. Slowly pull up the transfer tape, making sure all of the vinyl comes up with it, leaving the vinyl backing on its own. Place the transfer tape and vinyl on your container and use the scraper again to rub it onto the container. Remove the transfer tape slowly, making sure the vinyl is attached to the container. And you’re done! Repeat with any other jars you want to create a set of personalized containers with DIY labels – perfect for gifting to others!
Personalize It
It’s easy to turn these DIY labels into a personalized and thoughtful gift! Here are a few ideas I came up with to use them as a custom gift idea, but I’m sure you can come up with more as well!
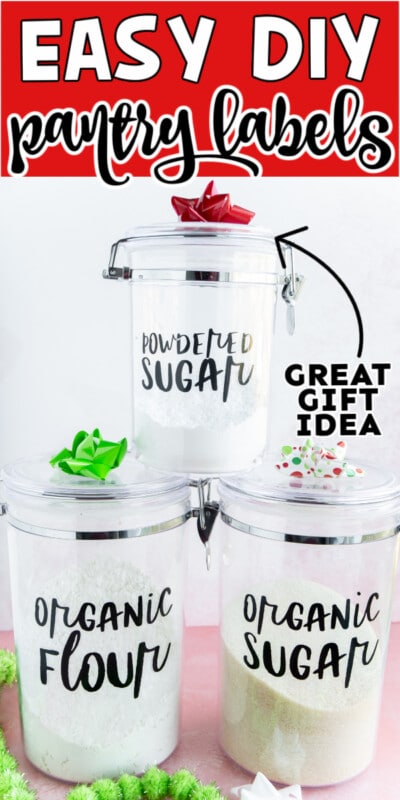
Use colors, fonts, and images that match their favorite colors, home colors/designs, or things they already have around their house. Use containers that make sense for their style – if they have kids, I recommend plastic containers with tight seals but if they don’t have kids or their kids are older, glass jars are great!Give them labels that show you know them – if you know they like Oreos (like my son), give them one for Oreos. If you know they love taking baths, give them a jar labeled bath salts full of bath salts. You can give them all the regular things as well (flour, sugar, etc.) but doing the other ones can make the gift so much more personal. Add names – I mentioned it above but people love seeing their name on things, especially kids
More Easy Cricut Projects
Back to school teacher giftsMonthly Mom & Me BoxPersonalized baby itemsDIY Puzzle Christmas giftDIY cake topperDIY felt banner